
If you're used to working with Umbraco, you're probably also familiar with with the various sections of Umbraco - e.g. Content and Media for the editors, or Developer and Settings for the developers. If you need something more than what Umbraco gives you by default, you can also add your own section - which is what this article is about.
To summarize this article, I have also created a GitHub repository with a Visual Studio solution and the entire code explained in this article. To login, simply build the solution, and then use skrift for the username and skrift1234 as the password.
Understanding sections and trees
To start with the basics, sections are the links/icons you see in the dark horizontal bar to the left when logging into Umbraco. A section may have one or more trees (or none at all) - if you see the screenshot below, the Settings section has individual trees for Stylesheets, Templates and so on.

When we move on to the code and configuration of Umbraco, it's worth noticing that a section is also sometimes referred to as an app/application. The apps of a given Umbraco installation is determined by the ~/config/applications.config file. By default it will look like the XML below (each section has an alias, a name as well as an icon and a sort order):
Default ~/config/applications.config in Umbraco 7.4.3
<?xml version="1.0" encoding="utf-8"?>
<applications>
  <add alias="content" name="Content" icon="traycontent" sortOrder="0" />
  <add alias="media" name="Media" icon="traymedia" sortOrder="1" />
  <add alias="settings" name="Settings" icon="traysettings" sortOrder="2" />
  <add alias="developer" name="Developer" icon="traydeveloper" sortOrder="3" />
  <add alias="users" name="Users" icon="trayuser" sortOrder="4" />
  <add alias="member" name="Members" icon="traymember" sortOrder="5" />
  <add alias="forms" name="Forms" icon="icon-umb-contour" sortOrder="6" />
  <add alias="translation" name="Translation" icon="traytranslation" sortOrder="7" />
</applications>
In a similar way, all trees are defined in the ~/config/trees.config file. The XML element for each tree will have the following attributes:
- initialize Whether the the tree should be initialized by default (show up when accessing the section in the backoffice). For the scope of this article, lets just assume it always should be true.
- silent Whether the tree should load silently. Let's just ignore this for now.
- sortOrder The order by which the tree should be sorted in the section it belongs to.
- alias A unique alias of the tree.
- application The alias of the application the three should belong to.
- title The title of the tree
- iconClosed the icon (CSS class) that should be used for the root node of the tree when the node is closed (collapsed).
- iconOpen the icon (CSS class) that should be used for the root node of the tree when the node is open (expanded).
- type since each tree is powered by some server side code, type specifies the .NET class that should be used for rendering the tree
If these attributes sound a little confusing - don't worry. You don't have to know about them all - and we'll get back to the ones you do later.
Anyways, to give an example of these attributes, have a look at the configuration file:
Default ~/config/trees.config in Umbraco 7.4.3
<?xml version="1.0" encoding="utf-8"?>
<trees>
  <!--Content-->
  <add initialize="true" sortOrder="0" alias="content" application="content" title="Content" iconClosed="icon-folder" iconOpen="icon-folder" type="Umbraco.Web.Trees.ContentTreeController, umbraco" />
  <add initialize="false" sortOrder="0" alias="contentRecycleBin" application="content" title="Recycle Bin" iconClosed="icon-folder" iconOpen="icon-folder" type="umbraco.cms.presentation.Trees.ContentRecycleBin, umbraco" />

  <!--Media-->
  <add initialize="true" sortOrder="0" alias="media" application="media" title="Media" iconClosed="icon-folder" iconOpen="icon-folder" type="Umbraco.Web.Trees.MediaTreeController, umbraco" />
  <add initialize="false" sortOrder="0" alias="mediaRecycleBin" application="media" title="Recycle Bin" iconClosed="icon-folder" iconOpen="icon-folder" type="umbraco.cms.presentation.Trees.MediaRecycleBin, umbraco" />

  <!--Settings-->
  <add initialize="true" sortOrder="0" alias="documentTypes" application="settings" title="Document Types" iconClosed="icon-folder" iconOpen="icon-folder-open" type="Umbraco.Web.Trees.ContentTypeTreeController, umbraco" />
  <add application="settings" alias="templates" title="Templates" iconClosed="icon-folder" iconOpen="icon-folder-open" type="Umbraco.Web.Trees.TemplatesTreeController, umbraco" initialize="true" sortOrder="1" />
  <add application="settings" alias="partialViews" title="Partial Views" silent="false" initialize="true" iconClosed="icon-folder" iconOpen="icon-folder" type="Umbraco.Web.Trees.PartialViewsTree, umbraco" sortOrder="2" />
  <add application="settings" alias="stylesheets" title="Stylesheets" type="umbraco.loadStylesheets, umbraco" iconClosed="icon-folder" iconOpen="icon-folder" sortOrder="3" />
  <add application="settings" alias="stylesheetProperty" title="Stylesheet Property" type="umbraco.loadStylesheetProperty, umbraco" iconClosed="" iconOpen="" initialize="false" sortOrder="0" />
  <add application="settings" alias="scripts" title="Scripts" type="umbraco.loadScripts, umbraco" iconClosed="icon-folder" iconOpen="icon-folder" sortOrder="4" />
  <add application="settings" alias="languages" title="Languages" iconClosed="icon-folder" iconOpen="icon-folder-open" type="Umbraco.Web.Trees.LanguageTreeController, umbraco" sortOrder="5" />
  <add application="settings" alias="dictionary" title="Dictionary" type="umbraco.loadDictionary, umbraco" iconClosed="icon-folder" iconOpen="icon-folder" sortOrder="6" />
  <add initialize="true" sortOrder="7" alias="mediaTypes" application="settings" title="Media Types" iconClosed="icon-folder" iconOpen="icon-folder-open" type="Umbraco.Web.Trees.MediaTypeTreeController, umbraco" />

  <!--Developer-->
  <add initialize="true" sortOrder="0" alias="dataTypes" application="developer" title="Data Types" iconClosed="icon-folder" iconOpen="icon-folder" type="Umbraco.Web.Trees.DataTypeTreeController, umbraco" />
  <add application="developer" alias="macros" title="Macros" type="umbraco.loadMacros, umbraco" iconClosed="icon-folder" iconOpen="icon-folder" sortOrder="2" />
  <add application="developer" alias="packager" title="Packages" type="umbraco.loadPackager, umbraco" iconClosed="icon-folder" iconOpen="icon-folder" sortOrder="3" />
  <add application="developer" alias="packagerPackages" title="Packager Packages" type="umbraco.loadPackages, umbraco" iconClosed="icon-folder" iconOpen="icon-folder" initialize="false" sortOrder="3" />
  <add application="developer" alias="relationTypes" title="Relation Types" type="umbraco.loadRelationTypes, umbraco" iconClosed="icon-folder" iconOpen="icon-folder" sortOrder="4" />
  <add application="developer" alias="xslt" title="XSLT Files" type="umbraco.loadXslt, umbraco" iconClosed="icon-folder" iconOpen="icon-folder" sortOrder="5" />
  <add application="developer" alias="partialViewMacros" type="Umbraco.Web.Trees.PartialViewMacrosTree, umbraco" silent="false" initialize="true" sortOrder="6" title="Partial View Macro Files" iconClosed="icon-folder" iconOpen="icon-folder" />

  <!--Users-->
  <add application="users" alias="users" title="Users" type="umbraco.loadUsers, umbraco" iconClosed="icon-folder" iconOpen="icon-folder" sortOrder="0" />
  <add application="users" alias="userTypes" title="User Types" type="umbraco.cms.presentation.Trees.UserTypes, umbraco" iconClosed="icon-folder" iconOpen="icon-folder" sortOrder="1" />
  <add application="users" alias="userPermissions" title="User Permissions" type="umbraco.cms.presentation.Trees.UserPermissions, umbraco" iconClosed="icon-folder" iconOpen="icon-folder" sortOrder="2" />

  <!--Members-->
  <add initialize="true" sortOrder="0" alias="member" application="member" title="Members" iconClosed="icon-folder" iconOpen="icon-folder-open" type="Umbraco.Web.Trees.MemberTreeController, umbraco" />
  <add initialize="true" sortOrder="1" alias="memberTypes" application="member" title="Member Types" iconClosed="icon-folder" iconOpen="icon-folder-open" type="Umbraco.Web.Trees.MemberTypeTreeController, umbraco" />
  <add application="member" sortOrder="2" alias="memberGroups" title="Member Groups" type="umbraco.loadMemberGroups, umbraco" iconClosed="icon-folder" iconOpen="icon-folder" />

  <!--Translation-->
  <add silent="false" initialize="true" sortOrder="1" alias="openTasks" application="translation" title="Tasks assigned to you" iconClosed="icon-folder" iconOpen="icon-folder" type="umbraco.loadOpenTasks, umbraco" />
  <add silent="false" initialize="true" sortOrder="2" alias="yourTasks" application="translation" title="Tasks created by you" iconClosed="icon-folder" iconOpen="icon-folder" type="umbraco.loadYourTasks, umbraco" />

  <!-- Custom -->
  <!--<add application="myApplication" alias="myTree" title="Me Tree" type="MyNamespace.myTree, MyAssembly"
       iconClosed="icon-folder" iconOpen="icon-folder" sortOrder="10" />-->

</trees>
Adding your custom app
You could just edit the configuration files manually, but if you're creating a package (or just like the automization), you can use Umbraco's APIs to edit the configuration files for you.
So to add a new section, we have to run some code during startup - it could look like this:
using Umbraco.Core;
using Umbraco.Core.Models;

namespace SkriftDemo {

    public class Startup : ApplicationEventHandler {

        protected const string SkriftSectionAlias = "skrift";

        protected override void ApplicationStarted(UmbracoApplicationBase umbraco, ApplicationContext context) {

            // Gets a reference to the section (if already added)
            Section section = context.Services.SectionService.GetByAlias(SkriftSectionAlias);
            if (section != null) return;

            // Add a new "Skrift Demo" section
            context.Services.SectionService.MakeNew("Skrift Demo", SkriftSectionAlias, "icon-newspaper");

        }

    }

}
If you run the code above in an Umbraco installation, you will see that the following line was added to your ~/config/applications.config:
<add alias="skrift" name="Skrift Demo" icon="icon-newspaper" sortOrder="8" />
Even with that line in the config file, the new section will not show up by default. In order for the section to show up, you have to go to the Users section and manually grant individual users access to the section. We could also grant all users access to the section through the code:
using Umbraco.Core;
using Umbraco.Core.Models;

namespace SkriftDemo {

    public class Startup : ApplicationEventHandler {

        protected const string SkriftSectionAlias = "skrift";

        protected override void ApplicationStarted(UmbracoApplicationBase umbraco, ApplicationContext context) {

            // Gets a reference to the section (if already added)
            Section section = context.Services.SectionService.GetByAlias(SkriftSectionAlias);
            if (section != null) return;

            // Add a new "Skrift Demo" section
            context.Services.SectionService.MakeNew("Skrift Demo", SkriftSectionAlias, "icon-newspaper");

            // Grant all existing users access to the new section
            context.Services.UserService.AddSectionToAllUsers(SkriftSectionAlias);

        }

    }

}
Since the section is added during startup, there is no way to determine the Umbraco user actually installing the package, and grant him/her access to the section, so it might be best to handle this process of granting access manually.
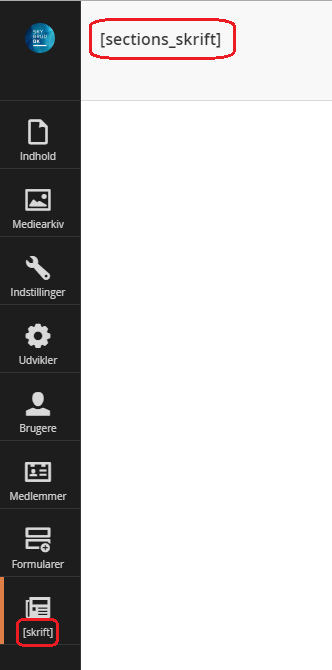
When you have granted your self access to the new section, you will see that the name looks a bit wrong. Even though we specified a title for the section (which isn't really used), we need to specify a translation for both the section (for the link in the horizontal bar) as well as for the dashboard of the section (see screenshot below).
To add the translation, we need to add our own language file (works from Umbraco 7.3 and above). If we create a new XML file at ~/App_Plugins/SkriftDemo/Lang/en-US.xml, Umbraco will automatically pick it up. The contents of the file should then look like:
<?xml version="1.0" encoding="utf-8" standalone="yes"?>

<language alias="en" intName="English (US)" localName="English (US)" lcid="" culture="en-US">
  <area alias="sections">
    <key alias="skrift">Skrift</key>
  </area>
</language>
We just need to provide a translation for en-US, since Umbraco will use this file as fallback for other languages. Of course you could provide translations for another language if the title differs from en-US.
Adding your custom tree
In a similar way, trees can be added with code as well. Basically there are two ways to do this - using the first we simply add a new tree using the ApplicationTreeService (similar to how we added the section/app).
Another way is to create a new class that extends the TreeController class that comes with Umbraco. We still need to extend this class to feed our tree with tree items, so we might as well use this class for registering the tree.
For this article, let's assume that our tree will list some of the famous animals in the Umbraco universe - namely Umbraco Rabbit and Umbraco Giraffe (you probably know them if you have been to #cg15 or #cg16). For the tree to work, we can create a SkriftAnimalsTreeController class that extends TreeController. Initially, our class can look something like below:
using Umbraco.Web.Mvc;
using Umbraco.Web.Trees;

namespace SkriftDemo.Controllers.Api {

    [Tree(SkriftConstants.SkriftSectionAlias, "animals", "Umbraco Animals")]
    [PluginController("SkriftDemo")]
    public class SkriftAnimalsTreeController : TreeController {

    }

}
To make the class register properly with Umbraco, we need to add a Tree attribute to the class. The first parameter is the alias for our section/app, which is skrift, the second is the alias of our tree - eg. animals. The third parameter is a more friendly name of the tree. The attribute also has a number of optional parameters for specifying some of the other options described earlier in this article - eg. a custom icon.
The PluginController attribute is to help with Umbraco's routing, and generally it is a good idea to name this the same as your package folder in ~/App_Plugins/ - eg. SkriftDemo in our case.
With the PluginController class above, the code won't compile since we haven't yet added the required methods. TheTreeController class requires us to implement two methods; GetTreeNodes and GetMenuForNode.
For our animals tree, we could update the class to look like (you also find the full SkriftAnimalsTreeController class in the GitHub repository):
using System.Net.Http.Formatting;
using Umbraco.Web.Models.Trees;
using Umbraco.Web.Mvc;
using Umbraco.Web.Trees;
using SkriftDemo.Models.Animals;

namespace SkriftDemo.Controllers.Api {

    [Tree(SkriftConstants.SkriftSectionAlias, "animals", "Umbraco Animals")]
    [PluginController("SkriftDemo")]
    public class SkriftAnimalsTreeController : TreeController {

        protected override TreeNodeCollection GetTreeNodes(string id, FormDataCollection queryStrings) {

            TreeNodeCollection nodes = new TreeNodeCollection();

            if (id == "-1") {
                foreach (SkriftAnimal animal in SkriftAnimalsRepository.Current.GetAll()) {
                    nodes.Add(CreateTreeNode(animal.Id + "", id, queryStrings, animal.Name, "icon-bird"));
                }
            }

            return nodes;

        }

        protected override MenuItemCollection GetMenuForNode(string id, FormDataCollection queryStrings) {

            return new MenuItemCollection();

        }

    }

}
To explain the methods a little further, GetTreeNodes (we'll get back to GetMenuForNode later) is responsible for serving the items of the tree. The id parameter represents the ID of the node we're requesting items/children for (-1 indicates the root of the tree). For a more advanced tree, we could also check for individual IDs, and return a list of child items based on particular item.
For this article, I have created a SkriftAnimalsRepository we can use to get the animals stored in our demo database. The implementation of this repository isn't really important, so let's just focus on the GetAll method, which we can use to iterate over the animals.
To add an animal to the tree, we can call the CreateTreeNode method. Here the first parameter is the ID of the tree item (as a string), the second parameter is the parent ID. The fourth and fifth parameters are the name and the icon of the item respectively.
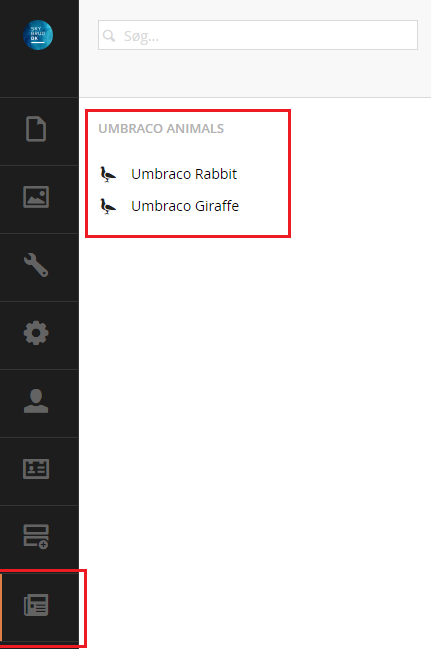
Given the code above, we should have a section and a tree looking something like this:
When an editor clicks on one of the animals, the URL in the address bar will change to something like /umbraco/#/skrift/animals/edit/1, where skrift is the alias of our section/app, animals is the alias of our tree and 1 is the ID of the tree item that the editor clicked on.
The URL is generated by Umbraco based on the attributes we specified for our tree earlier. If we want another URL, it is possible to specify a custom URL, but that is out of the scope of this article since becomes slightly more advanced.
Also, when trying to access the above URL, Umbraco will automatically attempt to load the following view: /App_Plugins/SkriftDemo/backoffice/animals/edit.html. Since we haven't created this view yet, Umbraco will trigger an error message about the the view not being found.
If you have cloned the repository from GitHub and opened the Visual Studio solution, you can find this file (and related files) here. With the view implemented, it can look something like this:

Gotta catch 'em all
The animals tree we have created so far is a bit simple with just a single level of items and the right click menu is empty.
Since Pokémon GO is a big trend right now, we can create a Pokémon based tree that is a bit more advanced. A SkriftPokemonTreeController could look like this (with the methods omitted):
using System.Globalization;
using System.Linq;
using System.Net.Http.Formatting;
using umbraco.BusinessLogic.Actions;
using Umbraco.Web.Models.Trees;
using Umbraco.Web.Mvc;
using Umbraco.Web.Trees;
using SkriftDemo.Models.Pokemon;
using SkriftDemo.Trees.Actions;

namespace SkriftDemo.Controllers.Api {

    [Tree(SkriftConstants.SkriftSectionAlias, "pokemon", "Pokémon")]
    [PluginController("SkriftDemo")]
    public class SkriftPokemonTreeController : TreeController {

    }

}
Again, the full class can be found at GitHub.
Multiple levels of tree items
Compared to SkriftAnimalsTreeController, this class adds a couple of new things - eg. multiple levels of tree items.
In our database, we have a small list of Pokémon, which we want to group by their type. So when Umbraco requests the root items of the tree, the id parameter for GetTreeNodes is -1, we can add each type to the collection of tree items.
// Get all types of pokemon in our repository so we can group them
foreach (string type in SkriftPokemonRepository.Current.GetAll().SelectMany(x => x.Type).Distinct()) {

    // Add a node/item for the group (the last parameter indicates that this node has children)
    nodes.Add(CreateTreeNode(type, id, queryStrings, type, "icon-playing-cards", true));

}
Notice that the last parameter specified for CreateTreeNode is set to true, which indicates that the tree item has children - in this case the individual Pokémon. If a item has any children, you will see the small expand icon in the backoffice.
The ID of a group/type can have a value like Normal or Water. With the groups/types added to the tree, our section will now look like on the screenshot below:

Notice that the tree area looks a little different than before since we now have two trees instead of one.
When the user expands one of the tree items, GetTreeNodes will be called again, but with the ID of the group/type. We can then add the Pokémon of the requested type:
// Get all Pokémon of the requested type
foreach (SkriftPokemon pokemon in SkriftPokemonRepository.Current.GetAll().Where(x => x.Type.Contains(id))) {

    // Add a node/item for the Pokémon (red icon by default, green icon if envolved)
    nodes.Add(CreateTreeNode(pokemon.Id, id, queryStrings, pokemon.Name, "icon-disc " + (pokemon.IsEvolved ? "color-green" : "color-red")));

}
With both trees expanded and a view implemented for viewing/editing a Pokémon, the section will now look like shown in the screenshot below:

Since we obviously want to evolve our Pokémon, we can add a right click menu item for evolving an individual Pokémon. Also, for the root tree item and the groups, we want to add the Reload nodes menu item known from other Umbraco trees.
For this we can use the GetMenuForNode method. When Umbraco requests the right click menu for a Pokémon, we can run the following code:
// Get a reference to the Pokémon
SkriftPokemon pokemon = SkriftPokemonRepository.Current.GetById(id);

// Add a "Evolve" menu item if the Pokémon hasn't yet been evolved
if (pokemon != null && pokemon.CanEnvolve) {
    collection.Items.Add("Evolve");
}
We only add the Evolve menu item if the Pokémon can be evolved. Also note that SkriftPokemonEvolveAction is a custom class (shown below with unimportant properties omitted - the full class can be found in the GitHub repository):
using umbraco.interfaces;

namespace SkriftDemo.Trees.Actions {

    public class SkriftPokemonEvolveAction : IAction {

        public string Icon {
            get { return "fullscreen"; }
        }

        public string Alias {
            get { return "evolve"; }
        }

    }

}
Clicking the menu item will open a new dialog with the /App_Plugins/SkriftDemo/BackOffice/Pokemon/Evolve.html view, where Evolve in the URL comes from the Alias property in the SkriftPokemonEvolveAction class.
For all other cases, we add a Reload nodes menu item instead:
// Add a "Reload" menu item
collection.Items.Add<RefreshNode, ActionRefresh>(Localize("actions/" + ActionRefresh.Instance.Alias));
That's it!
That's really it for now. I hope this article helps you understand the basics of working with sections and trees in Umbraco 7. There is more to sections and trees which I haven't covered in this article, but it also starts to get more complex. But feel free to ask if your have any questions, and I'll try my best to help ;)