
Creating and publishing a property editor package for Bellissima can be straightforward if you follow the right steps. In this guide, I’ll walk you through two major phases: Building the Package and Packaging your Package. By the end of this article, you will have successfully created and uploaded your package to the Nuget and Umbraco marketplace.
Part 1: Building the Package
The first step in creating a property editor for Bellissima is to write the code and structure the project properly. You'll want to ensure your package integrates seamlessly with Bellissima's framework. This involves creating the necessary property editor, compiling your code, and testing it thoroughly to ensure it works as expected.
Follow this link about Creating a Property Editor.
Part 2: Packaging Your Package
Once your property editor code is ready, the next step is to package it and distribute it via NuGet. Below are the detailed steps for packaging and publishing your property editor.
2.1 Create a GitHub Repository
Once you’ve initialized your package, the first step is to create a repository on GitHub to host your project. Be sure to include a LICENSE and README.md file in the repository for packaging.
After creating the repository, clone it and set up a GitHub workflow for automated releases. Create a folder .github/workflows inside the root of your project, and place a release.yml file there. This file will define the actions for building and releasing your package.
Release.yml
name: Release to Nuget

# Controls when the workflow will run
on:
  push:
    tags:
    - "v[0-9]+.[0-9]+.[0-9]+"
jobs:
  build:
    runs-on: ubuntu-latest
    timeout-minutes: 15
    steps:
    - name: Checkout
      uses: actions/checkout@v2
    - name: Verify commit exists in origin/main
      run: |
        git fetch --no-tags --prune --depth=1 origin +refs/heads/*:refs/remotes/origin/*
        git branch --remote --contains | grep origin/main
    - name: Set VERSION variable from tag
      run: echo "VERSION=${GITHUB_REF/refs\/tags\/v/}" >> $GITHUB_ENV
    - name: Build
      run: dotnet build --configuration Release /p:Version=${VERSION}
    - name: Pack
      run: dotnet pack --configuration Release /p:Version=${VERSION} --no-build --output .
    - name: Push
      run: dotnet nuget push YOUR_PACKAGE_NAME.${VERSION}.nupkg --api-key ${NUGET_API_KEY} --source https://api.nuget.org/v3/index.json
      env:
        NUGET_API_KEY: ${{ secrets.NUGET_API_KEY }}
Remember to replace your package name with YOUR_PACKAGE_NAME.
2.2 Create a Folder for your Package
Open Command Prompt (cmd) or any terminal you choose and navigate to the folder you have cloned from Github. Run the following command to create a new Umbraco package:
Replace the Umbraco <version> that you are using for your package.
dotnet new umbracopackage -p:v <version>
We need to add a .gitignore to the project. Using the following command:
dotnet new gitignore
If you’d like to see all available templates, you can check the list by running:
dotnet new list
Now go to the App_plugins of the folder you’ve created and delete all files and folders. Then copy all files and folders in the App_plugins folder of your property editor source code to this App_plugins folder.
Now, your packaging folder will look like this:
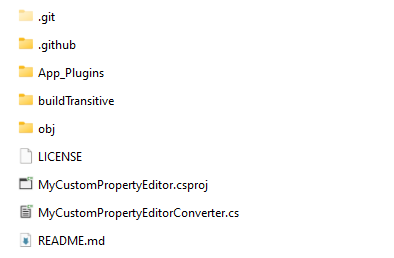
2.3 Modify .csproj file
We need to modify the .csproj file to ensure it references the correct LICENSE and README files. This ensures that your package is well-documented and follows NuGet’s licensing requirements. Refer to the `.csproj` file below:
.csproj
<Project Sdk="Microsoft.NET.Sdk">
  <PropertyGroup>
    <TargetFramework>net8.0</TargetFramework>
    <Nullable>enable</Nullable>
    <ImplicitUsings>enable</ImplicitUsings>
    <ContentTargetFolders>.</ContentTargetFolders>
    <PackageReadmeFile>README.md</PackageReadmeFile>
	<PackageLicenseFile>LICENSE</PackageLicenseFile>
  </PropertyGroup>

  <PropertyGroup>
    <PackageId>MyCustomPropertyEditor</PackageId>
    <Product>MyCustomPropertyEditor</Product>
    <Title>MyCustomPropertyEditor</Title>
    <Description>...</Description>
    <PackageTags>umbraco plugin package</PackageTags>
  </PropertyGroup>

  <ItemGroup>
    <PackageReference Include="Umbraco.Cms.Web.Website" Version="14.3.0" />
    <None Include="README.md" Pack="true" PackagePath=""/>
	<None Include="LICENSE" Pack="true" PackagePath=""/>
    <PackageReference Include="Umbraco.Cms.Web.Common" Version="14.3.0" />
  </ItemGroup>

  <ItemGroup>
    <Content Include="App_Plugins\MyCustomPropertyEditor\**" ExcludeFromSingleFile="true" CopyToPublishDirectory="Always" />
    <None Include="buildTransitive\**" Pack="true" PackagePath="buildTransitive" />
  </ItemGroup>
</Project>
To automatically build and package your front-end code, add the following two targets to the .csproj file (only do this for Umbraco V14+):
...
<Target Name="NpmBuild" BeforeTargets="BeforeBuild">
    <Exec Command="npm install" WorkingDirectory="App_Plugins\YOUR_PACKAGE_NAME" />
    <Exec Command="npm run build" WorkingDirectory="App_Plugins\YOUR_PACKAGE_NAME" />
</Target>

<Target Name="NpmRemove" AfterTargets="Build">
    <RemoveDir Directories="App_Plugins\YOUR_PACKAGE_NAME\node_modules" />
</Target>
...
Try running dotnet build, you will see the dist folder will automatically be created in App_plugins. (Note that we will not push the dist folder to Github and remember to add the dist folder to the .gitignore file.)
Refer to the following link about Extend and customize the build process.
You will also need to configure something in the .csproj file if you want your package to be listed on the Umbraco Marketplace, see below:
 <PropertyGroup>
    <PackageId>YOUR_PACKAGE_ID</PackageId>
    <Product>YOUR_PACKAGE_NAME</Product>
    <Title>Title of your package</Title>
    <Description>...</Description>
    <PackageTags>umbraco plugin package umbraco-marketplace</PackageTags>
    <Authors>...</Authors>
    <PackageProjectUrl>YOUR_GITHUB_REPOSITORY</PackageProjectUrl>
    <RepositoryUrl>YOUR_GITHUB_REPOSITORY</RepositoryUrl>
    <RepositoryType>git</RepositoryType>
    <PackageIcon>logo.png</PackageIcon>
 </PropertyGroup>

<ItemGroup>
  <None Update="logo.png" Pack="true" PackagePath="" />
</ItemGroup>
You also need to add your umbraco-marketplace.json file to provide deeper information about your package.Use <PackageIcon> to add your logo image for your package.
Refer to the following link about Listing Your Package.
You may have to change your <TargetFramework> to the correct version.
2.4 Pack your package
Before doing anything automatically through Github, you need to have a package already uploaded on Nuget. Update the version number in the umbraco-package.json (or package.manifest )file to reflect any changes or new releases before uploading. First, leave it as follows as the first version.
{
  "$schema": "../../umbraco-package-schema.json",
  "name": "YOUR_PACKAGE_NAME",
  "version": "1.0.0",
  "extensions": [
    ...
  ]
}
Now, you’re ready to package your first version of your property editor. Run the following command in the terminal to pack your package into a .nupkg file in folder /bin/Release:
dotnet pack
This command will create a NuGet package file that’s ready for distribution.
2.5 Upload to Nuget.org
Head to nuget.org, log in and upload your package. You’ll be prompted to browse for the .nupkg or .snupkg file you just created. Once selected, click Submit.
2.6 Create a NUGET-API-KEY
To automate future releases, go to nuget.org and create a NuGet API Key. Once your key is generated, go back to your GitHub repository settings. Navigate to Settings > Secrets and variables > Actions, and create a new repository secret.
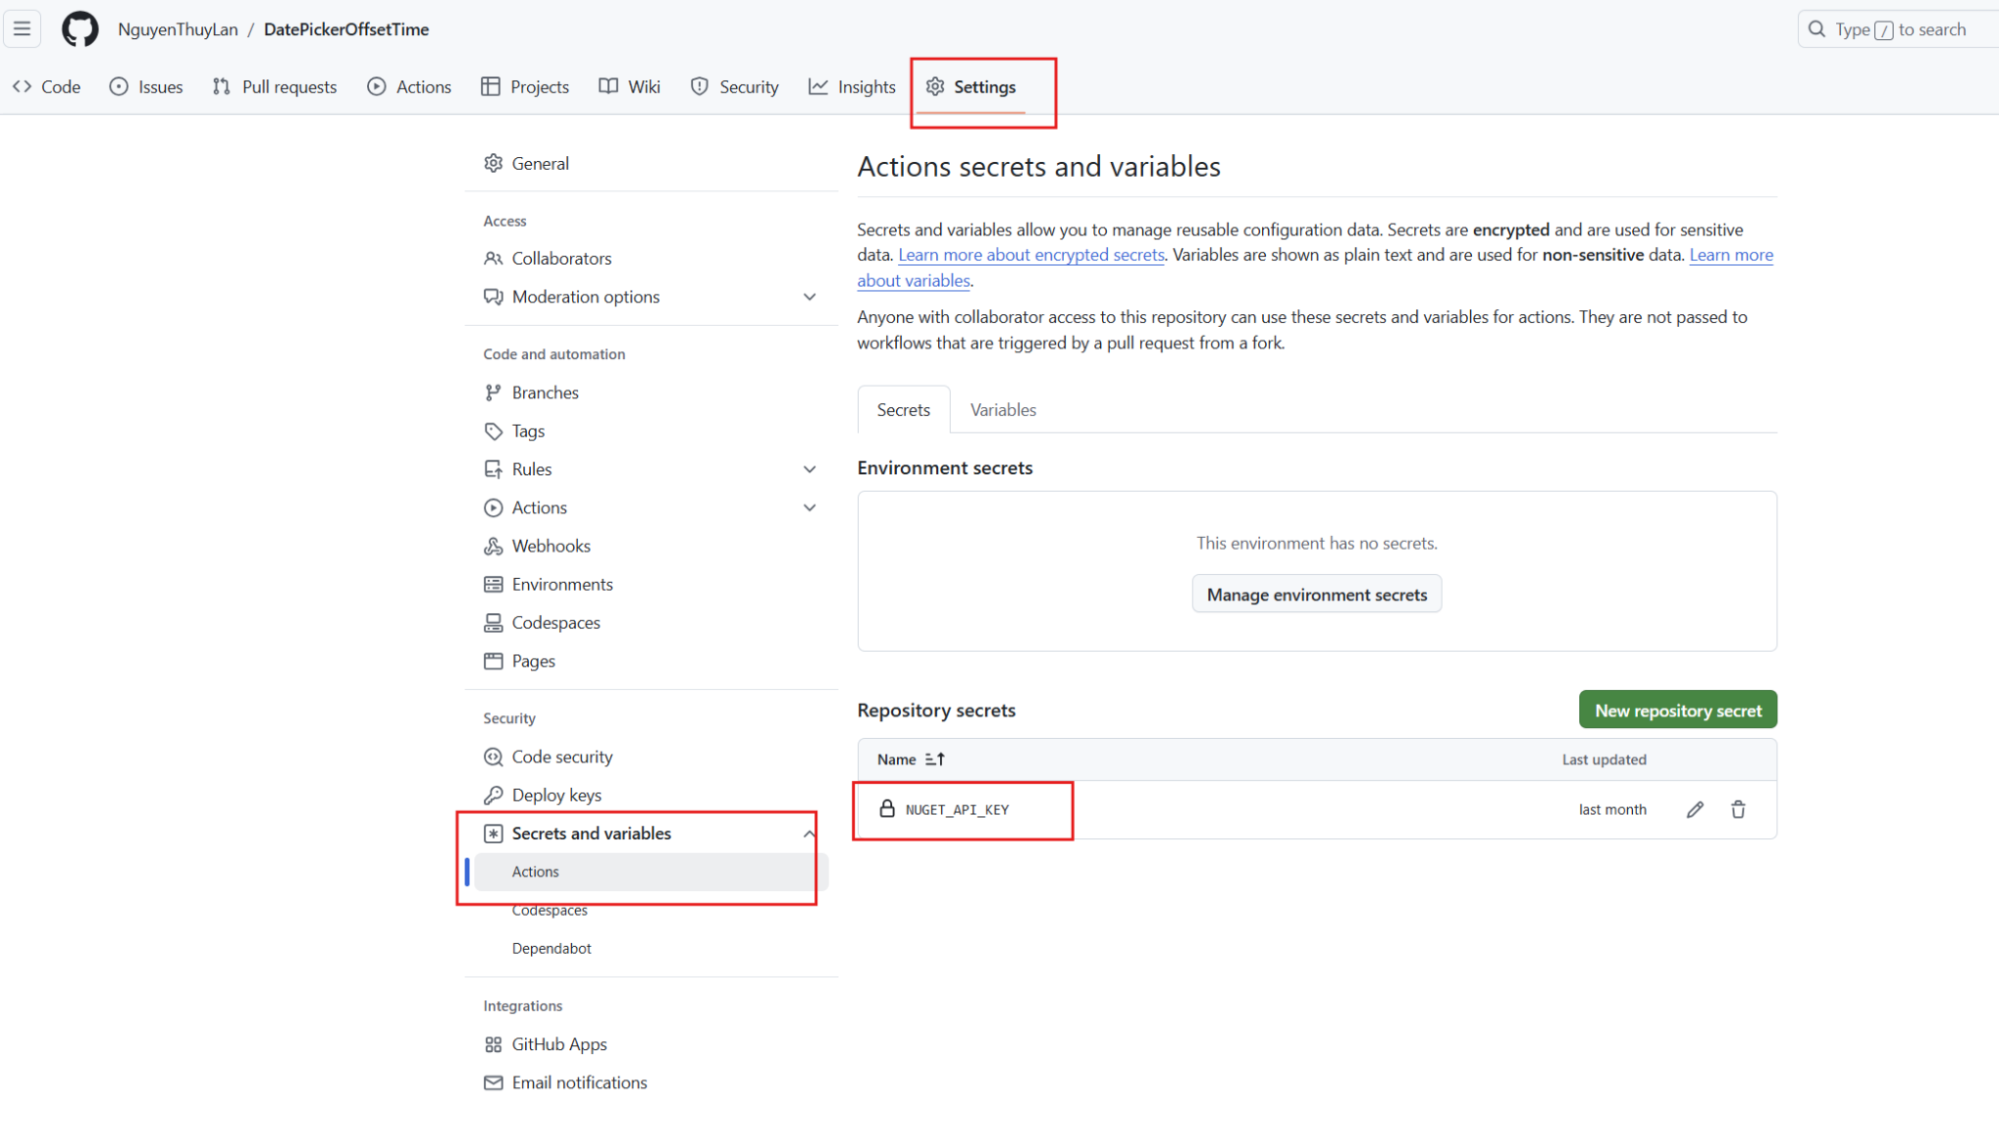
Set the secret's name to NUGET_API_KEY and the value should be the API key you generated from NuGet.
2.7 Automate Releases with GitHub Actions
At this point, everything is set up for automated releases. From now on, whenever you push code changes to GitHub and create a new release, GitHub Actions will automatically build your project, package it, and release a new version to NuGet.
Some reference links to custom packages:
- DatePickerOffsetTime: https://github.com/NguyenThuyLan/DatePickerOffsetTime
- Date Picker with Offset Time (marketplace) : https://marketplace.umbraco.com/package/datepickeroffsettime
- DatePickerOffsetTime (NugetSource): https://www.nuget.org/packages/DatePickerOffsetTime
With these steps completed, you’re all set! Happy packaging and best of luck with your property editor for Bellissima! 🚀🚀🚀