The Umbraco UI Builder is great for setting up collections of custom data and make it possible to work with it like you would any regular Umbraco content.
It has a built-in import and export functionality, but it is limited to CSV files - and the export can only handle one page of items at a time - so if you need to export everything you need to page through the collection and generate a file for each page.
It will also take an exact copy of the fields in the collection, and does not work with non-default Umbraco property editors which makes it less than ideal if using fx Contentment or if certain data should not be included in the export.
If you have requirements that goes beyond this specific functionality, then creating a custom export and import action is a great way to fulfil those requirements.
In this article I will run through how to create custom csv/excel export & import actions for a collection using Umbraco UI Builder.
My starting point is a list of movies:
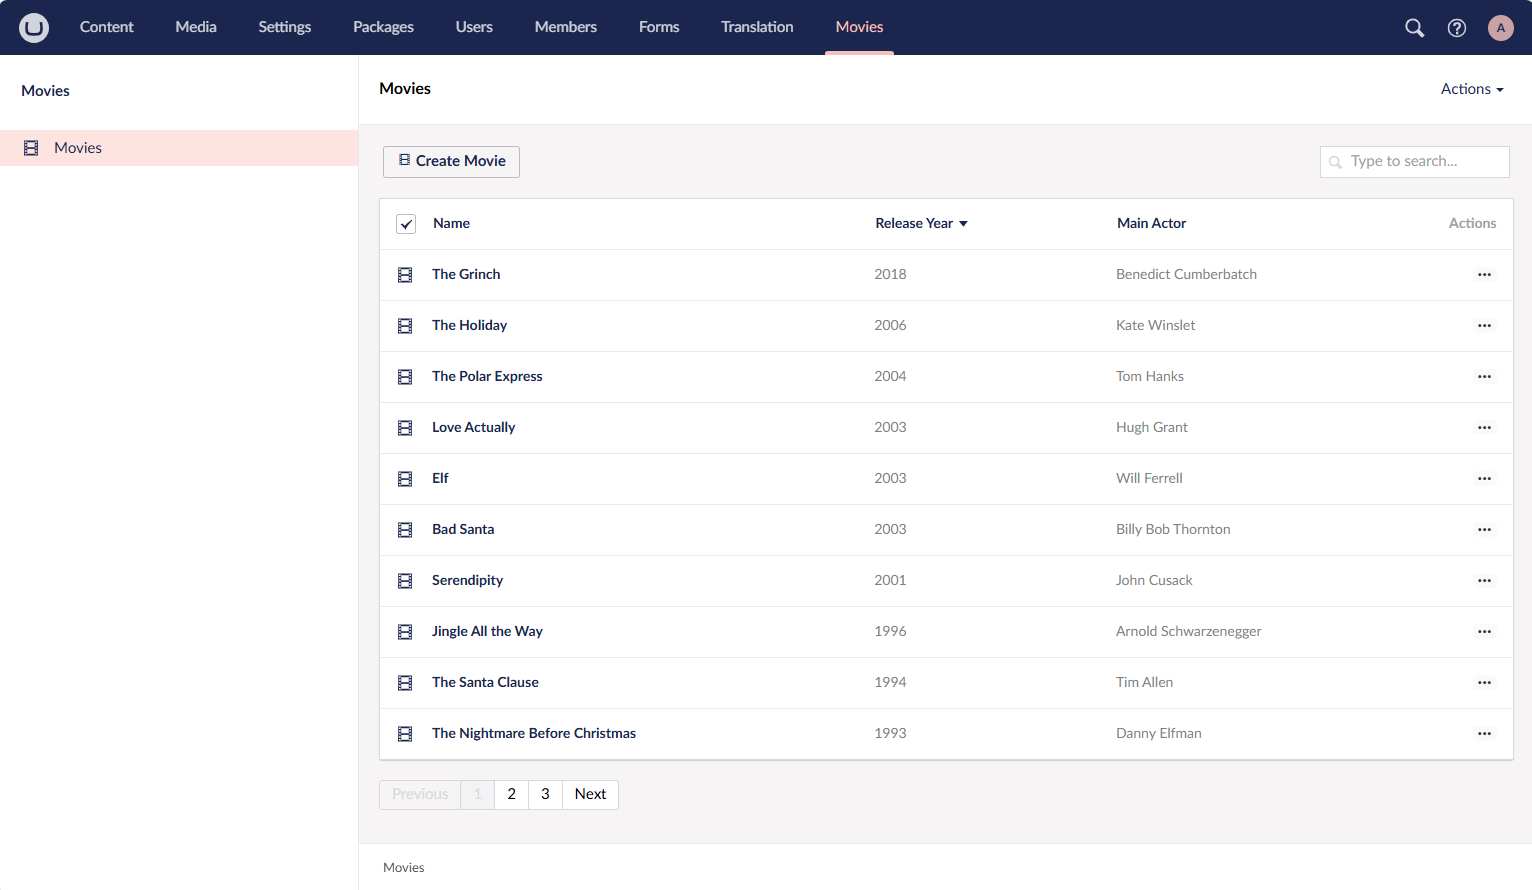
And the initial configuration looks like this:
public class UiBuilderConfigurator : IConfigurator
{
    public void Configure(UIBuilderConfigBuilder builder)
    {
        builder.AddSection("Movies", sectionConfig => sectionConfig
            .Tree(treeConfig => treeConfig
                .AddCollection(
                    x => x.Id,
                    "Movie",
                    "Movies",
                    "List of movies",
                    "icon-movie",
                    "icon-movie",
                    collectionConfig => collectionConfig
                        .SetRepositoryType()

                        .SetNameProperty(x => x.Name)

                        .ListView(listViewConfig => listViewConfig
                            .AddField(x => x.ReleaseYear)
                            .AddField(x => x.MainActor)
                            .SetPageSize(10))

                        .Editor(editorConfig => editorConfig
                            .AddTab("Content", tabConfig => tabConfig
                                .AddFieldset("General", fieldsetConfig => fieldsetConfig
                                    .AddField(x => x.ReleaseYear)
                                    .AddField(x => x.MainActor)
                                    .AddField(x => x.Genres)
                                        .SetDataType(new Guid("450133fc-56f6-4e6f-9982-516a76fffa01"))
                                        .SetValueMapper())))

                        .AddSearchableProperty(x => x.MainActor)
                        .SetSortProperty(x =>x.ReleaseYear, SortDirection.Descending)
                    )));
    }
}
Now you might have seen that UI Builder has some built-in export/import actions documented here: https://docs.umbraco.com/umbraco-ui-builder/actions/inbuilt-actions
However, if we add those:
.AddAction<ExportEntityAction>()
.AddAction<ImportEntityAction>()
We can see that under the "global" actions there is an import action now, but no export action. The export action appears once you select some items, and then it allows you to export those:
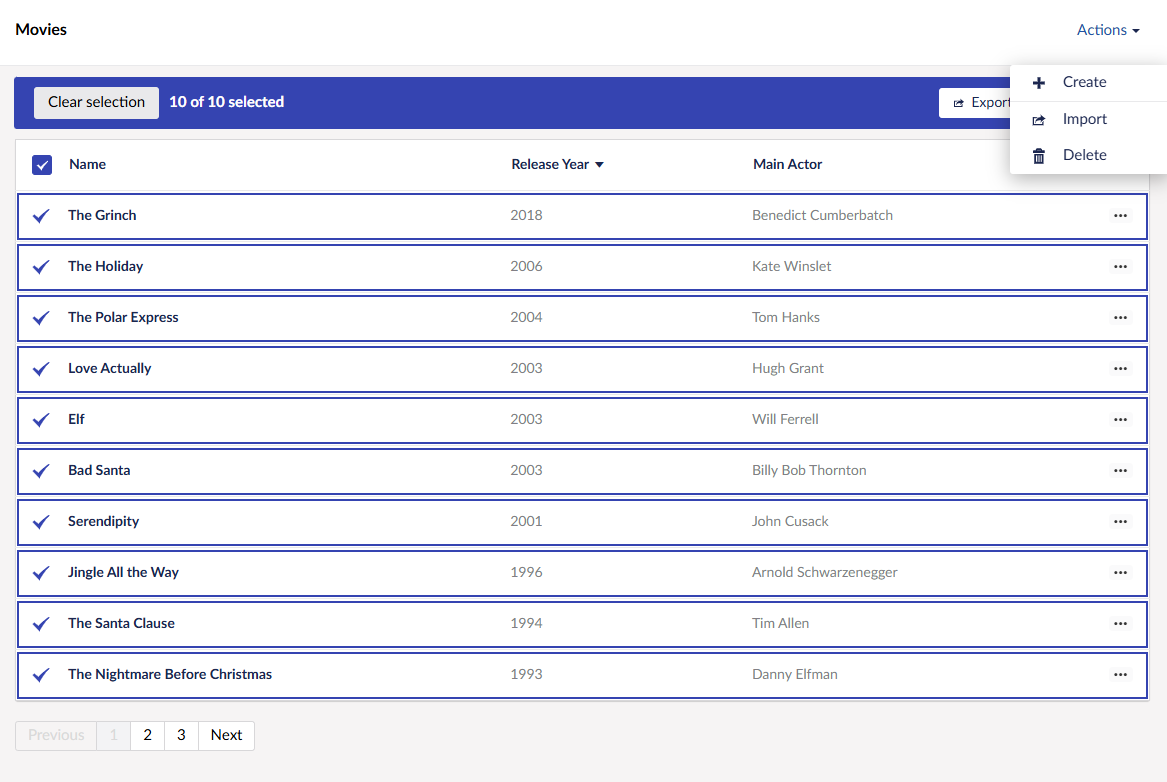
However, it only exports the selected items - which in a listview is at most the current page - if you have lots of records you will probably have multiple pages, and may not want to export each page individually.
You may also want to rewrite some of the data to better fit into a csv file, in my example I've used a Contentment picker connected to a custom datasource to be able to select movie genres:
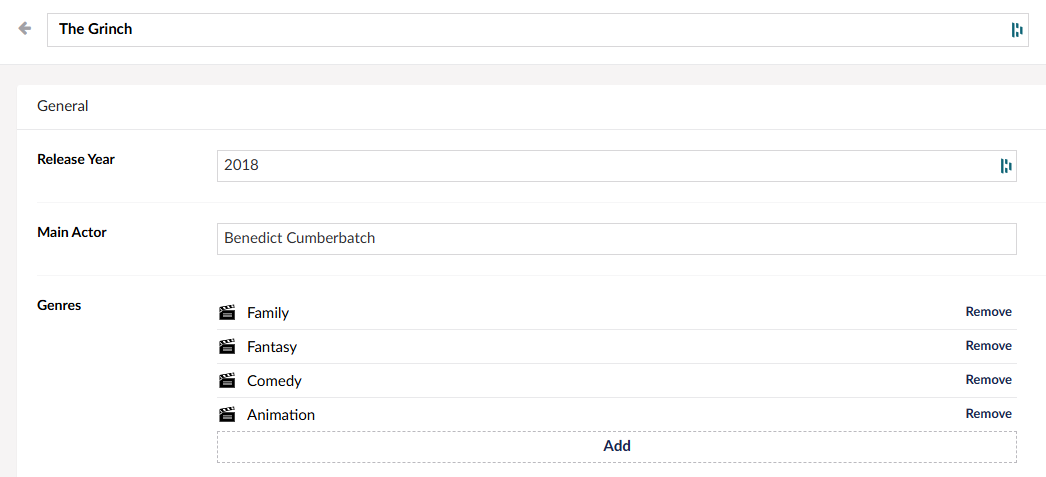
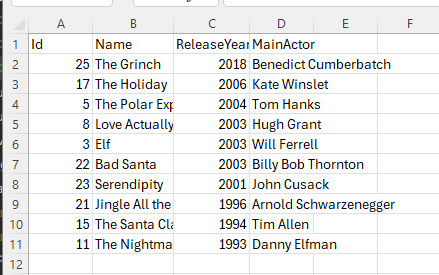
And the default export can't figure out how to write that into the csv file, so it skips it all together:
Creating a custom export action
As we can see in the documentation: https://docs.umbraco.com/umbraco-ui-builder/actions/the-basics#defining-an-action Creating a custom action is quite easy, so let's add the basics:
public class MovieExportAction : Umbraco.UIBuilder.Configuration.Actions.Action
{
    public override string Alias => "exportMovies";
    public override string Name => "Export Movies";
    public override string Icon => "icon-sharing-iphone";
    public override FileActionResult Execute(string collectionAlias, object[] entityIds)
    {
        throw new NotImplementedException();
    }
}
And register it in the configurator:
.AddAction(actionConfig => actionConfig
.SetVisibility(x => x.ActionType == ActionType.ContainerMenu))
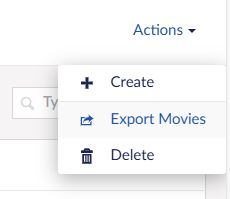
And on reload the new action is there, as seen to the right.
The action itself will return a FileActionResult - so once the processing is done it will download a file directly in the browser - no additional UI needed!
First thing first - we need a model of how the excel sheet should look, so I will add one that is basically the same as my movie model - except the IEnumerable is now just a string of comma separated movie genre names.
public class CsvMovieModel
{
    public int Id { get; set; }
    public string? Name { get; set; }
    public int ReleaseYear { get; set; }
    public string? MainActor { get; set; }
    public string? Genres { get; set; }
}
Then we write some logic to pull all movies from our repo and converting them to this new model:
public override FileActionResult Execute(string collectionAlias, object[] entityIds)
{
    try
    {
        var allMovies = _movieRepository.GetAll(null, null, true).GetAwaiter().GetResult();
        if (allMovies.Movies == null) return new FileActionResult(false);
        var movieCsvModels = MapToCsvModels(allMovies.Movies);
    }
    catch
    {
        return new FileActionResult(false);
    }
}

private IEnumerable MapToCsvModels(IEnumerable allMovies)
{
    foreach (var movie in allMovies)
    {
        var genres = string.Empty;

        if (movie.Genres.Count != 0)
        {
            genres = string.Join(", ", movie.Genres.Select(x => x.Name));
        }

        yield return new CsvMovieModel
        {
            Id = movie.Id,
            Name = movie.Name,
            ReleaseYear = movie.ReleaseYear,
            MainActor = movie.MainActor,
            Genres = genres
        };
    }
}
Finally, we need to build the excel sheet - luckily Umbraco ships with EpPlus, which can do it for us really easily:
public override FileActionResult Execute(string collectionAlias, object[] entityIds)
{
    try
    {
        var allMovies = _movieRepository.GetAll(null, null, true).GetAwaiter().GetResult();
        if (allMovies.Movies == null) return new FileActionResult(false);
        var movieCsvModels = MapToCsvModels(allMovies.Movies);

        var stream = new MemoryStream();

        using (var package = new ExcelPackage(stream))
        {
            var workSheet = package.Workbook.Worksheets.Add("Sheet1");
            workSheet.Cells.LoadFromCollection(movieCsvModels, true);
            package.Save();
        }

        stream.Position = 0;

        return new FileActionResult(true, stream,
            "application/vnd.openxmlformats-officedocument.spreadsheetml.sheet", "movies.xlsx");

    }
    catch
    {
        return new FileActionResult(false);
    }
}
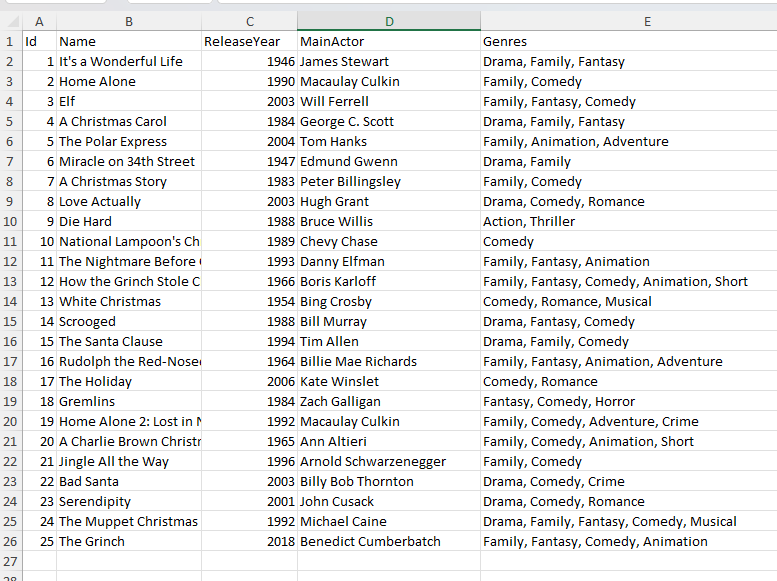
And now I get an excel sheet with all of my movies at once, including the genres in a comma seperated list:
Custom import action
Creating a custom import action is almost just doing everything in reverse - however, the download action didn't need any additional UI as it would end up triggering a file download in the browser directly when it finished.
For the import we need some way to deliver the file to the custom action in order to to all the mapping and updating in the repository - luckily UI Builder helps us there as well!
Let's create our new import action - this time we will not choose the FileActionResult - rather we can pass in our own settings class and choose the generic ActionResult:
public class MovieImportAction : Umbraco.UIBuilder.Configuration.Actions.Action<MovieImportSettings, ActionResult>
{
    public override string Alias => "importMovies";
    public override string Name => "Import Movies";
    public override string Icon => "icon-sharing-iphone";

    public override void Configure(SettingsConfigBuilder settingsConfig)
    {
        throw new NotImplementedException();
    }

    public override ActionResult Execute(string collectionAlias, object[] entityIds, MovieImportSettings? settings)
    {
        throw new NotImplementedException();
    }
}

public class MovieImportSettings
{
    public string FilePath { get; set; }
}
And of course remember to register it in the configurator:
.AddAction(actionConfig => actionConfig
    .SetVisibility(x => x.ActionType == ActionType.ContainerMenu))
.AddAction(actionConfig => actionConfig
    .SetVisibility(x => x.ActionType == ActionType.ContainerMenu))
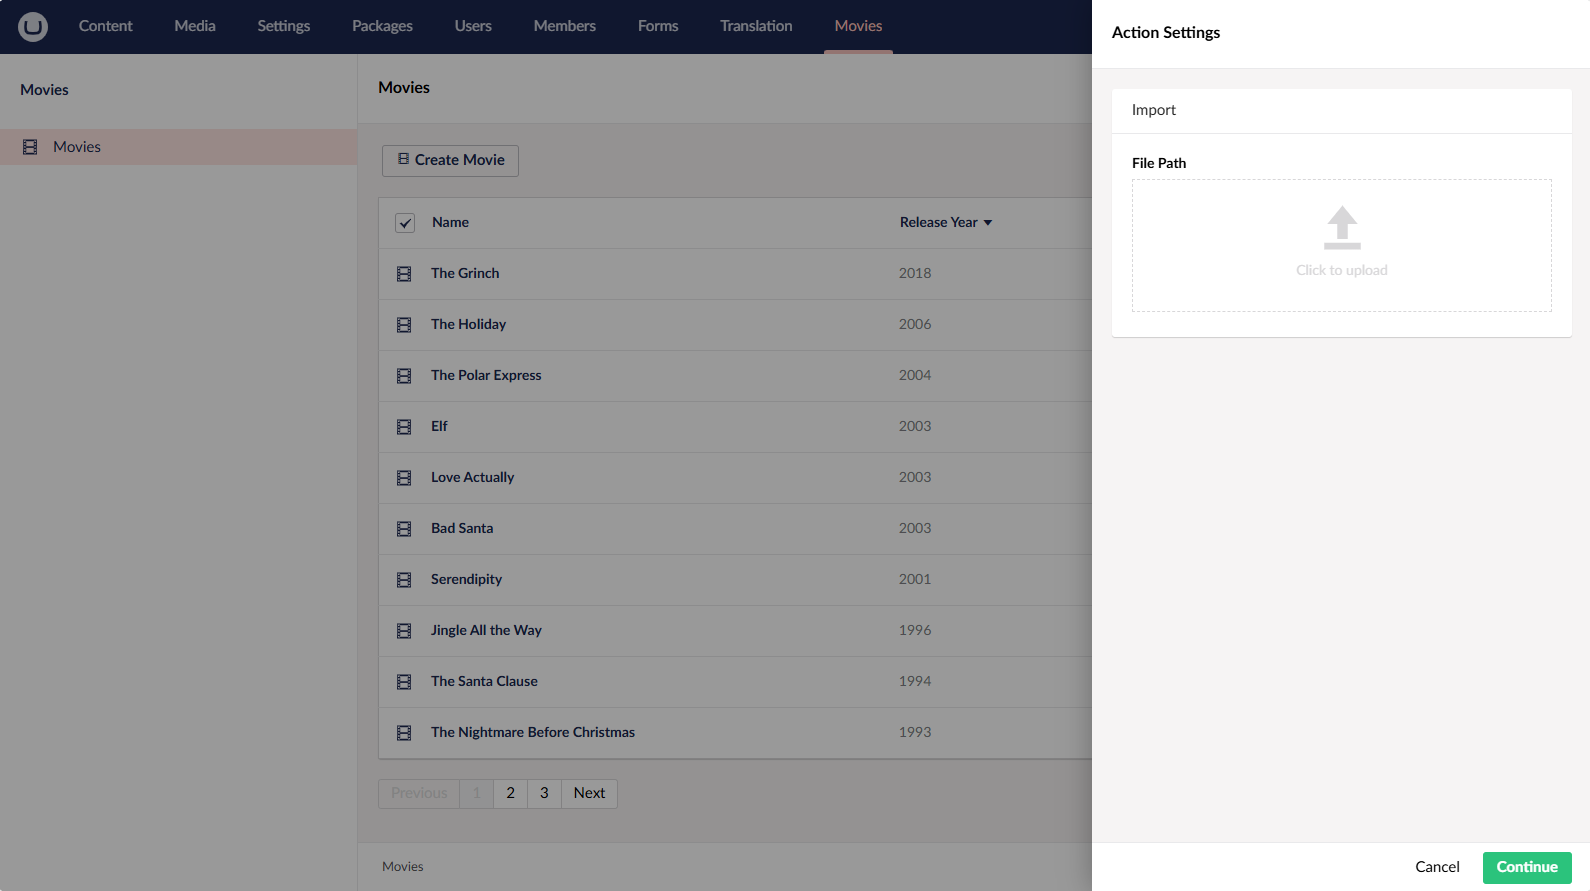
This generic action type has an additional Configure method that passes in the settings class I created - this method is basically the view that will open whenever the action is triggered. So to move on we can include the basic file upload property editor from Umbraco, which is a default property editor that ships with Umbraco and always has the standard ID of -90.
So we add a bit of code to the configure method:
public override void Configure(SettingsConfigBuilder settingsConfig)
{
    settingsConfig
        .AddFieldset("Import", fieldsetConfig => fieldsetConfig
            .AddField(f => f.FilePath)
            .SetDataType(-90));
}
This will bind the value of the file upload editor to MySettings.FilePath so we can get hold of the file in the execute method later.
Spinning up the site and triggering the action and I see this:
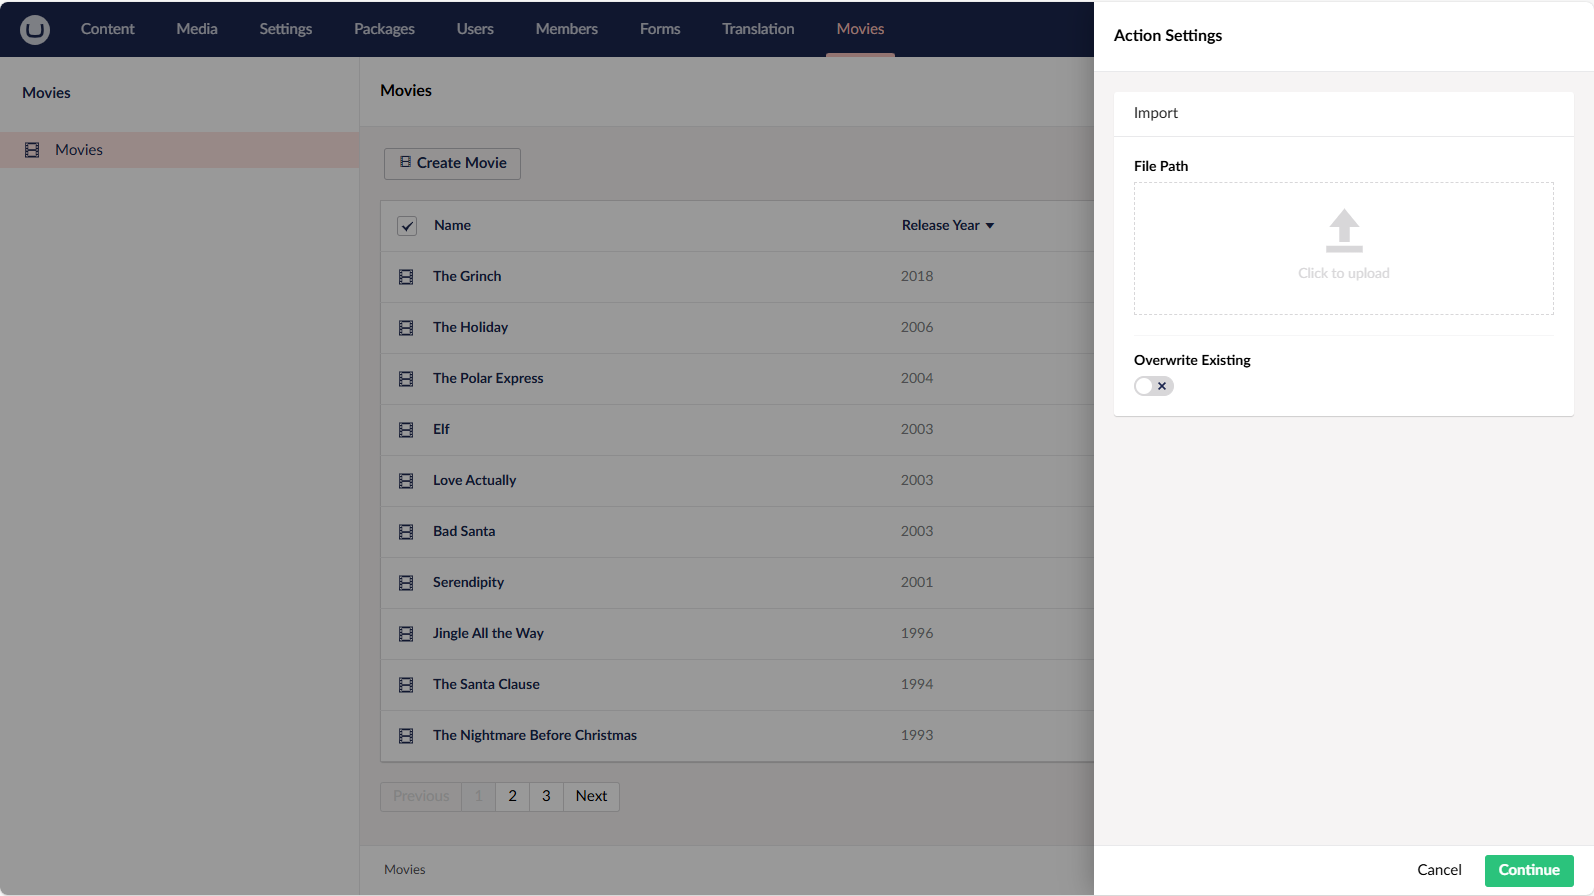
You can edit this Action settings view just like you can for a regular listview or editor in a collection. So if you fx also want the user to choose whether to overwrite existing data with updates then you can add a boolean to the settings and add a new field to the Configure method:
 public class MovieImportSettings
{
    public string FilePath { get; set; }
    public bool OverwriteExisting { get; set; }
}

public override void Configure(SettingsConfigBuilder settingsConfig)
{
    settingsConfig
        .AddFieldset("Import", fieldsetConfig => fieldsetConfig
            .AddField(f => f.FilePath)
            .SetDataType(-90)
            .AddField(f => f.OverwriteExisting));
}
And just like that a toggle is added:
Now onto actually processing the file we receive and importing the data into our repository:
Inside the Execute method we can use Umbracos MediaFileManager to open a stream of the file. The reason this is used instead of just the .NET File is that it will automatically handle getting the file from the relevant MediaFileSystem. So in short if something like blob storage is used it will know to receive it from there instead of from the server.
if (settings == null || string.IsNullOrWhiteSpace(settings.FilePath))
{
    return new ActionResult(true);
}

var fileStream = _mediaFileManager.FileSystem.OpenFile(settings.FilePath);
if (fileStream == null)
{
    return new ActionResult(false);
}

using var package = new ExcelPackage(fileStream);

var worksheet = package.Workbook.Worksheets.FirstOrDefault();
if (worksheet is null)
{
    return new ActionResult(false);
}
So we can use the filepath returned from the upload to get the file, and then again use EpPlus to process the excel sheet.
I've created a few extensions that can map the excel sheet data into our Movie model that we use with our repo. They can also convert the comma seperated string of movie genres into a proper collection of the genre model:
private IEnumerable MapToMovieModel(ExcelWorksheet worksheet)
{
    var movies = new List();
    for (var row = 2; row <= worksheet.Dimension.Rows; row++) // Row 1 is the header so we start on row 2 for the first movie
    {
        var movie = new Movie
        {
            Id = int.TryParse(worksheet.Cells[row, 1].Value?.ToString(), out var id) ? id : 0,
            Name = worksheet.Cells[row, 2].Value?.ToString() ?? "",
            ReleaseYear = int.TryParse(worksheet.Cells[row, 3].Value?.ToString(), out var releaseYear) ? releaseYear : 0,
            MainActor = worksheet.Cells[row, 4].Value?.ToString(),
            Genres = GetGenres(worksheet.Cells[row, 5].Value?.ToString())
        };

        movies.Add(movie);
    }

    return movies;
}

private List GetGenres(string? genres)
{
    var movieGenres = new List();

    if (string.IsNullOrWhiteSpace(genres))
    {
        return movieGenres;
    }

    var genreArray = genres.Split(',');

    foreach (var genre in genreArray)
    {
        movieGenres.Add(new MovieGenre
        {
            Name = genre.Trim()
        });
    }

    return movieGenres;
}
Finally we just need to put it all together and then call our repo to update the changes:
public override ActionResult Execute(string collectionAlias, object[] entityIds, MovieImportSettings? settings)
{
    if (settings == null || string.IsNullOrWhiteSpace(settings.FilePath))
    {
        return new ActionResult(true);
    }

    var fileStream = _mediaFileManager.FileSystem.OpenFile(settings.FilePath);
    if (fileStream == null)
    {
        return new ActionResult(false);
    }

    using var package = new ExcelPackage(fileStream);

    var worksheet = package.Workbook.Worksheets.FirstOrDefault();
    if (worksheet is null)
    {
        return new ActionResult(false);
    }

    var movies = MapToMovieModel(worksheet);

    foreach (var movie in movies)
    {
        _movieRepository.InsertOrUpdate(movie).GetAwaiter().GetResult();
    }

    return new ActionResult(true);
}
At this point I can download the excel sheet, change fx Die Hard to Die Hard 3 and import - at which point it is automatically updated in my list:
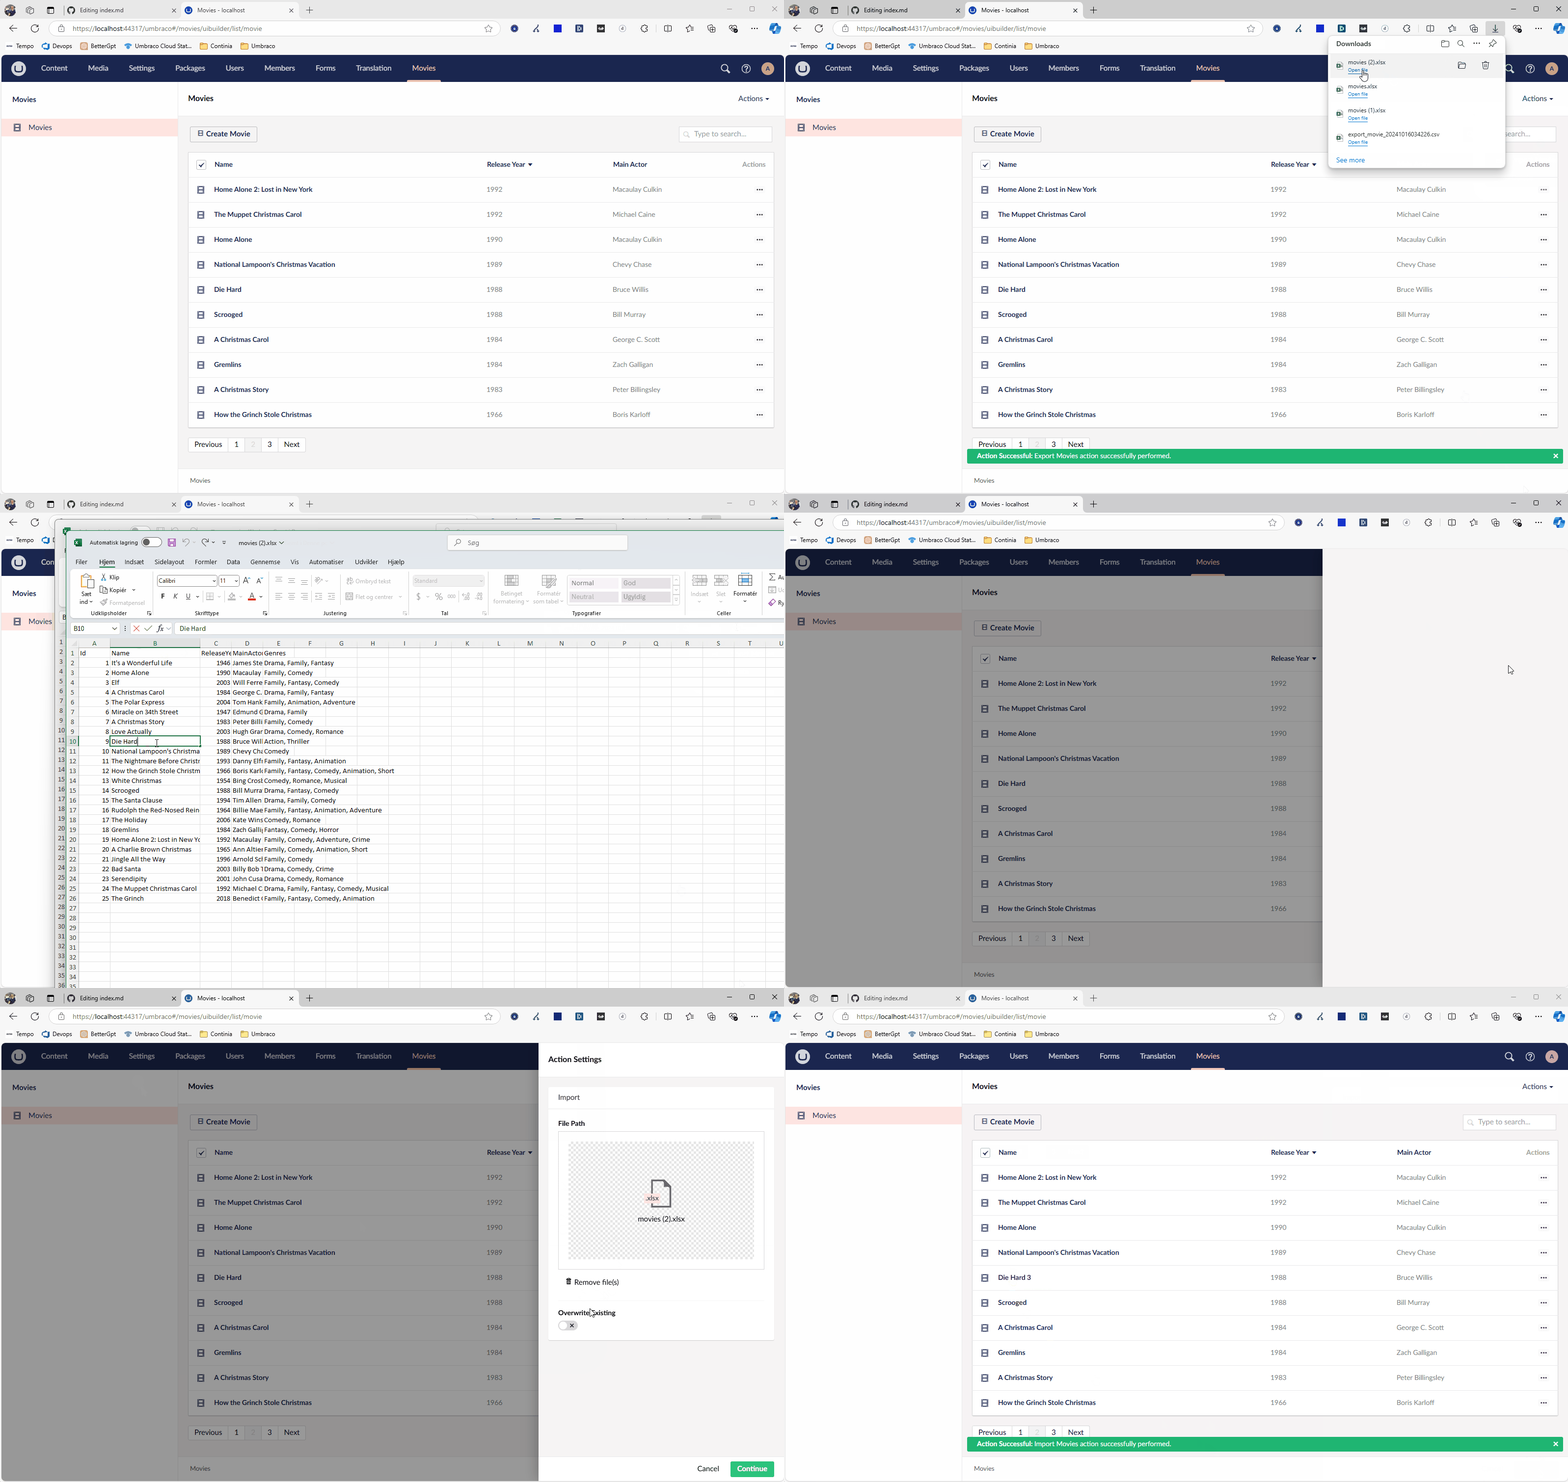
Now we have a fully functional import/export action that can take the entire collection, reformat the data to whatever format is fitting and give it to the user. As well as being able to reupload the data in the new format, and convert it back to the models Umbraco UI Builder needs and save the changes.
These custom actions give you the power to take the collection data and deliver it in any way and any format you need.
