
In this bonus article I will show how to use Azure DevOps to deploy to an FTP(S) server or Web Deploy in cases where you may not have the Azure agent available.
I will be deploying the same application I built in part two of the original series to a Standard Package on UmbHost, firstly using FTP and then using Web Deploy.
FTP Deployment
Build Pipeline
The build process requires a few changes to work with the FTP release pipeline, so you can follow part two up until the Adding the build tasks section. At this point you will want use the MSBuild arguments defined below:
/p:DeployOnBuild=True /p:DeployDefaultTarget=WebPublish /p:WebPublishMethod=FileSystem
/p:DeleteExistingFiles=True /p:publishUrl="$(Build.ArtifactStagingDirectory)\$(Build.BuildId)"
/p:AutoParameterizationWebConfigConnectionStrings=False
You will then need to add the Archive task. To do this click the plus + on the Agent job 1 bar then in the blade enter the following into the search box in the top right "archive files", adding the first result with the same name to the stage.
In this task, configure as follows:
Root folder or file to archive:
$(Build.ArtifactStagingDirectory)/$(Build.BuildId)Select zip from the Archive type dropdown, and then finally enter the archive name in to the box titled Archive file to create, for example:
$(Build.ArtifactStagingDirectory)/SkriftArticle.Web.zipNext you will need to add the publish task. Search for this in the same way as the Archive task, instead entering publish build artifacts in the search box and adding the first result to the stage.
Configure this task by setting Path to publish as follows:
$(Build.ArtifactStagingDirectory)/SkriftArticle.Web.zipThat is the build process done with, next up is configuring the release pipeline.
Creating the Release Pipeline
First browse to the Releases menu item under the Pipelines menu.
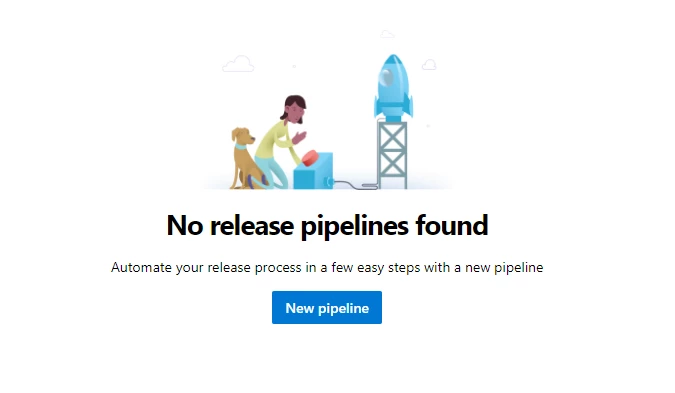
 Once there you will be presented with a message saying No release pipelines found. Beneath that will be a button called New pipeline; click this to begin the process.
 On the next screen select Empty job.
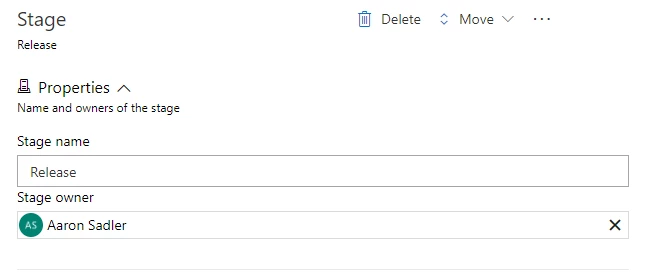
In the Stage name text box input your build environment type. This is directly linked to naming of your web.config transforms.
For example, a stage name of Release would mean that during the deployment process it would use the Web.Release.config transformation file.
For the purposes of this walk through I have entered Release.
 Now press the
 X in the right to close this blade.
Linking the artifact
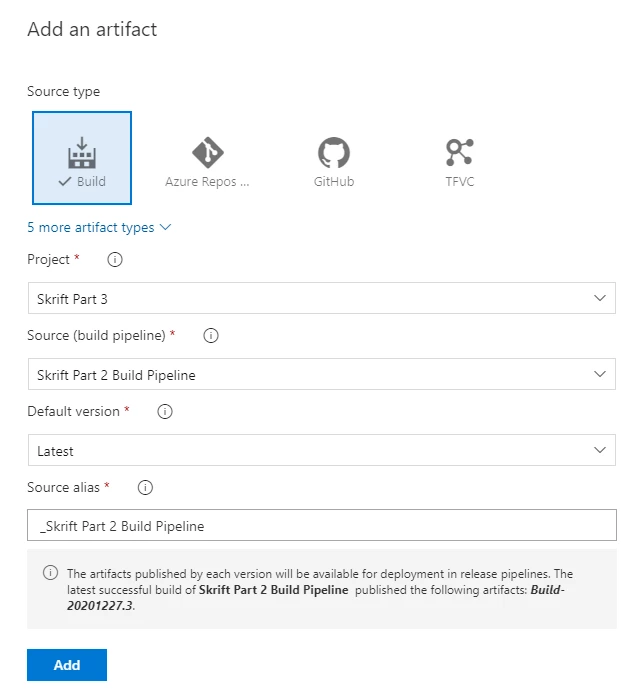
Next the artifact needs linking to the pipeline. To do this click on the Add an artifact button then on the blade which opens up, and select the building pipeline from within the Source (build pipeline) dropdown.
Typically the default values in the rest of the fields should be fine.
 Finally click the Add button to close the blade.
Configuring the task
The tasks now need to be configured. First we will need to add a task to extract the zip file generated during the build process.
To add the extraction task click on the plus + on the bar entitled Agent job. In the search box on the blade which appears enter Extract files and add the first result.
Now you need to point the extract task to the artifact created during the build process, press the 3 dots to open the browse blade, and select the *.Web.zip file. Then press Ok to close the blade.
You should have something similar to this in the input:
$(System.DefaultWorkingDirectory)/_Skrift Part 2 Build Pipeline/Build-20201227.3/SkriftArticle.Web.zipThis needs modifying to work with each run. The folder name needs to be swapped out at release time by the agent. To do this change the build folder name to a predefined Azure DevOps variable $(Build.BuildNumber) so it looks similar to below:
$(System.DefaultWorkingDirectory)/_Skrift Part 2 Build Pipeline/$(Build.BuildNumber)/SkriftArticle.Web.zipIn the destination folder box enter the text as below:
$(Build.ArtifactStagingDirectory)/Release-$(Build.BuildNumber)/Next is to setup the file transforms. We need to add a specific task to achieve this, so again click on the plus + then in the search box in the right of the blade enter File transform then add the first result.
In the package or folder box enter the text as below:
$(Build.ArtifactStagingDirectory)/Release-$(Build.BuildNumber)/Tick the XML transformation checkbox, modify the rules as required by your application, and finally choose XML in the file format drop down.
The final step in the FTP deployment pipeline is to deploy to the server. To do this click on the plus + then in the search box in the right of the blade enter FTP Upload, once again adding the first result to the stage.
Under Authentication Method select Enter Credentials and then enter your details. Be sure to tick the Preserve file paths checkbox a bit further down under Advanced.
Now you will want to name each release as something useful. This naming may differ depending on your company rules.
Click on the Options tab and then in the release name format box paste the following:
Rel-$(date:ddMMyyyy)$(rev:.r)The will generate something similar to below:
Rel-21012021.1Finally name your pipeline. In the top left find New release pipeline and change this to your pipeline name, then click Save in the top right.
 Run the Pipeline
So now all the configuration is done you will need to run the pipeline to push the files to the Web App. To do this click the Create Release button in the top right.
 In the blade which opens use the default values, then click Create at the bottom.
On the green bar that shows click the release name to open the information relating to the release.
If you hover over the Release block the Logs button appears. Here you can view the deployment as it happens.
Once complete, you should have your website deployed via FTP.
Do note that due to the nature of FTP it cannot tell what has changed, so every deployment will deploy every file held within the zip folder.
Web Deploy Deployment
Build Pipeline
You can follow all of the steps in part two as this works with Web Deploy.
Creating the release pipeline
First browse to the Releases menu item under the Pipelines menu.
 Once there you will be presented with a message saying No release pipelines found. Beneath that will be a button called New pipeline; click this to begin the process.
 On the next screen, select Empty job.
 In the Stage name text box input your build environment type. This is directly linked to naming of your web.config transforms.
For example, a stage name of Release would mean that during the deployment process it would use the Web.Release.config transformation file.
For the purposes of this walk through I have entered Release.
 Now press the
 X in the right to close this blade.
Linking the artifact
Next the artifact needs linking to the pipeline. To do this click on the Add an artifact button then on the blade which opens up select the building pipeline from within the Source (build pipeline) dropdown.
Typically the default values in the rest of the fields should be fine.
 Finally click the Add button to close the blade.
Configuring the task
The tasks now need to be configured.
First we will need to setup the file transforms. We need to add a specific task to achieve this so again click on the plus + then in the search box in the right of the blade enter File transform then add the first result.
In the package or folder box enter the text as below:
$(Build.ArtifactStagingDirectory)/Release-$(Build.BuildNumber)/Tick the XML transformation checkbox, modify the rules as required by your application, and choose XML in the file format drop down.
Next you will need to install a task from the Marketplace to use Web Deploy in the same way as the file transforms task. Click the plus + and search for the following MSDeploy Package Sync. Once you have installed this into your Azure DevOps account add the task to the stage.
This will need configuring as below:
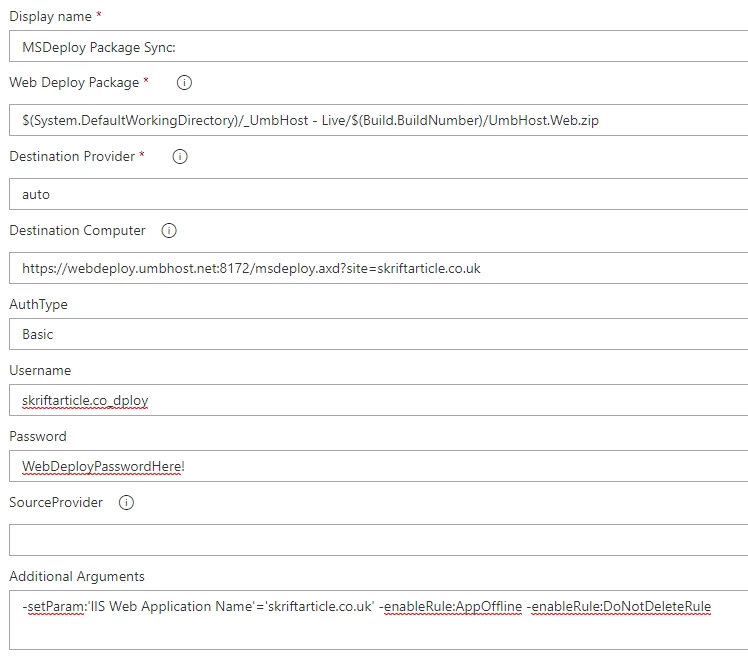
The additional arguments should be as follows, changing skriftarticle.co.uk to your website name:
-setParam:'IIS Web Application Name'='skriftarticle.co.uk' -enableRule:AppOffline -enableRule:DoNotDeleteRuleYou may also need to add the following argument if you have set any custom parameters at build time:
-setParamFile:"$(System.DefaultWorkingDirectory)/_UmbHost - Live/$(Build.BuildNumber)/SkriftArticle.Web.SetParameters.xml"You can find a full list of Web Deploy rules here.
The most important setting here is the additional argument called IIS Web Application Name. Without this set it can throw an error if your web deploy user is not an administrator account.
Now you will want to name each release as something useful. This naming may differ depending on your company rules.
Click on the Options tab and then in the release name format box paste the following:
Rel-$(date:ddMMyyyy)$(rev:.r)The will generate something similar to below:
Rel-21012021.1Finally name your pipeline. In the top left find New release pipeline and change this to your pipeline name then click Save in the top right.
 Run the pipeline
So now all the configuration is done you will need to run the pipeline to push the files to the Web App. To do this click the Create Release button in the top right.

In the blade which opens, use the default values, then click Create at the bottom.
On the green bar that shows click the release name to open the information relating to the release.
If you hover over the Release block the Logs button appears. Here you can view the deployment as it happens.
Once complete you should have your website deployed via FTP.
Wrap up
So that's all there is to it. Using the FTP method will allow you to use Azure DevOps with pretty much every host out there.
If your host offers Web Deploy (UmbHost includes this as standard) then my recommendation would be to use Web Deploy over FTP due to the fact it will only deploy changed files.
If you have any questions leave a comment below. I'll make sure to reply where I can. If you need a more personal response then feel free to drop me a message on Twitter or via my contact form.