
So you’ve built your client a new website in Umbraco and two months later they have decided they would like to add an eCommerce store to it.
This is a very common scenario in our world, you have everything set up and now have to ‘bolt on’ a store. Well luckily for you Merchello makes it rather easy with the new FastTrack starter kit.
FastTrack is the new fully built starter kit for Merchello, essentially an install and go store. What makes the new starter kit really cool is that you can quite easily move the store into your own existing site without too much fuss.
We recently wrote a blog post about FastTrack on our website which explains the concept of FastTrack and how you can use it as is, or customise part or all of it to suit your needs. But in this blog post, I’m going to cover the quickest way to get the FastTrack into your site.
![]() Welcome to *Flux It!* a cool new company that designs Flux Capacitors owned by a Dr Emmett Brown.
Welcome to *Flux It!* a cool new company that designs Flux Capacitors owned by a Dr Emmett Brown.
The company's website is a nice information brochure site built in Umbraco (As you can see below).
It consists of a Home page, About Us and a Contact Us page and is built using (MVC) Controllers and Actions to render the pages and uses Bootstrap for the layout/views.
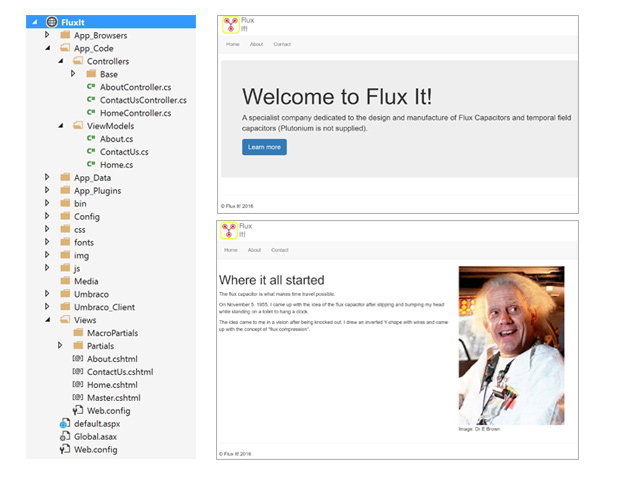
Emmett recently had a breakthrough on a new Flux Capacitor design based on one that he had previously installed into a DeLorean. He would now like to sell the old Flux Capacitor and the new one through his website. To satisfy this requirement, he will need to add an eCommerce store to this site.
So let’s help Emmett out and get him a new store integrated into his existing site. I estimate this will only take you about 20 minutes to do. That’s pretty quick in my book.
If you want to follow along with this post, then download the latest Umbraco from our.umbraco and install it locally (WebMatrix is handy for this sort of stuff).
** Make sure you don’t install a starter kit **
Once Umbraco has finished installing download the Flux It! site package (link below) and install it into Umbraco as you would a normal Umbraco package/plugin. This will set up the base site and get you ready to follow along (You may need to publish the site after install to get it to show).
https://merchello.com/media/1068/flux_it_site_10.zip
Note: Please note that Fasttrack is built using the built in Umbraco ModelsBuilder so you must have it enabled in your web.config.
<addkey="Umbraco.ModelsBuilder.Enable"value="true"/>We now have our starting point. An existing website that we are going to add a store too.
1. Merchello
Let’s now install Merchello (You have to install Merchello before you can install FastTrack). Just go to our.umbraco and download the latest Merchello package.
https://our.umbraco.org/projects/collaboration/merchello/
Install it like you would any other Umbraco package, please be patient when installing as it can take a few seconds/minutes as the installer creates a great deal of database tables.
2. FastTrack
Once Merchello is installed and you can see the Merchello icon, we then need to install FastTrack (Which is the starter kit addon).
Again, you download this from the Merchello our.umbraco page, and you will see the package Merchello_FastTrack_2.3.0. Just download, and again install it like a normal Umbraco package. This can also take a few seconds to install.
FastTrack is also available as a Nuget package, but the reason we have ‘initially’ used the package install is because that creates the nodes/doctypes/settings etc...
The Nuget package does not. The Nuget package is for the Binaries and must be installed afterwards, so we can easily keep the FastTrack up to date as the project moves forward.
https://www.nuget.org/packages/Merchello.FastTrack/
The same goes for the Merchello Nuget package
https://www.nuget.org/packages/Merchello.Core/
That is the core files (Just like Umbraco has a Core Nuget package), and you must install Merchello via our.umbraco as a normal package first. Once you have done that, you can install the nuget package (Overwrite existing files where needed) and you can now keep Merchello up to date via Nuget.
This post will not cover installing the Nuget packages.
Note: The process explained in this post below will only work with Merchello v2.3.0 and above. Previous versions of the FastTrack will not work as shown below.
3. FastTrack Settings
FastTrack comes all set up out of the box, and for speed and to keep this post as short as possible we’ll be leaving all the settings untouched.
If you want to update the main store settings, have a look at the documentation here
https://merchello.readme.io/docs/global-settings
As with Umbraco, Merchello also comes with a .config settings file for more advanced settings/config changes. You can find it in:
App_Plugins/Merchello/config/merchello.config
4. Members
When FastTrack is installed it creates a Member Group and a Member Type.
- Member Group = Customers
- Member Type = Merchello Customer
For Emmett’s store this is fine, as we had no previous membership/members functionality. But if your store has it’s own MemberTypes that you want to use, then you just need to update the merchello.config to make sure Merchello knows about it.
<customer memberTypes="customer,Customer,merchelloCustomer,MerchelloCustomer" />And make sure your memberType has a First Name (firstName) and Last Name (lastName) property on it or that won’t get stored on your members.
5. Two Website
You should have noticed by now that when the FastTrack installed, it created another website in the Content tree. So we now have the Flux It! site and the the FastTrack site - Which is what we want.
What we are going to do is take the ‘guts’ of FastTrack, which is actually everything apart from the root node ‘Store’ and move it over into our site.
Then update the FastTrack views to use our Flux It! Master template and a few other minor tweaks and we should be up and running.

6. Document Types & Tree Nodes
Let's move the nodes over first, so we want everything from the FastTrack under the ‘Store’ node. We want to enable each one to be allowed to be moved under our ‘Home’ node. So we’ll edit the Home docType permissions, and they will look like this when we are done (Note the six docTypes prefixed with ft...)

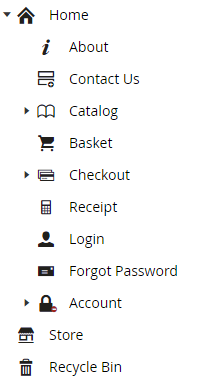
Now we just right click on each node under the 'Store', and move it to under our Flux It! 'Home' node. Once everything is moved, we can delete the redundant 'Store' node. So we now have our finished tree/site structure.
7. FastTrack.config
The FastTrack also comes with it’s own config file which you can find in the following location
\App_Plugins\FastTrack\config\fasttrack.config
Because we have moved the entire FastTrack 'guts' into a new store then we need to tell FastTrack that the store root is now a different DocumentType to what it installed with. Open up the fasttrack.config and update the 'ContentTypeAliasStore' to the Home Document Type (Remember has to be lowercase first letter)
<setting alias="ContentTypeAliasStore" value="home" />8. Views
Now we have our finished tree/structure, we need to update the FastTrack views so they look like the rest of our site.
We have a main template in Flux It! that all the other views use for the layout called ‘Master.cshtml’. So we just need to go through each of the FastTrack views which can be found in the ‘Views’ folder (They are prefixed with ft….) and update the layout from ‘FastTrack.cshtml’ to point to our own Master page. So any view that has this:
Layout = "FastTrack.cshtml";Needs to be changed to
Layout = "Master.cshtml";Not all views use the FastTrack layout, so double check before changing - We only need to change the ones that do, the rest can stay as they are.
Once you have done this, we now need to update our own Master page with some FastTrack Css & Js files to make sure the site functions. Or we’ll end up with odd looking products and some functionality not working as expected.
Again, this is very simple and is just a copy and paste task. In the <head> of the Flex It! Master page. Add the following CSS tag
<link rel="stylesheet" href="~/App_Plugins/Merchello/client/css/merchello.ui.min.css" />And finally for the JavaScript we need to add the following scripts at the end of the ‘Master.cshtml’ just above the @RenderSection("scripts", false), delete as appropriate if you already use JQuery, Bootstrap etc… As you don’t want two references to the same files. We already have a bootstrap.min.js file, so I could replace that line with our bootstrap file (/js/bootstrap.min.js) if I wanted to.
<script src="~/Scripts/jquery-1.10.2.min.js"></script>
<script src="~/Scripts/jquery.validate.min.js"></script>
<script src="~/Scripts/jquery.unobtrusive-ajax.min.js"></script>
<script src="~/Scripts/jquery.validate.unobtrusive.min.js"></script>
<script src="~/Scripts/underscore.min.js"></script>
<script src="~/Scripts/bootstrap.min.js"></script>
<script src="~/App_Plugins/Merchello/client/js/merchello.ui.min.js"></script>
<script src="~/App_Plugins/Merchello/client/js/merchello.ui.settings.js"></script>
<script src="~/App_Plugins/Merchello/client/js/fasttrack.js"></script>
9. Working Site
Believe it or not, we now have a working site of sorts. For example you can browse to a category page via the Umbraco backoffice. I’ll go to /catalog/funny-t-shirts/ and I can see the shirts listed.

10. Finishing Touches
Although we have a working site, without a navigation and a visible basket it’s not much use. We need to make a couple of extra changes to the header of our site to get this all in and a fully functional store.
Navigation, Basket & Login
Firstly let’s add some navigation to Flux It! Below is what our current navigation looks like.
<ul class="nav navbar-nav">
    <li><a href="/">Home</a></li>
    <li><a href="/about/">About</a></li>
    <li><a href="/contact-us/">Contact</a></li>
</ul>
We need a few local variables from the FastTrack view before we change the navigation list items also need a couple @using/@inherits statements added at the top of the ‘Master.cshtml’.
In your Master.cshtml just replace the current @inherits UmbracoViewPage at the top of the view, with the below:
@using Merchello.Core.Models
@using Merchello.FastTrack.Ui
@using Merchello.Web
@inherits Merchello.Web.Mvc.MerchelloViewPage<IPublishedContent>
Note: MerchelloViewPage<T> is nothing special and just inherits from UmbracoViewPage<T> but exposes a few helpful properties, one of which is @CurrentCustomer and we’ll use that in the nav. This is available in all Merchello installs for you to use.
Now add the following variables to your ‘Master.cshtml’ underneath your ‘Layout = null’ making sure they are inside the {} brackets too.
   var catalogRoot = ExampleUiHelper.Content.GetCatalog();
   var basketPage = ExampleUiHelper.Content.GetBasket();
   var accountPage = ExampleUiHelper.Content.GetAccount();
We can now start adding navigation items. I’m not going to worry about order of the nav, you can update this however you wish at the end or you can remove items you don’t want.
Underneath the <li>for the contact page add the following code:
   <li>
        <a href="@catalogRoot.Url">
            @catalogRoot.Name
        </a>
    </li>
    <li>
        <a href="@basketPage.Url">
            <span class="glyphicon glyphicon-shopping-cart" aria-hidden="true"></span>
            @basketPage.Name (<span data-muilabel="basketcount">@CurrentCustomer.Basket().TotalQuantityCount</span>)
        </a>
    </li>
    <li>
        <a href="@accountPage.Url">
            <span class="glyphicon glyphicon-user" aria-hidden="true"></span>
            @if (CurrentCustomer.IsAnonymous)
            {
                <span>Login</span>
            }
            else
            {
                var customer = (ICustomer) CurrentCustomer;
                <span>@customer.FirstName @customer.LastName</span>
            }
        </a>
    </li>
    @if (!CurrentCustomer.IsAnonymous)
    {
        <li class="dropdown">
            <a href="#" class="dropdown-toggle" data-toggle="dropdown" role="button" aria-haspopup="true" aria-expanded="false"><span class="caret"></span></a>
            <ul class="dropdown-menu">
                <li>@Html.ActionLink("Logout", "Logout", "CustomerMembership", new { area = "FastTrack", redirectId = Model.Id }, null)</li>
            </ul>
        </li>
    }
    <li @(!CurrentCustomer.Basket().Items.Any() ? MvcHtmlString.Create("class=\"mui-quickcheckout\"") : MvcHtmlString.Empty) data-value="quickcheckout">
        <a href="@ExampleUiHelper.Content.GetCheckout().Url" class="success">Quick Checkout</a>
    </li>
Save the ‘Master.cshtml’ and refresh your page and you should now see the following. We can now get to products, see our basket and login for existing customers.
Featured Products
Finally, on the homepage Emmett wants some featured products. Merchello comes with a number of Property editors that you can use to pick products and collections. Let’s add a ‘Merchello Product List View’ to the ‘Home’ node and then display them on the home page.
Open up the ‘Home’ Document Type and click ‘Add Property’ under the Content tab (Under the Main Content RTE). Now add the following data type making sure you use the same name and alias.
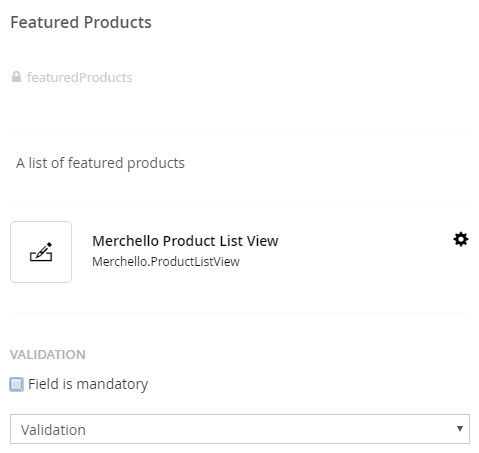
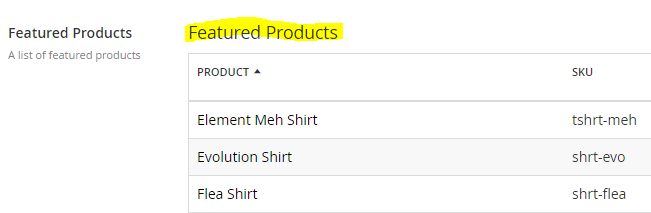
Save the Document Type and then go to your content tree and edit the ‘Home’ node. When the page loads you’ll see it’s showing all products. Click on the cog icon on the right hand side of the product list view. This will open up a dialog window showing all the Merchello Collections that have been created. Select the ‘Featured Products’ collection and ‘Save’ to close the dialog.
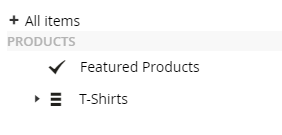
You will now see the Featured Products selected (As below). Make sure you ‘Save & Publish’ your home page now.
Finally, let's display the products on the home page of the website. Open up your ‘Home.cshtml’ and right at the top of the page add the following @using statement.
@using Merchello.Web.Models.VirtualContentNow under the ‘jumbotron’ div. Paste the following code.
<h2>Featured Products</h2>
<div class="row">
    @foreach (var fp in Model.GetPropertyValue<IEnumerable<IProductContent>>("featuredProducts"))
    {
        <div class="col-sm-4">
            @Html.Partial("_ProductBox", fp)
        </div>
    }
</div>
Note: Normally I would update the Home model with the FeaturedProducts, but for the sake of speed and this tutorial I am getting the products directly in the view.
10. Flux It!
That’s it. We now have a fully working eCommerce store in Flux It!

However it’s selling t-shirts at the moment and not Flux capacitors.... But I won’t run through changing/updating products and categories in this post as it’s pretty simple to change, just delete the unwanted categories and Merchello collections (Or rename them which would be even quicker) then add your own Products/Categories.
Hopefully you were able to follow along, it looks like a long blog post but in fact it’s pretty straightforward with just minor changes here and there. I hope this helps you understand how to quickly get Merchello eCommerce into your own existing Umbraco websites.