
Running a development studio has its challenges. The biggest challenge we all face, whether you run the studio as management, or whether you are the developer, is time. So in order to fight time itself you have be very good at time management, the best ways to manage your time is to get rid of the mundane tasks, the tasks that literally eat away at your time, so that you can focus on the important things with deadlines hanging overhead.
We recently had seven Umbraco websites land in our studio, with a one month deadline! These websites were not just your normal everyday portfolio websites, you know, the ones you can stamp out in a few days without any real effort. They contained custom sections, email notifications, custom database tables the list goes on!
The client wanted progress updates by way of allowing for the QA environment to run in parallel with completing sections in Dev. Knowing that this was going to be a very tight deadline we needed all the time available to us to focus on the important things.
Deploying seven websites to the QA environment would take a lot of time everyday. After going through the following process just once,and of course realising that it’s the same for all of them:
- Merge and get everything into the master/production branch
- Build the project
- Package the built project
- Upload the package via FTP
- Remote into the server
- Copy and overwrite the files in the IIS directory
- Hit F5
This consumed time which we just didn’t have the luxury of wasting. What if we could optimise this process? I had often heard of CI (Continuous Integration) & CD (Continuous Deployment) which could do just that. There are a lot of solutions on offer like “Team City” or “GO Server”. However, these cost a lot of money every month. If you are a big software development company or a massive corporate this is not an issue, alas my company is a very small and still new outfit.
The answer? Jenkins! Our open source savior. Jenkins can accomplish all of this and more. I am going to show you how.
Prerequisite Installation
Before we install Jenkins, we do need to make sure that we have some packages installed on the server.
- MSBuild tools
- nuget - install the latest windows x86 command line version
- PuTTY
Jenkins setup
To install Jenkins on your server, simply download it from the following link, https://jenkins.io/download/ and follow the instructions. There is no special setup required, just follow the default instructions from the installer. When you have completed the installation process, in your browser on the server, go to http://localhost:8080/
The next step is to add some plugins via the plugin manager, http://localhost:8080/pluginManager/. The plugins needed are:
- Git plugin
- Git client plugin
- Github Branch Source plugin
- Github plugin
- MSBuild plugin
These plugins are all available via the plugin manager. Install them and restart the Jenkins service.
Once MSBuild Plugin is installed we need to configure this in Jenkins Global Configuration Tools http://localhost:8080/configureTools/
Under MSBuild section add a new MSBuild by clicking the “Add MSBuild” button. Give this a name “MSBuild Default” and a path to the MSBuild.exe file. (see below)
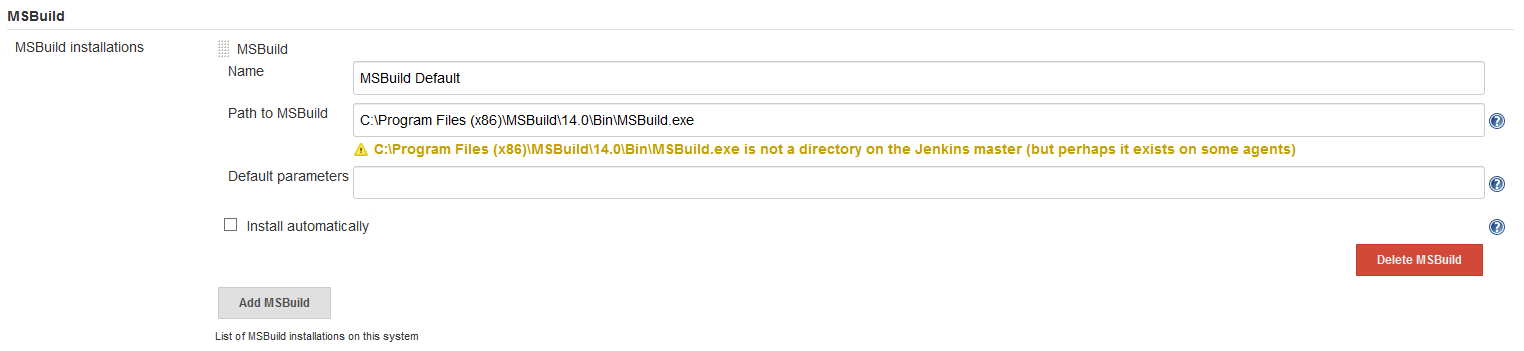
This MSBuild configuration will be needed later on.
Jenkins Build Jobs
Now that we have setup up Jenkins and installed the necessary plugins, we can start creating build jobs for our Umbraco website.
Go back to the dashboard and select “New Item” on the left hand menu.
Give your job a name and select “Freestyle project” from the options. Click OK.
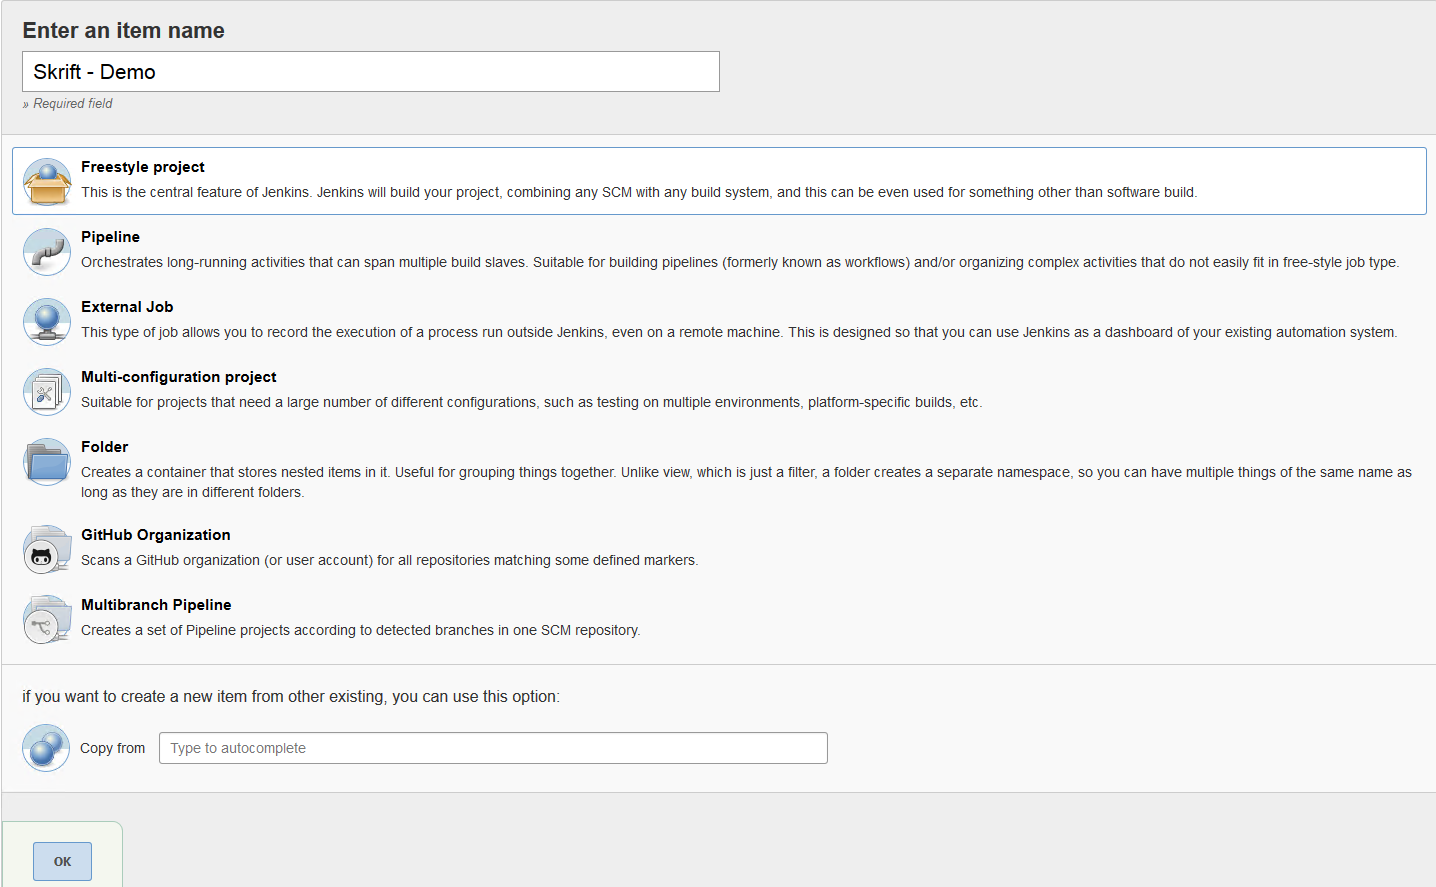
You will now be redirected to the Job Configuration page.
Your newly created job needs to be configured to clone a Github repository, restore Nuget packages and build it using MSBuild tools. Once built successfully with MSBuild the job will need to deploy the Umbraco website to a pre-configured IIS (Or any other web server) website directory. Let’s look at each step individually.
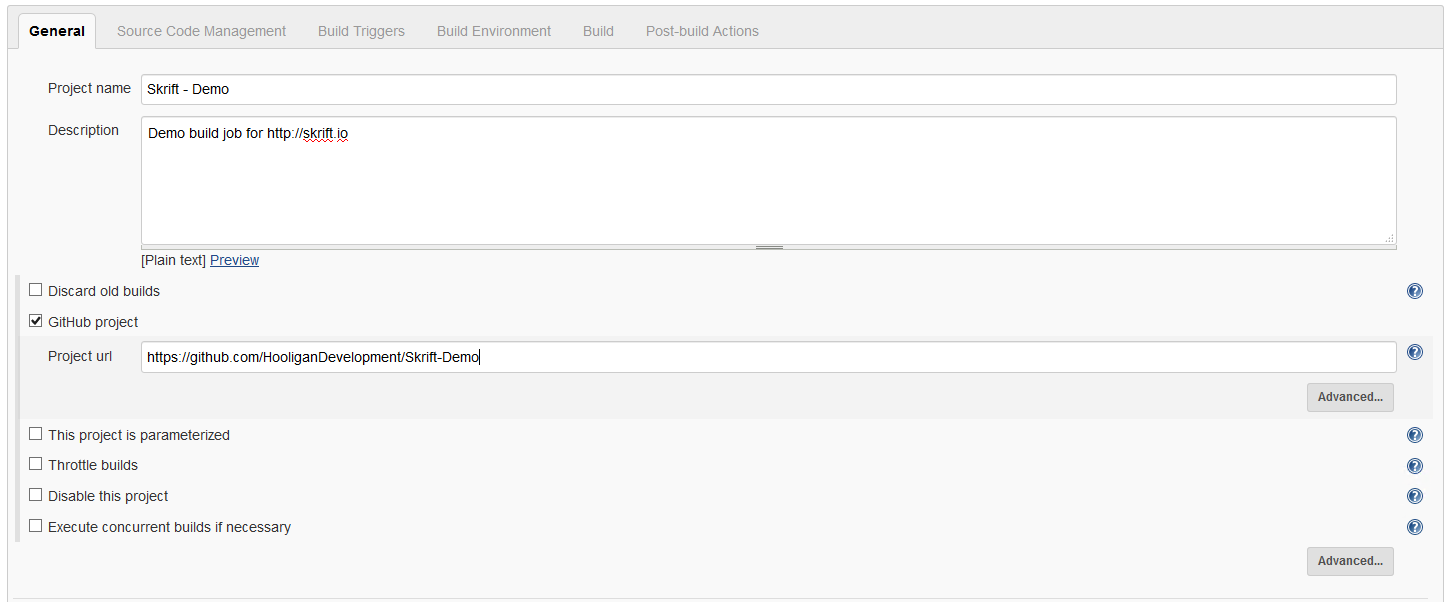
General Configuration
Because we had installed plugins before getting to this step we have a few non-standard configuration properties that we have available to us. You will see a Github project checkbox, check this and add your Github Url. It is also a good idea to add a description to your job if you're as pedantic as I am.
Source Code Management
The next configuration step is to setup the source code management. It is most likely that your Umbraco project is stored safely as a private repository. For this we will need to ensure that the server has SSH keys to access your repository. I personally use PuTTY to generate my ssh keys. Fire up PuTTYgen and generate your public and private SSH key. For more information on how to generate SSH keys see the following link https://www.ssh.com/ssh/putty/windows/puttygen
Copy your public key and add this to your Github Account, this can be done in Account Setting -> SSH and GPG Keys.
Keep your private key stored somewhere safe on your server we will need this in the next step.
In the job configuration section go to Source Code Management, select Git as your option.
Enter in your Git SSH repository Url. You will see an error being displayed saying “Failed to connect to repository” see below:
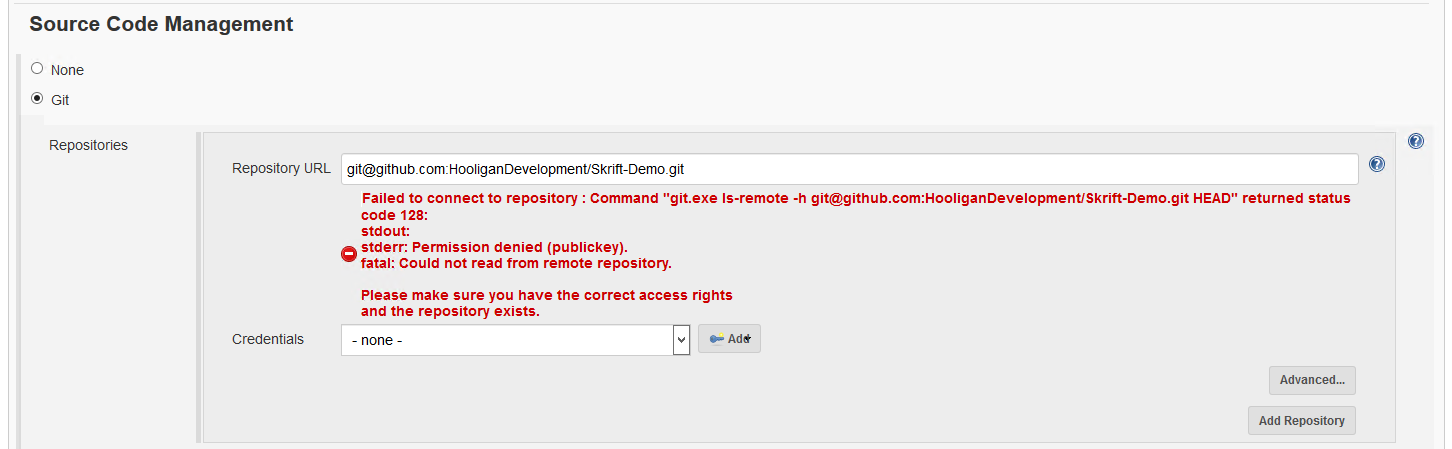
This is because we have not setup any credentials for Jenkins to use to access Github. To add credentials click on the Add button next to the credential drop down and select Jenkins. This will take you to Jenkins Credential Provider.
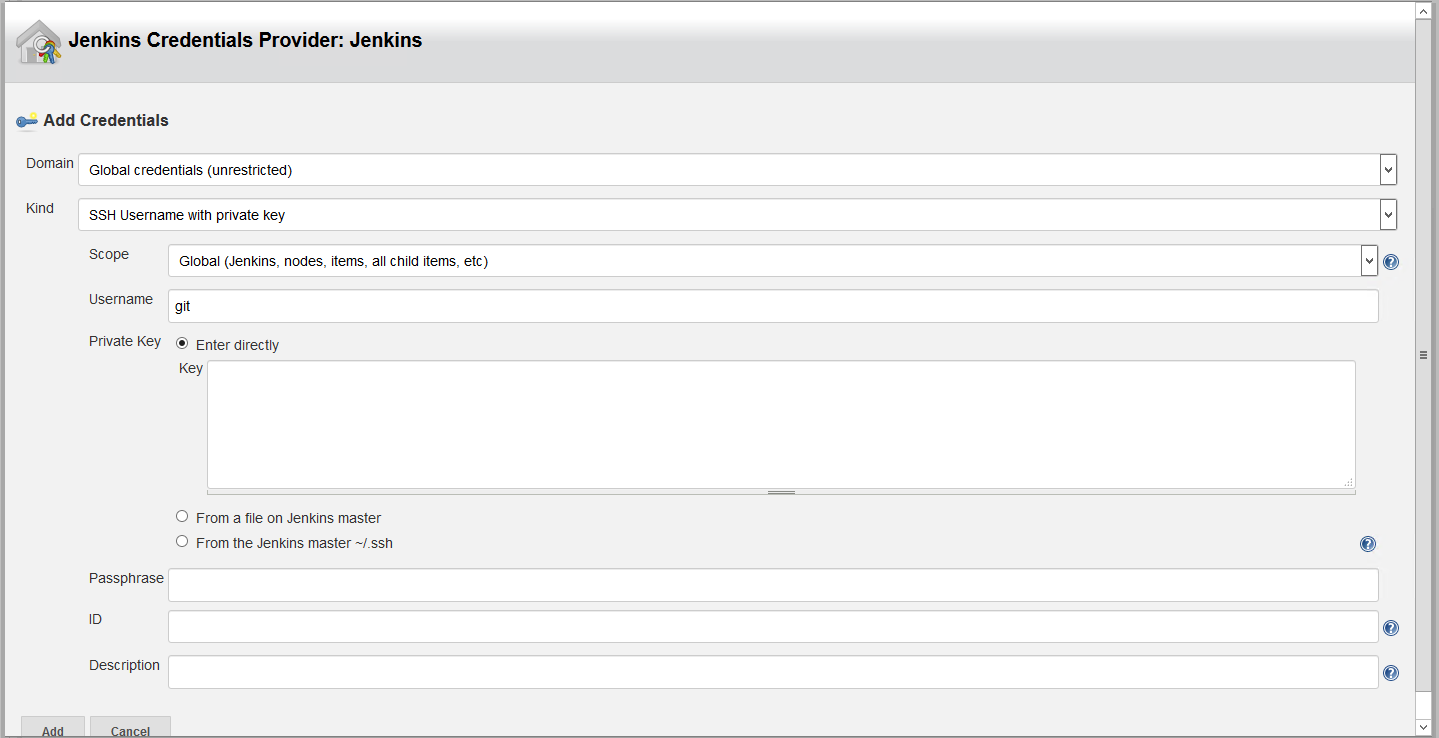
- Select “SSH Username with private key”using the dropdown.
- Enter in a username like “git” for example.
- Select “Enter directly” for private key and paste in the contents of your private SSH key your stored earlier.
- If you created the key with a passphrase enter this passphrase into the field provided.
- Save the credential by clicking the Add button.
Once you have added your SSH credential to Jenkins, select it from the credential dropdown, the error should now disappear.

Underneath Repositories you have the option to select which branch must be built, this is by default */Master but you can edit this if you require any other branch to be built, for example */Production or */Stage.
Build Triggers
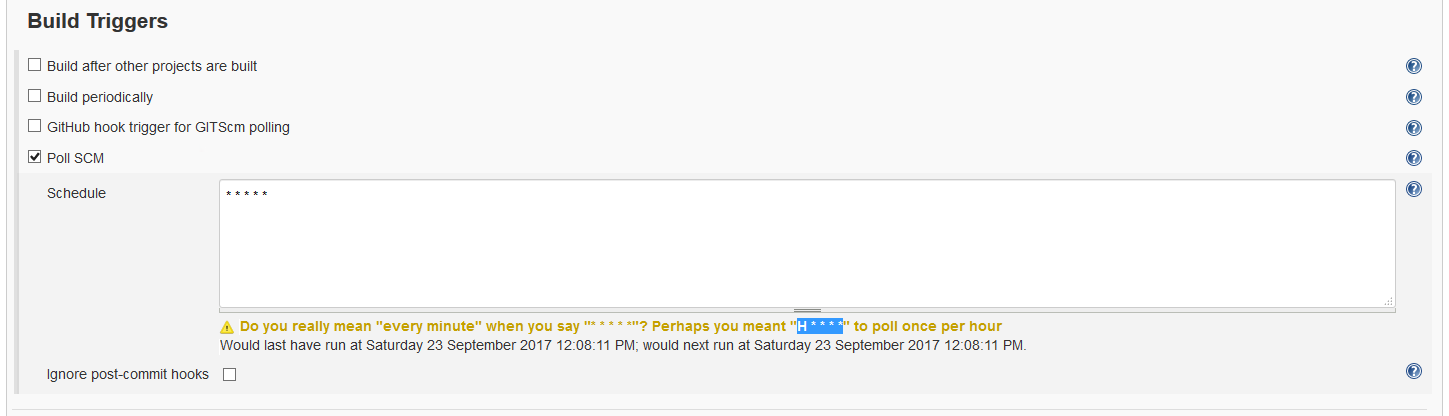
Our next step is to configure the “Build Triggers“. This allows us to configure Jenkins to trigger the build job to our liking. You have a few options, the quickest option will be to poll the repository for changes to the branch you have specified in the previous step.
Select the Poll SCM option and add “* * * * *” without quotes to the schedule property. This will poll the repository every minute for changes. The polling schedule is based off the Linux crontab so you can customize this to your liking for example, every hour “H * * * *”.
Build
Jenkins needs to know what to do with the newly cloned repository. We do this by adding build steps. Build steps run in order from top to bottom and you can have as may steps as you like.
The first step will be to restore any nuget packages. Add this step by clicking “Add build step” and select “Execute Windows Batch Command” from the available options. Add the following command to the command property "C:\CLI Tools\nuget.exe" restore .\ be sure to add quotes around your path if it has spaces. This command is pretty straight forward, it restores the nuget packages.
It is important to note that all the Windows Batch commands get executed from a workspace context. When Jenkins clones a repository it will clone it to a working directory for example: [Path to Jenkins]\workspace\[Job Name]. All Scripts and build steps are executed and contained to that path unless otherwise specified. This is why we are able to provide a relative path to our nuget restore “./”

Our next build step will be to actually build the project using MSBuild tool. Add another step and select “Build a Visual Studio project or solution using MSBuild” from the available options.
Select “MSBuild Default” as the MSBuild version we configured earlier and specify the .csproj file it must build. In my case this was SkriftDemo.Website\SkriftDemo.Website.csproj remember that the path is relative to the workspace directory Jenkins creates.
Save the configuration by clicking the save button at the bottom this will take us to the Job Dashboard.
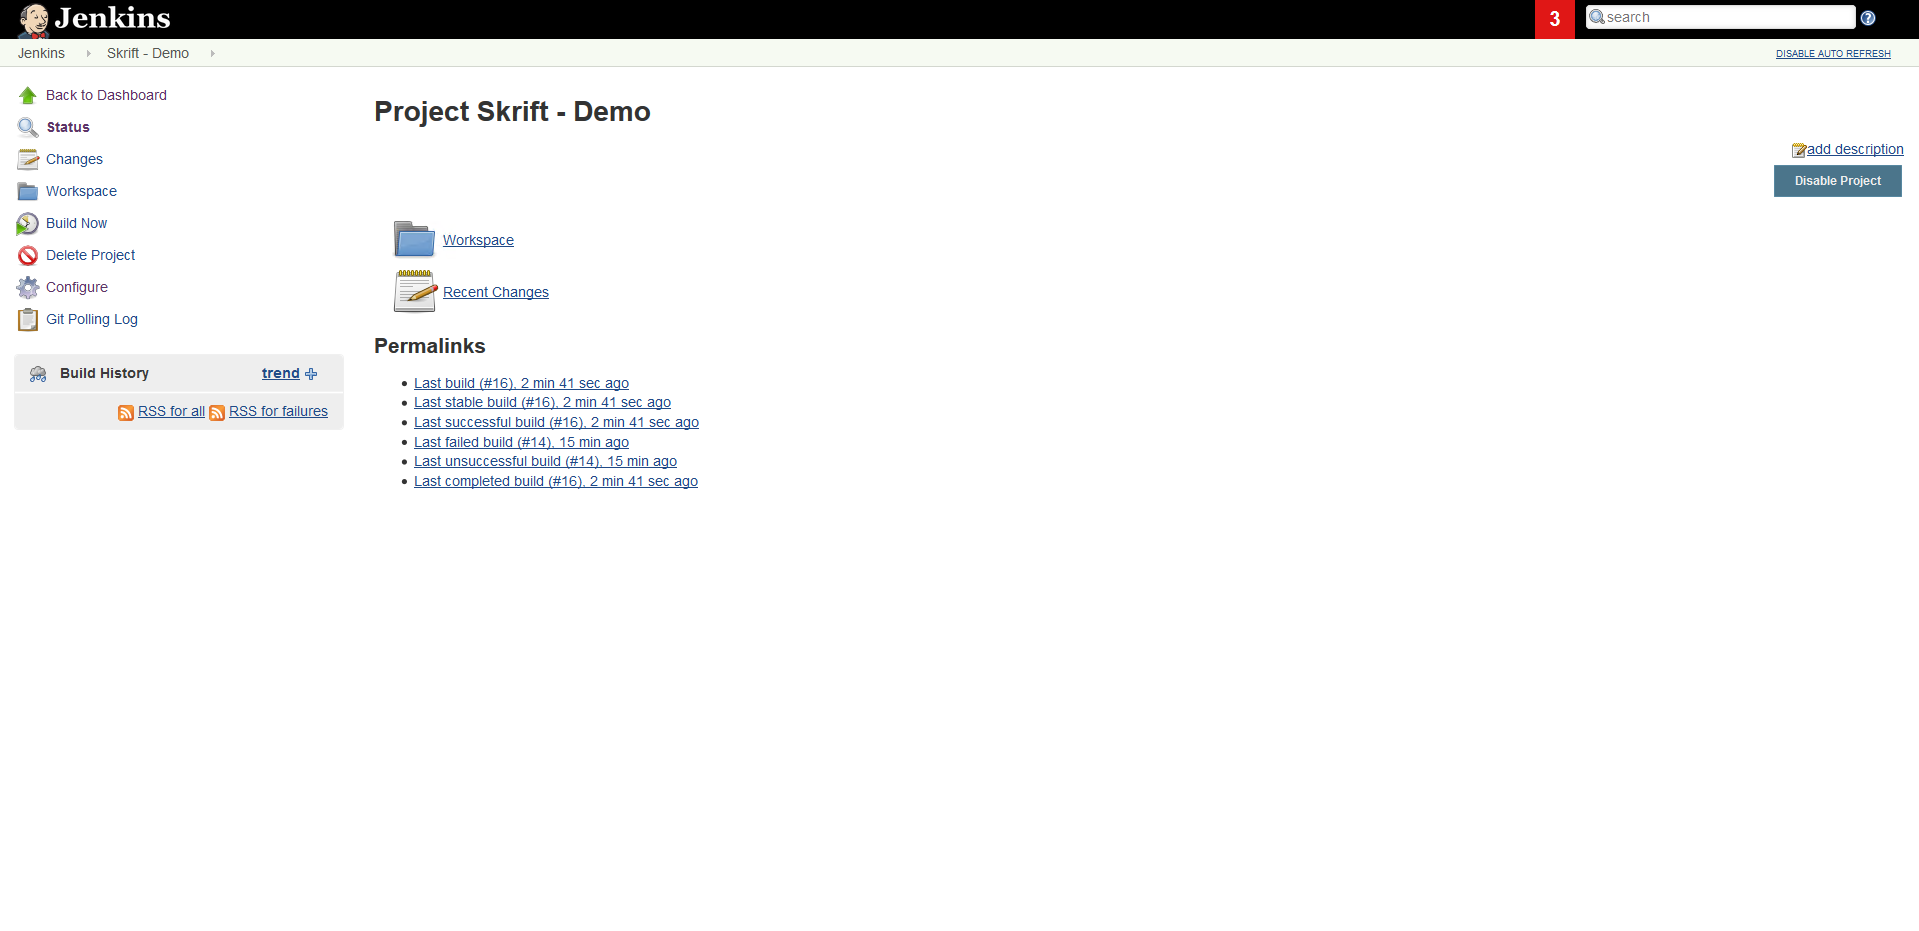
Now we can test to see if all our configuration is working. Click the “Build Now” button in the left hand menu to start a build. Under Build history you can monitor the progress of the build.

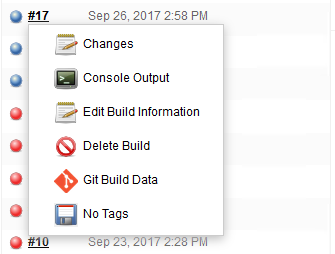
Next to the Build number you can find a quick link dropdown.
Clicking “Console Output“ you can see the output of the build to debug if any errors occurred during the build process. If the MSBuild failed to build the source code, the status circle next to your build number will turn red to alert you.
Our final step is to instruct Jenkins to deploy to our website IIS folder each and every time it builds the source code project. Go back to the Job Configuration page by clicking “Configure” in the left hand menu.
Add a new Build Step and select “Execute Windows Batch Command” from the available options. Add the following command to the command property "xcopy /s/y "C:\Program Files (x86)\Jenkins\workspace\Skrift - Demo\SkriftDemo\SkriftDemo.Website" "C:\inetpub\wwwroot\Skrift Demo" be sure to add quotes around your path if it has spaces. The batch command uses xcopy to copy the contents of the workspace for the job to our IIS website folder.

Saving the configuration will take you to the Job Dashboard. Click the “Build Now” option on the left hand menu. Our newly built version will now be copied to our IIS website folder applying all changes to our staging environment.
Clicking the “Build Now” button forces a new build to take place, but remember we had already setup source code polling in the configuration which means we can now just edit our code and commit into our master branch, which Jenkins is now polling to automatically build and deploy our Umbraco project.
Conclusion
Although configuring Jenkins to do CI (Continuous Integration) and CD (Continuous Deployment) with Umbraco does involve a few steps, it is certainly easy and also saves a lot of time keeping our stage and QA environments up to date and making sure that the project builds without errors while doing so.
Going forward with adding additional Umbraco sites into Jenkins the process is even easier. You can simply copy the job we just created and create a new build job for a different Umbraco site, all the configurations, except the name, are copied over allowing you to just replace the Github repo and build steps accordingly. As it stands with this current setup, I am able to get CI & CD setup for a new Umbraco site within minutes.
After implementing Jenkins and using it extensively as my CI & CD solution I find my time deploying has dramatically decreased allowing myself and my team to concentrate on delivering high quality Umbraco solutions to our clients.