
Editor's Note (02 April 2024): This article is a few years old. While it still contains useful information, there's an updated tutorial on setting up Vite and Umbraco v13.
What is Vite?
Vite is a frontend build tool created by Evan You, the creator of Vue.js. It gets its name from the french word for “quick” because… it’s fast, much faster than the tools it aims to replace.
Vite Logo
Essentially Vite is a next-generation alternative to Webpack (or Rollup, or Parcel.js) and does all of the same JavaScript module and dependency bundling you’d expect but with some next-generation advantages — specifically speed.
Why do I need JavaScript module and dependency bundling?
If you didn’t just ask that question in your head, or you are already using modern JavaScript, skip ahead.
The problem it solves
Managing frontend dependencies for websites used to be a problem, especially for large and complex websites. Managing multiple scripts, bundling/minifying for performance, and loading the right assets where and when they’re needed often became problematic, and the tools designed to help often required awkward compromises or ugly code (I’m looking at you IIFEs!).
Using Umbraco we’ve been super lucky because it’s shipped with tools to help solve this problem server-side. Specifically Smidge, and Client Dependency Framework before that. In the meantime these problems have been solved for frontend development in a different way:
JavaScript module bundling
JavaScript module bundling is the process of, you guessed it, bundling JavaScript modules. Tools like Vite and Webpack use the JavaScript (ES) module syntax to build bundles of JavaScript, along with their dependencies, to deliver them to the browser efficiently.
More than just JavaScript

The genie from Aladdin fitting a ridiculous amount of things in a suitcase
Where these tools are especially clever is that they don’t just munge JavaScript together, they look inside the JavaScript itself for dependencies and handle those too. For example, your javascript can import a CSS file like this*:
import './style.css' // this is not an ES module, but it is a dependency
That CSS file, and all the dependencies that the CSS file uses, will be included in the build (think background images or font files referenced in your CSS). We can also add rules or plugins that do other things like optimize images, inline SVGs, post-process CSS, and much more.
* N.B this is not really valid JavaScript import syntax, we’re leveraging the fact that tools like Vite pre-process your JavaScript to look for dependencies and knows how to bundle them into the build.
Some other quick-fire benefits of this kind of approach:
- Code splitting and dynamic imports allow you to only load what you need when you need it.
- ES module APIs provide native support for fully modular and scoped JavaScript with straightforward syntax (no more ugly IIFEs!).
- Dependencies are managed in your code using native language features.
- The frontend build is defined by your code, not an external config or gulpfile etc.
- Everything is hashed for browser cache busting.
Why Vite?
Speed!

Baby Yoda flung back in their seat with their arms raised as they fly through space
It’s fast to develop with, much faster than Webpack.
If you want a bit more detail then the best thing to do is to check out the docs. In short the two main reasons it’s so fast is that it:
- leverages modern browsers’ native ES module support to serve assets
- Uses esbuild (which runs natively, not in node.js) to pre-build dependencies.
When Webpack pioneered the approach of bundling frontends in this way, ES Module support in browsers was not great. Webpack let us use the full power of modules for development, while transpiling/polyfiling module support for use in the browser, but we don’t need to do that so much any more* and certainly not in development. You’re not developing in IE right? …right!?!
Note: If you do need to target browsers that don’t support ES modules you can use the Vite plugin @vitejs/plugin-legacy which will generate a legacy build with polyfills for all the module features (including code-splitting). It’ll also run your code through @babel/preset-env so you can use all the modern JS you like.
It works great with Umbraco 9+
Tools like Vite and Webpack (and the development workflows that go with them) are now pretty much the de facto standard for frontend development. Microsoft has created a new library for .NET 6 to add some interoperability with ASP.NET Core when working in development in .NET.
It’s easy to get started with, and migrate to - even from Gulp!
That’s right, if you’ve got a Gulp based frontend build, you don’t have to turn all your IIFEs into ES Modules - just create an entry point and import them, then gleefully delete your gulpfile.
If you’re already using webpack, you can pretty much just drop Vite in and go. You may need to tweak your config a bit and add some plugins but I’ve migrated a few projects now and it’s been super smooth sailing.
Getting started with Vite
From here on out this is going to be a guide to getting up and running with a Vite frontend for an Umbraco site.
I'll add a trigger warning here for those with sensitive to monorepos. This will be a regular ol’ “headful” site where the Umbraco site handles and serves the views/markup.
What you’ll need
- Node 14.18+, I strongly recommend using the latest version of Node (16 at time of writing).
- An Umbraco 10 site, running on .NET 6. .NET 6 is important as the library that provides interop between frontend build tools has changed between .NET 5 and 6.
Creating the Frontend Project
I’m going to start with a new frontend project. You can totally use Vite to replace your existing frontend build (even a Gulp/IIFE based build) but I find it best to start with a clean directory (and package.json) and then move any existing code into it, adding dependencies as you go.
Starting from scratch also means you can use the lovely Vite initializer. This will scaffold your project using the framework of your choice, optionally adding TypeScript support, and create a simple demo app that shows you how Vite handles various types of frontend dependencies.
For reference, my project directories are structured like this:
.                            ← my repository root
└── src/
    ├── frontend/            ← my frontend project
    └── JasonsWebsite.Web/   ← my Umbraco project
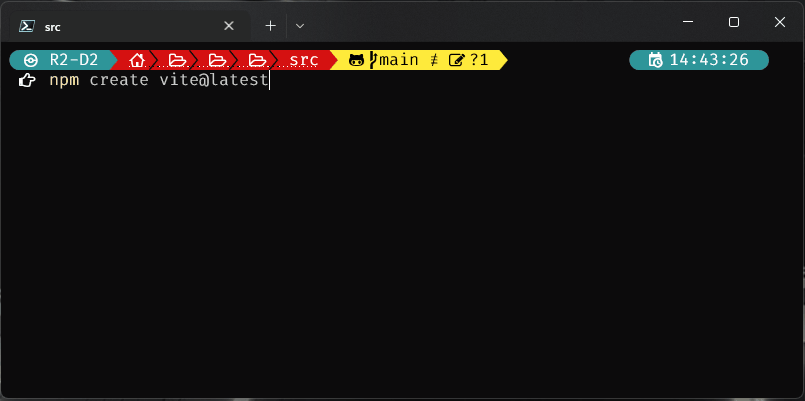
Inside of frontend/ initialize a new Vite project with this command:
npm create Vite@latest
Then follow the prompts to scaffold the project. I’ve gone for a “vanilla” JS build, but pick whatever floats your boat - integrating with Umbraco is basically the same for all of them.
Command prompt showing the initialization of Vite
Then follow the instructions it gives you to install NPM dependencies and start the the demo. Maybe try modifying a few files to see what Vite does.
The entry point
The entry point is a key concept to understand. This is where Vite first enters your code and discovers the dependencies that it needs to build your app. Vite’s default is to build a SPA app with index.html as its entry point, but our Umbraco site won’t use an index.html (we’ll be using razor views) so we’ll need to change this.
You may or may not already have a vite.config.js file (or vite.config.ts file if you chose to use TypeScript), it depends which options you chose when scaffolding. If you don’t have one, create it.
We’ll make main.js our entry point, and move the output from the default location to the wwwroot/app/ directory of the Umbraco project. This should be a directory dedicated to Vite as it will add/remove assets as it needs to, plus it makes it really easy to manually remove the assets from your projects should you need to.
Here's the config to do that:
// vite.config.js:

import { defineConfig } from 'vite'
import { resolve } from 'path'

export default defineConfig({
  build: {
    outDir: '../JasonsWebsite.Web/wwwroot/app/', // inside the Umbraco project
    emptyOutDir: true, // needs to be explicitly set because it’s outside of ./
    rollupOptions: {
      input: {
        main: resolve(__dirname, 'main.js')
      }
    }
  }
})
This effectively makes index.html redundant, but we’ll leave it there for now. At this point you’ll want to run a “production” build to make sure that you can see the assets being added to the right place in your Umbraco project.
SSL all the things
It’s always best to use SSL, even in development, but Vite requires you to generate your own trusted SSL certificate. Your Umbraco site is already configured for SSL (right!?!) so you can (and should) use the same certificate for both. The Visual Studio 2022 example SPA templates use this neat trick to export the ASP.NET development certificate and I’ve slightly modified it to work with Vite.
// build/certs.js

import fs from 'fs';
import child_process from 'child_process';
import path from 'path';

// where the certificate and key is going to live
const baseFolder =
  process.env.APPDATA !== undefined && process.env.APPDATA !== ''
    ? `${process.env.APPDATA}/ASP.NET/https`
    : `${process.env.HOME}/.aspnet/https`;

// get the cert name from the CLI --name arg or use the NPM package name.
const certificateArg = process.argv.map(arg => arg.match(/--name=(?.+)/i)).filter(Boolean)[0];
const certificateName = certificateArg?.groups?.value ?? process.env.npm_package_name;

if (!certificateName) {
  console.error('Invalid certificate name. Run this script in the context of an npm/yarn script or pass --name=<> explicitly.')
  process.exit(-1);
}

const certFilePath = path.join(baseFolder, `${certificateName}.pem`);
const keyFilePath = path.join(baseFolder, `${certificateName}.key`);

// check if the cert and key already exist
if (!fs.existsSync(certFilePath) || !fs.existsSync(keyFilePath)) {
  // export a new copy of the cert and key from .NET
  var fetchCert = child_process.spawnSync('dotnet', [
    'dev-certs',
    'https',
    '--export-path',
    certFilePath,
    '--format',
    'Pem',
    '--no-password',
  ], { stdio: 'inherit', });

  var exitCode = fetchCert.status ?? 0;
  if (exitCode !== 0) {
    process.exit(exitCode)
  }
}

// read the cert and key as UTF8 strings
const cert = fs.readFileSync(certFilePath, 'utf8');
const key = fs.readFileSync(keyFilePath, 'utf8');

// export the cert and key so we can use in them our dev server configuration
export {
  cert,
  key
}
Though this is an ES module, this is specifically for using in your Vite config so you may want to keep it somewhere specific. I like to keep it in ./build. Import it into your Vite config (which is itself an ES module) like this:
// build/certs.js

// ...
import { cert, key } from './build/certs'
import { setDefaultResultOrder } from `dns`

setDefaultResultOrder('verbatim')

export default defineConfig({
  //...
  server: {
    https: {
      cert: cert,
      key: key
    }
  },
})
setDefaultResultOrder('verbatim') forces the CLI to print out "https://localhost:5173/" instead of "https://127.0.0.1:5173/". This is useful for local development as the certificate is specifically bound to localhost so if you use 127.0.0.1 you will get a warning or error in the browser.
Preparing ASP.NET and Umbraco
Dev server proxy
When you run Vite in development mode it will start a local “dev server” at https://localhost:5173. 5173 is the default port but it can be changed in config. Vite uses this to serve the assets it’s building.
First install the SpaServices.Extensions package. This provides the tools we need to enable ASP.NET to use Node.js and the Vite dev server.
dotnet add package Microsoft.AspNetCore.SpaServices.Extensions
Then inside startup.cs configure a development server proxy like this, right after app.UseUmbraco(), to run in development.
// startup.cs

public void Configure(IApplicationBuilder app, IWebHostEnvironment env)
{
  //...

  if (env.IsDevelopment())
  {
    app.UseSpa(spa =>
      spa.UseProxyToSpaDevelopmentServer("https://localhost:5173")
    );
  }
}
This tells ASP.NET to proxy any requests that it’s not handling back to https://localhost:5173.
Umbraco will ignore requests for files with extensions, but Vite’s dev server uses specific routes for serving files in development mode, so we need to add these to Umbraco’s ReservedPaths.
appsettings.Development.json
"Umbraco": {
  "CMS": {
    "Global": {
      "ReservedPaths": "~/app_plugins/,~/install/,~/mini-profiler-resources/,~/umbraco/,~/@vite/,~/@id/,"
    }
  }
}
We’re only actually adding ~/@vite/ and ~/@id/, the other paths are those needed by Umbraco by default.
Wiring up the views
Now we need to load our frontend assets in our views. My site has a master called Layout.cshtml so I’m including my assets there. If you’re starting from scratch, you could copy content of the index.html file that Vite scaffolded earlier, if not you can probably delete it now.
In development mode, Vite streams assets from its dev server. In production mode it outputs static files. We need our views to handle both scenarios.
We can handle this with the really useful “environment” tag helper which is included with ASP.NET Core. This helper includes or excludes its contents based on the current environment.
<!-- Layout.cshtml -->

<head>
<!-- ... Meta tags etc. -->

<environment include="Development">
  <script type="module" defer src="~/@@vite/client"</script> <!-- load Vite -->
  <script type="module" defer src="~/main.js"></script> <!-- define the entry point -->
</environment>

<environment exclude="Development">
   <link rel="stylesheet" asp-href-include="~/app/assets/main.*.css"> <!-- load styles -->
   <script type="module" defer asp-src-include="~/app/assets/main.*.js"></script> <!-- load Vite build output -->
</environment>

</head>
The first tag helper is specifically for the Development environment. We have two script tags here: the first loads Vite itself, the second tells vite which entry point to use (the entry point we configured earlier is actually only used for production builds). You’ll notice we don’t need to do anything with CSS in development, Vite will handle it.
The second tag helper loads the static assets for production and you might notice a couple of new or unusual things here:
Firstly, I’m using the Script tag helper, with the asp-src-include attribute, and a * in the path. This feature of the tag helper resolves files on disk and allows wildcards in the filename (to account for the file hash that gets appended to the filename for cache busting).
Secondly, I also added a script tag for a script that’s not there. Once I start importing third-party code from node-modules into my frontend codebase Vite will split it out into this file. The Script tag helper won’t actually render anything to the page unless it finds the file, so it’s safe to leave it there.
It’s worth pointing out at this point that this is a rather basic setup. In a real world app I might have multiple entry points and include different entry points in different views depending on what functionality I need.
You’re ready to go!
-
Start your Vite frontend with npm run dev.
-
Start your Umbraco site with dotnet run.
You will see changes to frontend code built and reflected in your Umbraco site at lightning speed.
The developer experience could still be better
It should be possible to configure ASP.NET Core to automatically start Vite on run. This would be great for getting developers up and running quickly with a project, (especially as it’s already possible to automatically run npm commands in build targets in a project's csproj).
Unfortunately the current tooling either doesn’t work with Vite or doesn’t work well alongside Umbraco. It wouldn't take much to write a middleware to handle this (after all, middleware already already exists for Angular CLI and React Development Server)