
When working on new projects in Umbraco v8, it is great to have the opportunity to try out new packages which will make your life easier as an Umbraco Developer and as an editor. I was recently in this position where I was reviewing different packages to use on my new project and I installed Contentment after it was recommended to me.
Contentment is a collection of data editors built by Lee Kelleher. He has put them all into one package and has been kind enough to share them with us all. These aren't any ordinary property editors, they are special. Some of them, especially the Data List, give you something that doesn't exist in Umbraco currently, but as soon as you start using it you will think it should be part of the Core Umbraco project.
Here are the editors available out of the box:
Property Editors
- Bytes - a read-only label to display file sizes in relative bytes.
- Code Editor - a code snippet editor, (using the ACE library that is bundled with Umbraco).
- Content Blocks - a block editor, configurable using element types.
- Data List - an editor that combines a custom data source with a custom list editor.
- Icon Picker - an editor to select an icon (from the Umbraco icon library).
- Notes - a read-only label to display rich-text instructional messages for content editors.
- Number Input - a numeric editor, with sizing configurations.
- Render Macro - a read-only label dynamically generated from an Umbraco Macro.
- Text Input - a textstring editor, configurable with HTML5 options.
The one which stood out the most to me was Data List. This gives you the power to create custom property editors with ease. So to demonstrate the power of Data List I decided to write this article and share it with you.
Creating an Author Picker with images and names
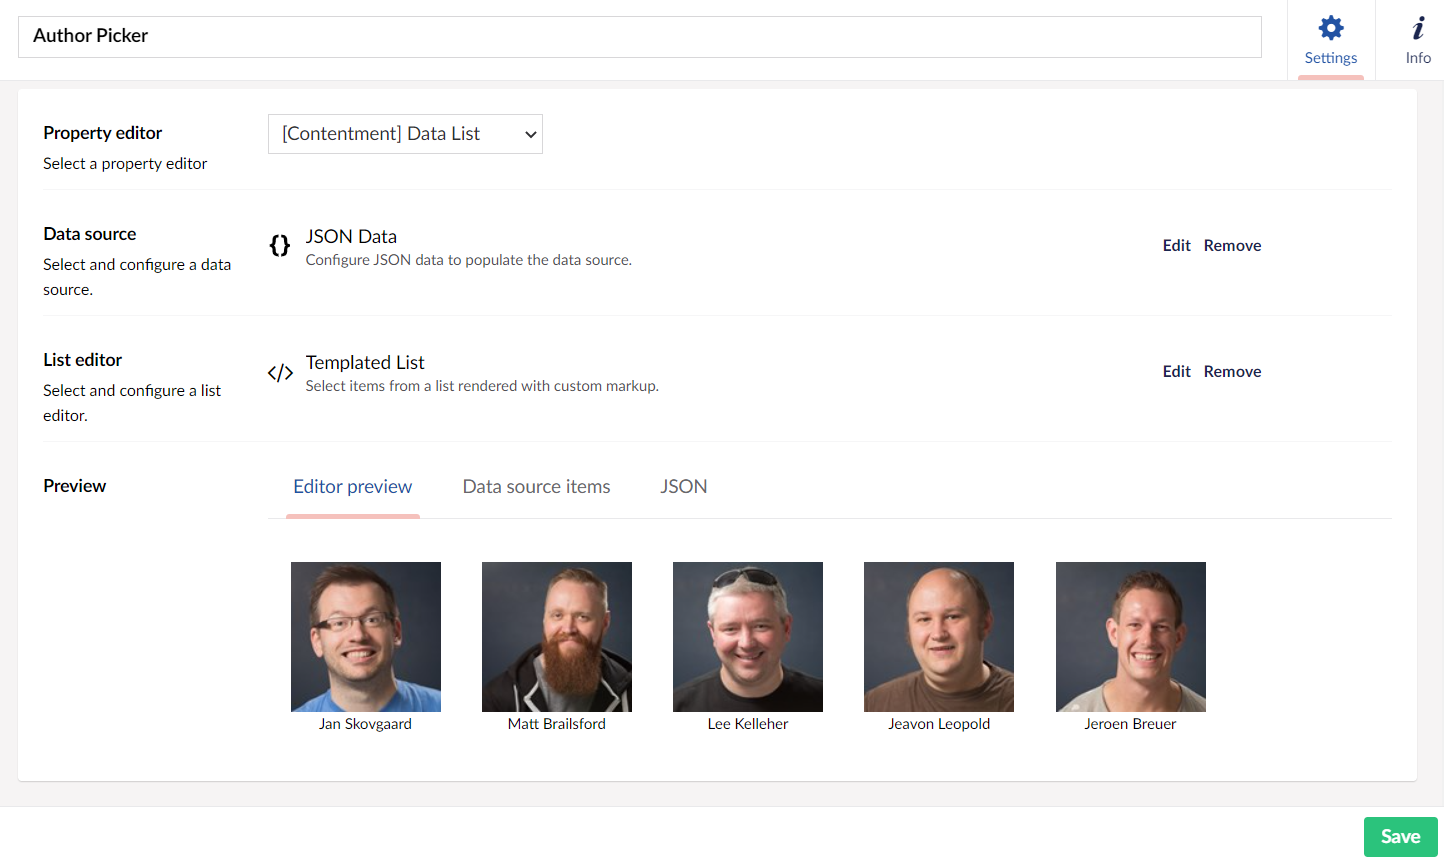
In my experimentation with the package, I was able to produce this Author Picker data type:

So in this article I'm going to show you how I created this picker using the Data List editor.
What is so great about this editor is you get to define your data source and then define your property editor giving you great flexibility.
You have a selection of different data sources to choose from.
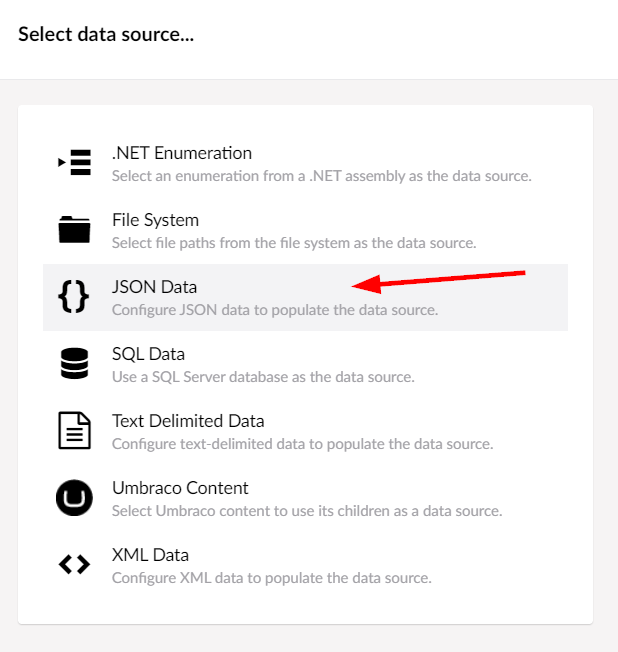
Here are the Data Source options you get out of the box (there are more available if you enable them):
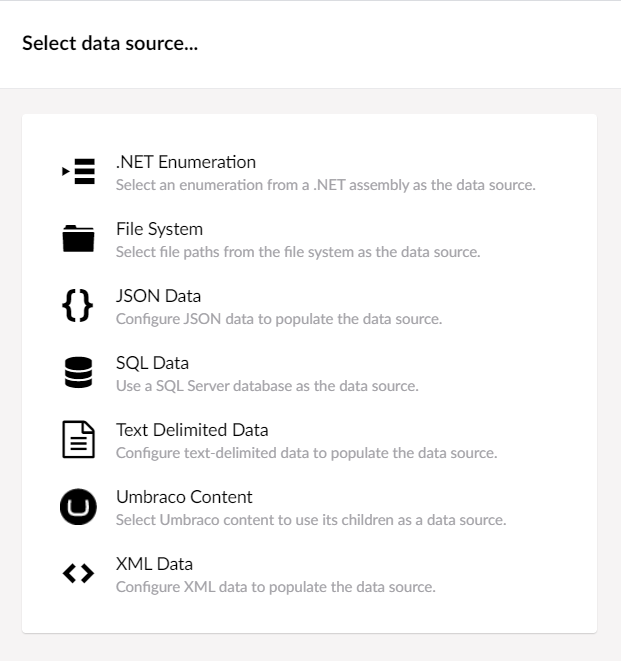
You can then choose a predefined property editor, or even a template when you can create your own HTML to render out the property editor.
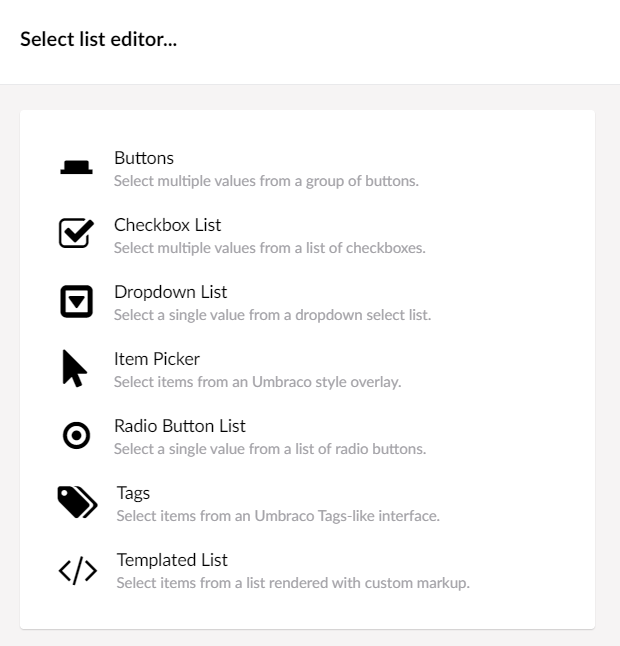
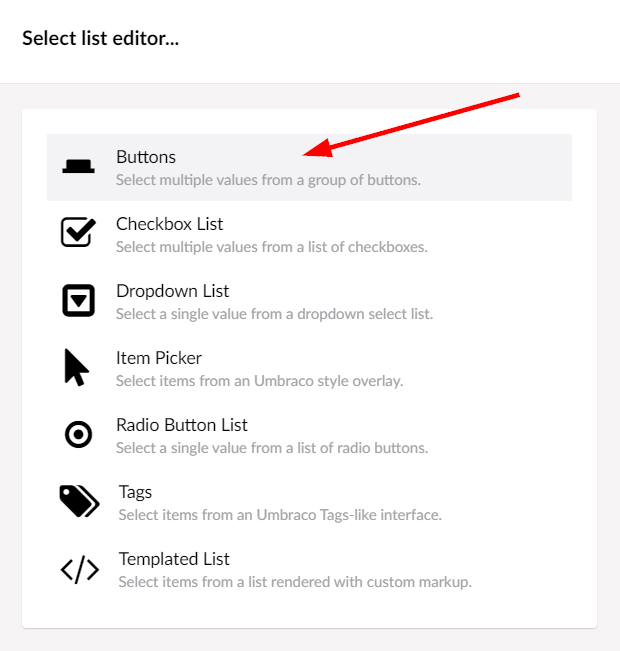
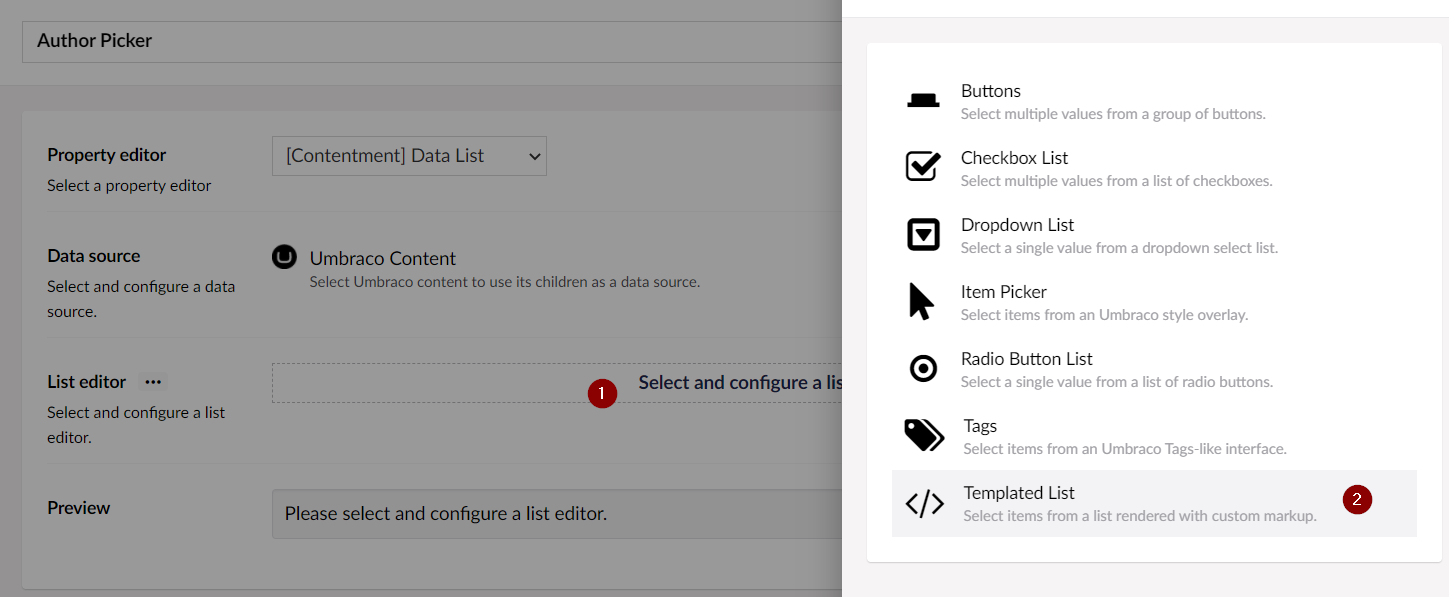
Here are the List Editor options you get out of the box:
 To create the Author picker, I used a JSON Data source with a Templated List editor. This enabled me to render the image on the button along with the name. In order to get the Image url for the person, I needed to create an API endpoint which returned the name, image url and UDI of the person.
Follow Along
I did this with the default Umbraco starter kit, so if you want to follow along, install Umbraco 8.13.0 or later with a default starter kit.
Install Contentment
You can easily install Contentment by going to the Packages section of the Umbraco backoffice and searching for Contentment:
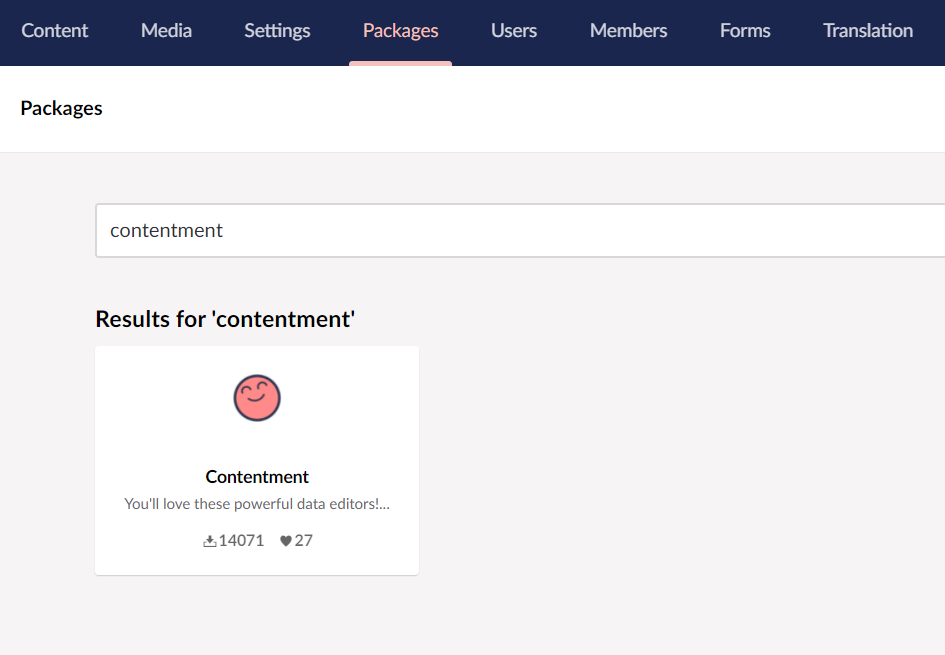
Click on Install and once it is done click on Finish.
If you would prefer to install it via NuGet you can do so. Here is the link to the NuGet Package and here is the command to install it using Package Manager Console.
Install-Package Our.Umbraco.Community.ContentmentCreate a new data type
Now we have the package installed we need to create our new data type. So go to the Settings section in Umbraco, click on the 3 dots next to the Data Types folder and create a new data type.
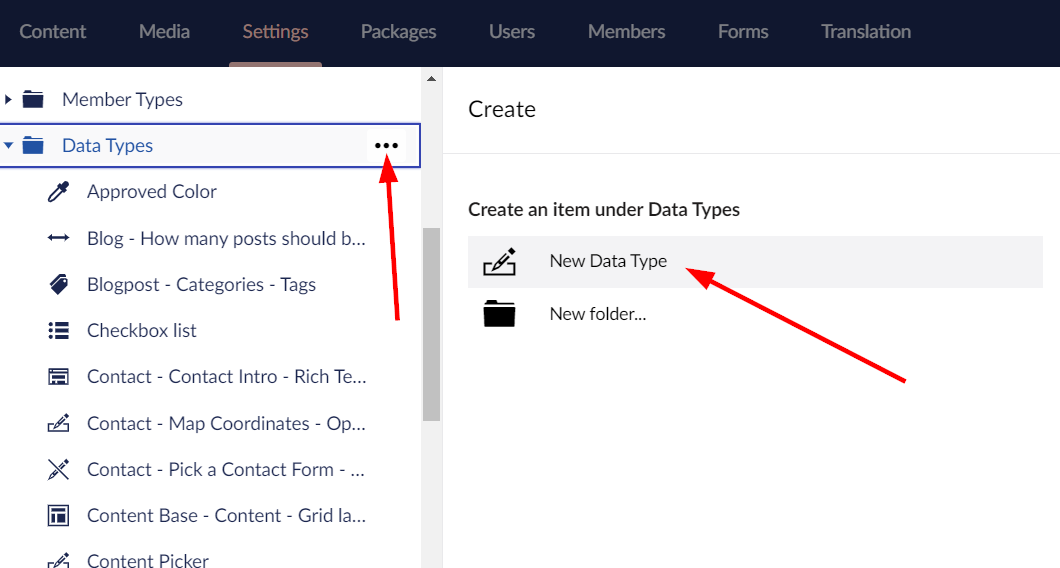
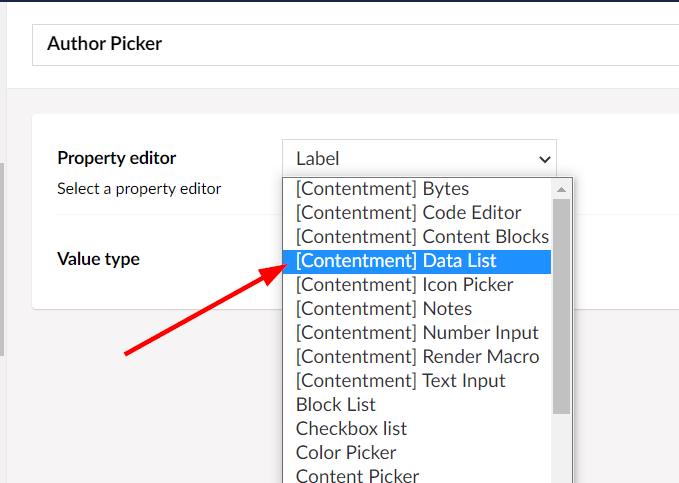
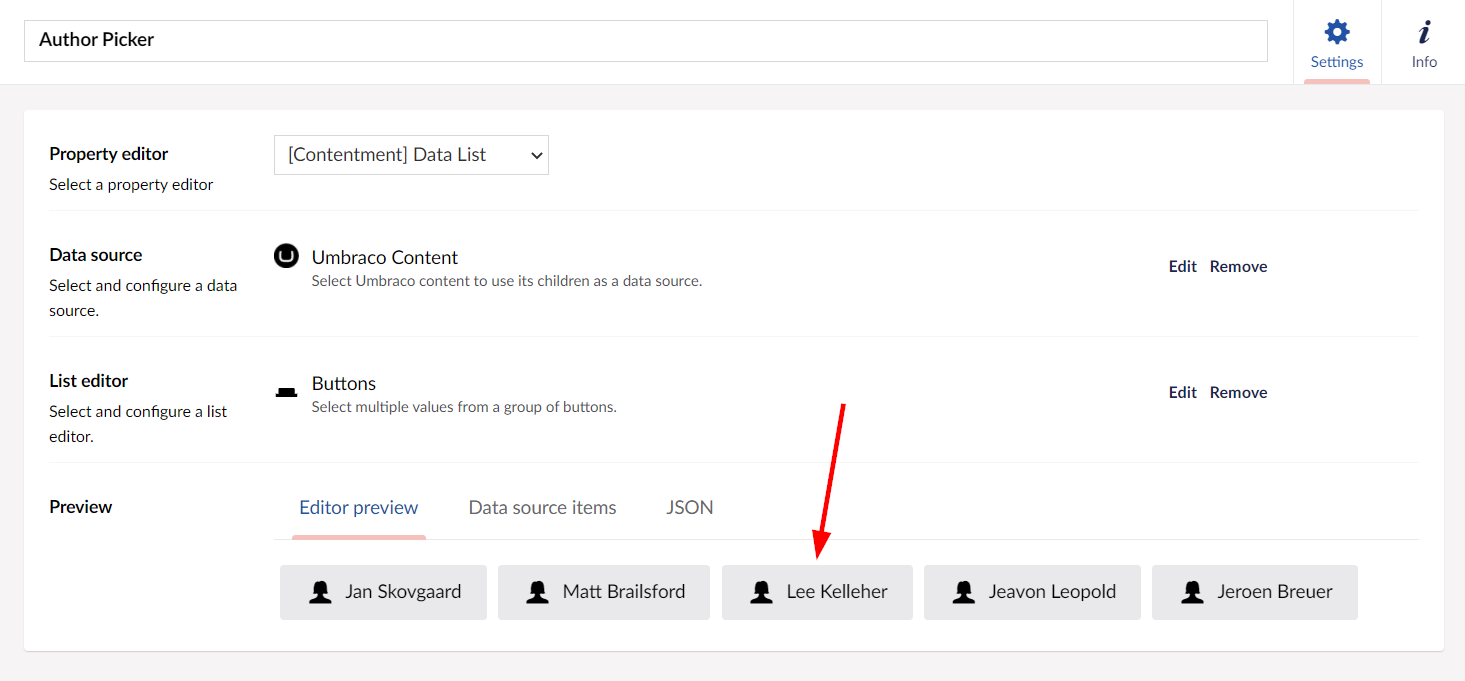
Enter the name Author Picker and in the list of Property Editors Choose [Contentment] Data List:
Umbraco Content Data Source
Before we create our API endpoint, I just wanted to show how you can get close to this without needing an API endpoint or Templated List.
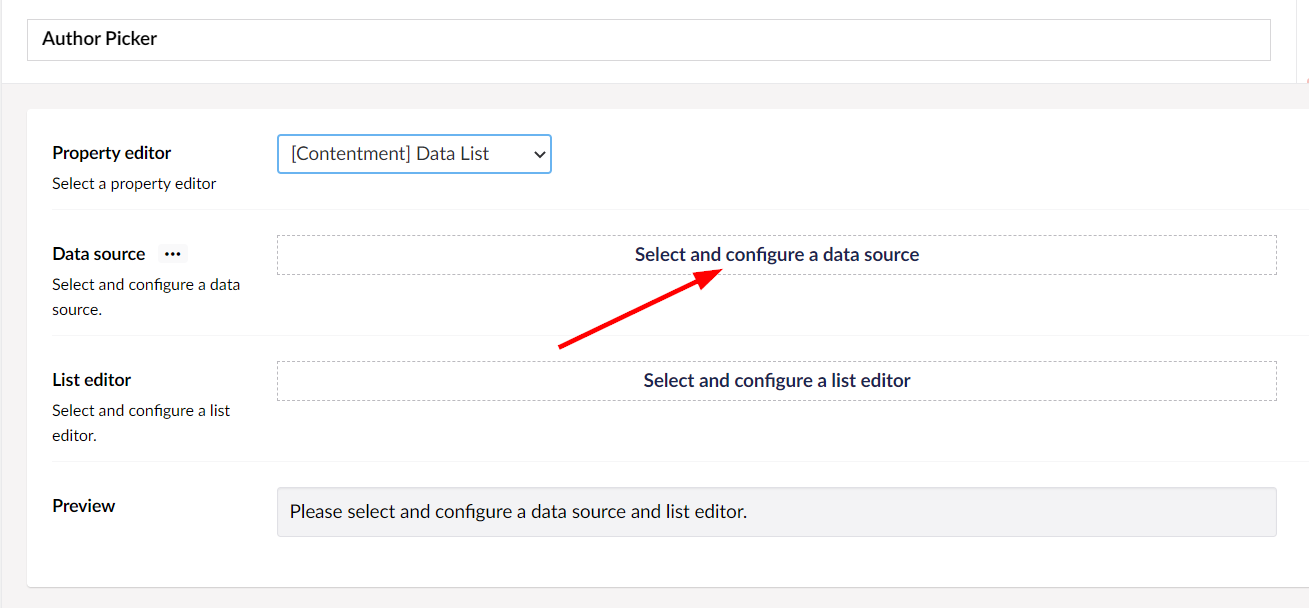
On the next screen click on Select and configure a data source:
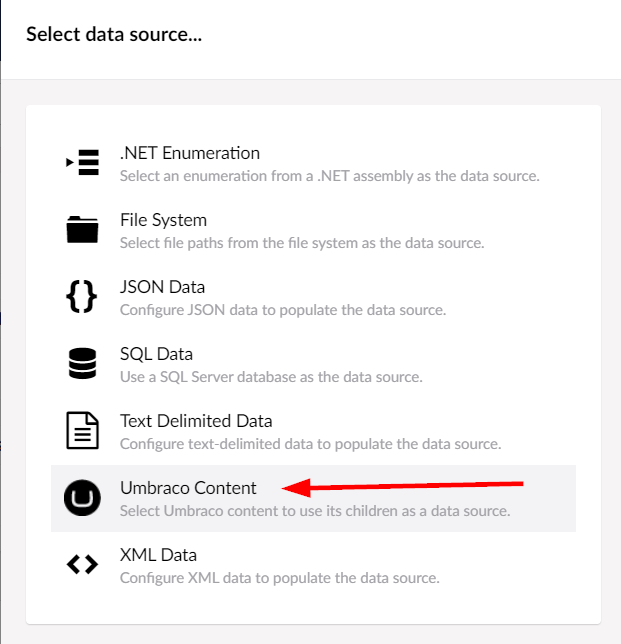
 And choose Umbraco Content.
 You can then pick the parent node of the items you in your picker data type. This is similar to how you define a multi node tree picker. For ease, click on the blue Choose button and then navigate the tree and click on People and then click Done.

Button List Editor
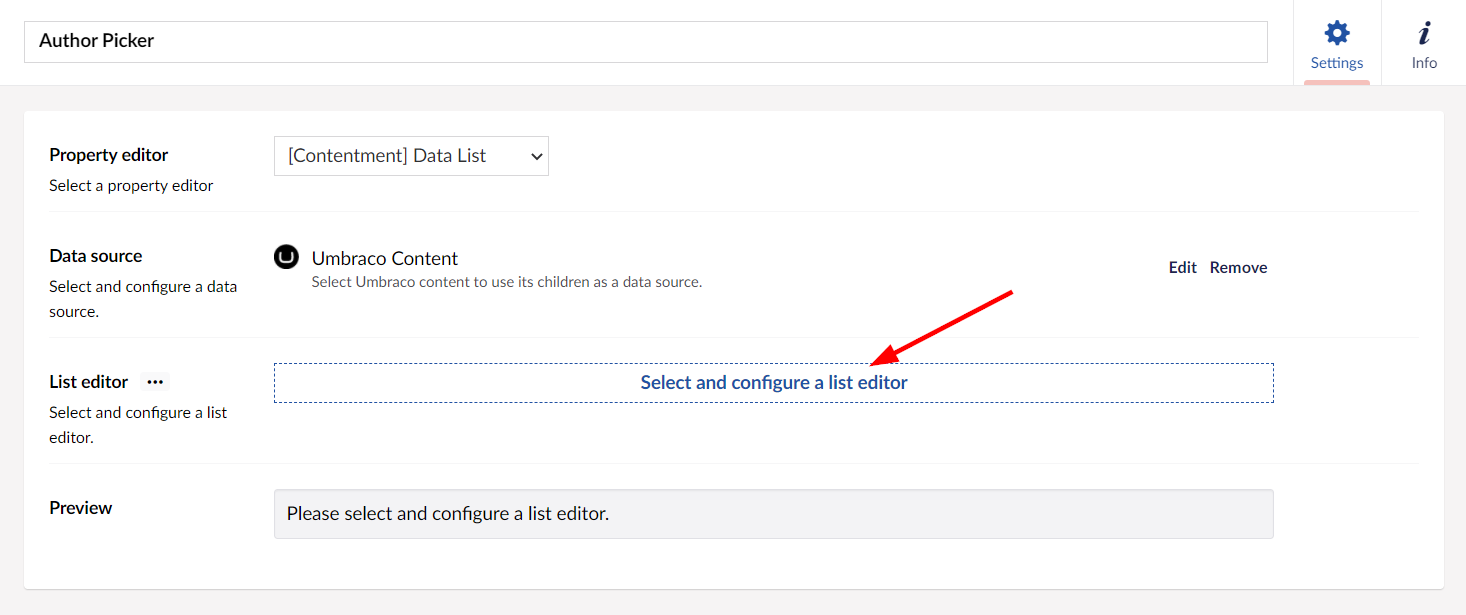
Now we can click on Select and configure a list editor:
Next choose Buttons, leave the default settings in place and click Done.
 You should see a preview at the bottom of the screen, showing what the buttons will look like with the Icons and Text.
 In the preview section click on the JSON tab to see the JSON which is used for this property editor.
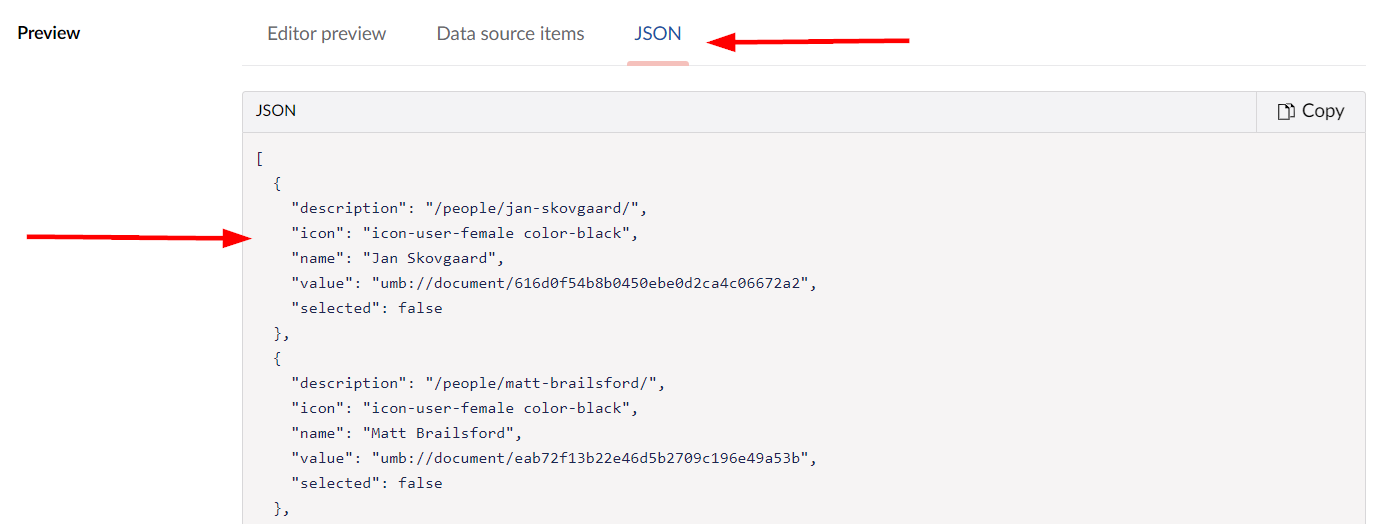 So now we have an idea of what our JSON needs to look like. Essentially we just need to replace the icon with the image url. We don't need to worry about the description or selected property because we won't be using them.
Create an API endpoint
In order to create our JSON we need to have an API endpoint. These are relatively easy to create, especially when I'm giving you the code for it 😁.
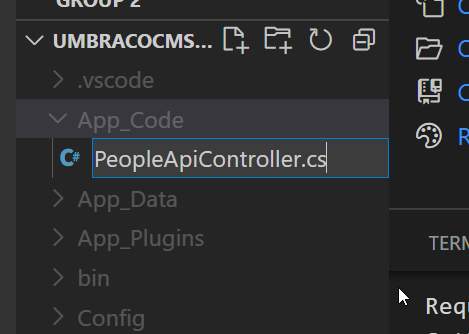
For simplicity of this demo and because I am using VS Code and IIS Express I am putting the API code in the App_Code folder. If you don't have an App_Code folder yet you can create one. It is at the same level as the App_Data folder.
In the App_Code folder create a file called PeopleApiController.cs:
 Make sure you add all of these usings at the top of the file. A lot of tutorials miss them out and it annoys me. So I'm making a point of including them all now.
using System.Collections.Generic;
using System.Linq;
using System.Web.Http;
using Umbraco.Community.Contentment.DataEditors;
using Umbraco.Core;
using Umbraco.Core.Models.PublishedContent;
using Umbraco.Web;
using Umbraco.Web.WebApi;
Before we get the actual data we need, we want to get a simple version of the API working, so add this code to the file to create a simple api controller which returns the word hello. Read more about creating API Controllers in the Umbraco documentation
namespace MyProject.Web.App_Code
{
public class PeopleApiController : UmbracoApiController
{
public IHttpActionResult GetPeople()
{
return Json("hello");
}
}
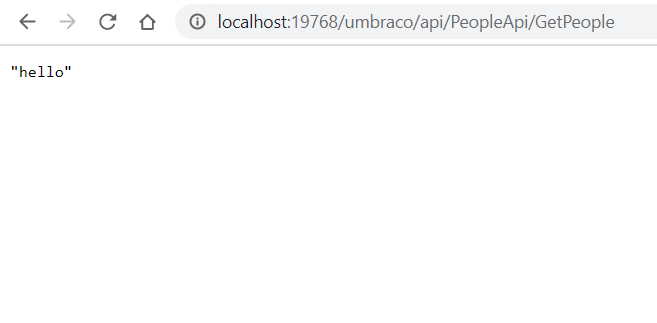
}Now in your browser visit the url of your API endpoint. Mine is:
http://localhost:19768/umbraco/api/PeopleApi/GetPeople
And this is what it looks like in the browser:
We want our endpoint to return a list of DataListItem. There is already a DataListItem model defined for this in the Contentment package so we can use that. All we need to do is make sure we have using Umbraco.Community.Contentment.DataEditors; defined in our usings at the top of the file.
So let's update our code to return a list of DataListItem with 1 hard coded record in it.
public IHttpActionResult GetPeople()
{
    var results = new List<DataListItem>();

    results.Add(new DataListItem() {
        Name = "Paul",
        Icon = "test.png",
        Value = "1234"
    });

    return Json(results);
}
And if we visit the url of the API endpoint again, we see this:
[
  {
    icon: 'test.png',
    name: 'Paul',
    value: '1234',
  },
];
Full API Controller Code
Now let's cut to the chase and update the code to query the umbraco data and return the people records. I've added notes to the code to explain what it is doing.
using System.Collections.Generic;
using System.Web.Http;
using Umbraco.Core.Models.PublishedContent;
using Umbraco.Web;
using Umbraco.Web.WebApi;
using Umbraco.Core;
using System.Linq;
using Umbraco.Community.Contentment.DataEditors;

namespace MyProject.Web.App_Code
{
    public class PeopleApiController : UmbracoApiController
    {
        public IHttpActionResult GetPeople()
        {
            List<DataListItem> results = new List<DataListItem>();

            //get call content items which are using the document type alias of 'person'
            var people = Umbraco.ContentAtXPath("//person");

            //make sure there are some people items
            if (people != null && people.Any())
            {

                //loop through the people itmes
                foreach (var person in people)
                {

                    //generate a udi from the key property of the content item
                    //we will use this to store as the value of the author picker
                    var udi = Udi.Create(Constants.UdiEntityType.Document, person.Key);
                    if (udi == null) break;

                    //create a new DataListItem object to store the data
                    var item = new DataListItem()
                    {
                        Name = person.Name,
                        Value = udi.ToString()
                    };

                    //check if the person record has a photo
                    if (person.HasValue("photo"))
                    {
                        var photo = person.Value<IPublishedContent>("photo");
                        item.Icon = photo.GetCropUrl(120, 120);
                    }

                    //add the item to our list of results
                    results.Add(item);
                }
            }

            //return the list of results back as json
            return Json(results);
        }
    }
}
Now if we visit the URL of the API we can see all of the people data in a JSON array.
[
  {
    icon: '/media/os3fsksm/18720470241_ff77768544_h.jpg?anchor=center&mode=crop&width=120&height=120&rnd=132655313292170000',
    name: 'Jan Skovgaard',
    value: 'umb://document/616d0f54b8b0450ebe0d2ca4c06672a2',
  },
  {
    icon: '/media/qggbak2u/18531852339_981b067419_h.jpg?anchor=center&mode=crop&width=120&height=120&rnd=132655313296730000',
    name: 'Matt Brailsford',
    value: 'umb://document/eab72f13b22e46d5b2709c196e49a53b',
  },
  {
    icon: '/media/aj1pb0zn/18531854019_351c579559_h.jpg?anchor=center&mode=crop&width=120&height=120&rnd=132655313301470000',
    name: 'Lee Kelleher',
    value: 'umb://document/9946f2490d6e496c91b664eaf1a3dffd',
  },
  {
    icon: '/media/4t2ntpml/18095416144_44a566a5f4_h.jpg?anchor=center&mode=crop&width=120&height=120&rnd=132655313305670000',
    name: 'Jeavon Leopold',
    value: 'umb://document/4f0b7052d85443b5bb7c6c82af4d96d1',
  },
  {
    icon: '/media/rbiknpxo/18530280048_459b8b61b2_h.jpg?anchor=center&mode=crop&width=120&height=120&rnd=132655313309700000',
    name: 'Jeroen Breuer',
    value: 'umb://document/1301ecb2beaf44f3a12e48bdbcde6023',
  },
];
So now we have created our API endpoint we need to go back to our data type, remove the existing Umbraco Content data source and choose JSON Data.
 In the configure JSON Data screen make sure the values in the fields are as follows and click Done. (just make sure the URL is the one you are using and make sure you update $.alias to $.value)
 As it is you need to include the domain in the URL of the JSON data source, it doesn't work with a relative URL e.g. /umbraco/api/PeopleApi/GetPeople. To find out more about this, read this discussion on the Contentment GitHub repository.
So now we have our data source set up we can create a Template list to render it.
Remove the existing list editor and then choose Select and configure a list editor and choose Templated List.
You can enter whichever HTML you want, but the key parts are how you bind the image src and the name. This is the HTML that I have found to look the best so far.
<div class="umb-content-grid__content">
  <ul class="umb-content-grid__details-list">
    <li class="umb-content-grid__details-item">
      <div class="umb-content-grid__details-value">
        <img ng-src="{{item.icon}}" />
      </div>
    </li>
    <li class="umb-content-grid__details-item">
      <div class="umb-content-grid__details-value">
        <span ng-bind="item.name"></span>
      </div>
    </li>
  </ul>
</div>
Notice how the image is bound:
<img ng-src="{{item.icon}}" />And also notice how the name is bound:
<span ng-bind="item.name"></span>Before you press Done, add an html attribute at the bottom. In the name column put class and in the Value column put flex flex-wrap
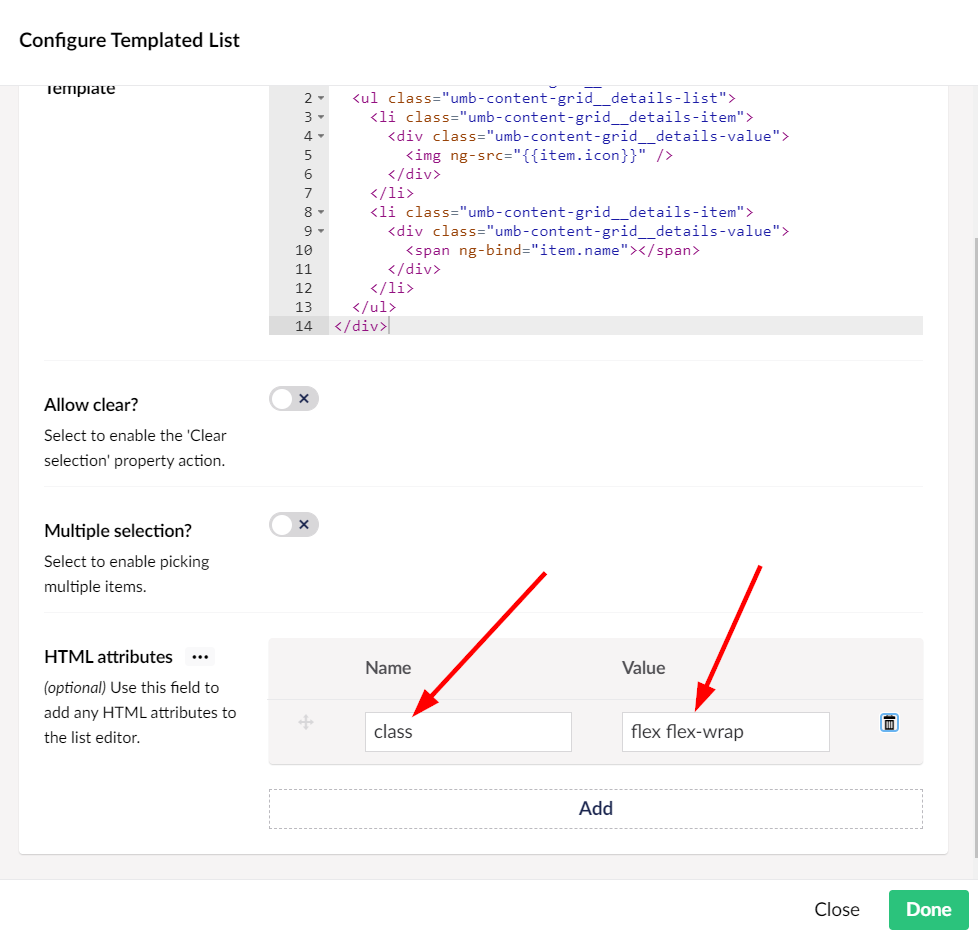
This will use flexbox to make the items go across the screen horizontally instead of vertically, and they will wrap onto the next line if there are too many.
Using this data type
So now if you add this new Author Picker property to the Blog Post document type, in Umbraco you will have something that looks like this:

A note about security
This example was using an UmbracoApiController so you can visit the url in your browser and test it out easily as you follow along. As it is just returning some author names and ids I would say it doesn't need to be protected, but if you were to use this for something else you might want to make it an UmbracoAuthorizedApiController. Here is the documentation for that.
There's so much more
This just scratches the surface of what you can do with Contentment. Why not try out some of the other property editors and share what you learn with the rest of the community?
Why didn't you just use a custom data source?
I showed this article to Lee out of courtesy and one of the first things he said to me after reading it was:
Why did you decide on writing an API controller (for the JSON data-source), rather than a custom data-source?
The short answer is because I didn't know about them. But I couldn't end this article without adding the code for the custom data source. This basically removes the need for an API Controller but it's good to learn more than one way of doing something, right?
I'm not going to go too much into what they are and how to make your own, but I will give you a link to the page I read about them on GitHub and I will leave you with the working code:
using System;
using System.Collections.Generic;
using System.Linq;
using Umbraco.Core;
using Umbraco.Core.Models.PublishedContent;
using Umbraco.Core.PropertyEditors;
using Umbraco.Core.Services;
using Umbraco.Core.Xml;
using Umbraco.Web;
using UmbConstants = Umbraco.Core.Constants;
using Umbraco.Community.Contentment.DataEditors;

namespace MyProject.Web.App_Code
{
    public class PeopleDataListSource : IDataListSource
    {
        private readonly IUmbracoContextAccessor _umbracoContextAccessor;

        public PeopleDataListSource(IUmbracoContextAccessor umbracoContextAccessor)
        {
            _umbracoContextAccessor = umbracoContextAccessor;
        }

        public string Name => "Author Content Items";

        public string Description => "Use authors content items as a data source.";

        public string Icon => "icon-users";

        public OverlaySize OverlaySize => OverlaySize.Small;

        public Dictionary<string, object> DefaultValues => new Dictionary<string, object>();

        public IEnumerable<ConfigurationField> Fields => Enumerable.Empty<ConfigurationField>();


        public IEnumerable<DataListItem> GetItems(Dictionary<string, object> config)
        {
            var umbracoContext = _umbracoContextAccessor.UmbracoContext;

            List<DataListItem> results = new List<DataListItem>();

            //get call content items which are using the document type alias of 'person'
            var people = umbracoContext.Content.GetByXPath(false, "//person");

            //make sure there are some people items
            if (people != null && people.Any())
            {

                //loop through the people itmes
                foreach (var person in people)
                {

                    //generate a udi from the key property of the content item
                    //we will use this to store as the value of the author picker
                    var udi = Udi.Create(Constants.UdiEntityType.Document, person.Key);
                    if (udi == null) break;

                    //create a new DataListItem object to store the data
                    var item = new DataListItem()
                    {
                        Name = person.Name,
                        Value = udi.ToString()
                    };

                    //check if the person record has a photo
                    if (person.HasValue("photo"))
                    {
                        var photo = person.Value<IPublishedContent>("photo");
                        item.Icon = photo.GetCropUrl(120, 120);
                    }

                    //add the item to our list of results
                    results.Add(item);
                }

                return results;
            }

            return Enumerable.Empty<DataListItem>();
        }

    }
}
When you come to choose your data source, it will appear in the list like this:
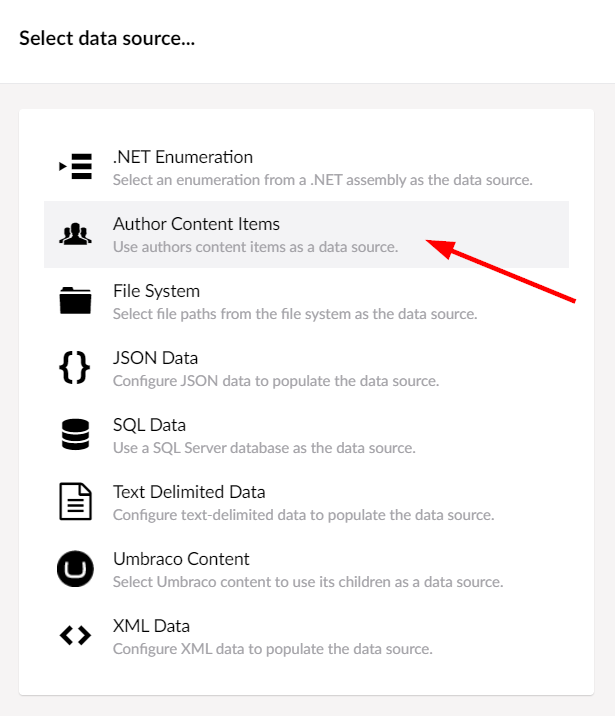 It works exactly the same and is probably the best way to do it. I'll leave that up to you to decide.