Umbraco 9 was released on September 28, 2021. Umbraco 10 was released on June 16, 2022. These releases use .NET 5 and .NET 6, respectively. It is an undeniably big step up for Umbraco, as it opens the way to fully run it in Linux, Docker, and Kubernetes environments. To be honest, Umbraco 9 passed me by, but the 10th version made me happy with its working speed, easy assembly, and the ability to use Linux as a build agent and hosting environment. And it gives room for experiments!
The problem: UKAD is a big enough company to have some complications in managing the equipment. We tried different solutions available on the market, but there always was something wrong with them, either the necessary features were missing, or they were too cumbersome. And commonly they had too many features that will never be used, making the system unusable and confusing the editor with an overflow of buttons and pickers.
Using such systems was a real torture, so we came up with a crazy idea: what if we try to make our own inventory system based on Umbraco? Yes, it's a content management system, so what? Computers in the office are also content in some way. A crazier idea followed next: let's host our solution in Kubernetes. We have never done this before, so it will be an interesting experience.
Application Functionality
It all started with the requirements. The company has different departments with many employees using tons of equipment: personal computers, laptops, phones, and lots of other stuff which needs to be systematized somehow. Also, we want to make the life of our system administrators as easy as possible and minimize the time of assigning a device to the user. And it would be nice to have a history of the movement of equipment within the company. For example, when the company purchases a new computer for a developer and gives an older one to the office manager, and the office manager's old computer is decommissioned or put up for sale.
Then, one of the mandatory requirements was the ability of the end user to see all the equipment that he owns at the moment. Not all existing systems provide this, although it is really important to reduce chaos.
In this way, what was a simple task grew into a full-fledged project. We conducted a meeting with the team, discussed the functionality, tested it, and discussed it again. As the project should be delivered as quickly as possible and with minimal effort, because we have lots of other tasks, in most cases we used the ready-made Umbraco functionality.
How it works
One of the typical problems is the naming of assets. For example, a processor can be listed as "i7-12700K" or as "Intel Core i7 12700K". It plays zero impact on the sense of the device but adds some mess to statistics with each entry. Therefore, instead of a manual listing of each piece of equipment, we made repositories with predefined components. It allows us to select a component from already added and solves the problems of content duplication and the human factor.
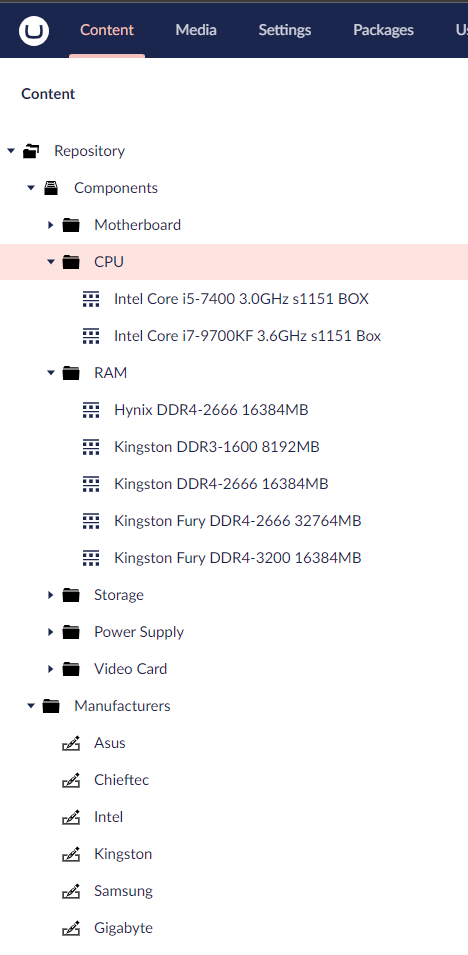
The repository contains almost all the equipment and components that have to be inventoried: CPU, RAM, displays, and so on. Everything that we do not monitor (headphones, mice, keyboards and other consumables) is simply added as generic, and does not have a repository, like Generic headset. This approach allows systematizing and reuse of any components.
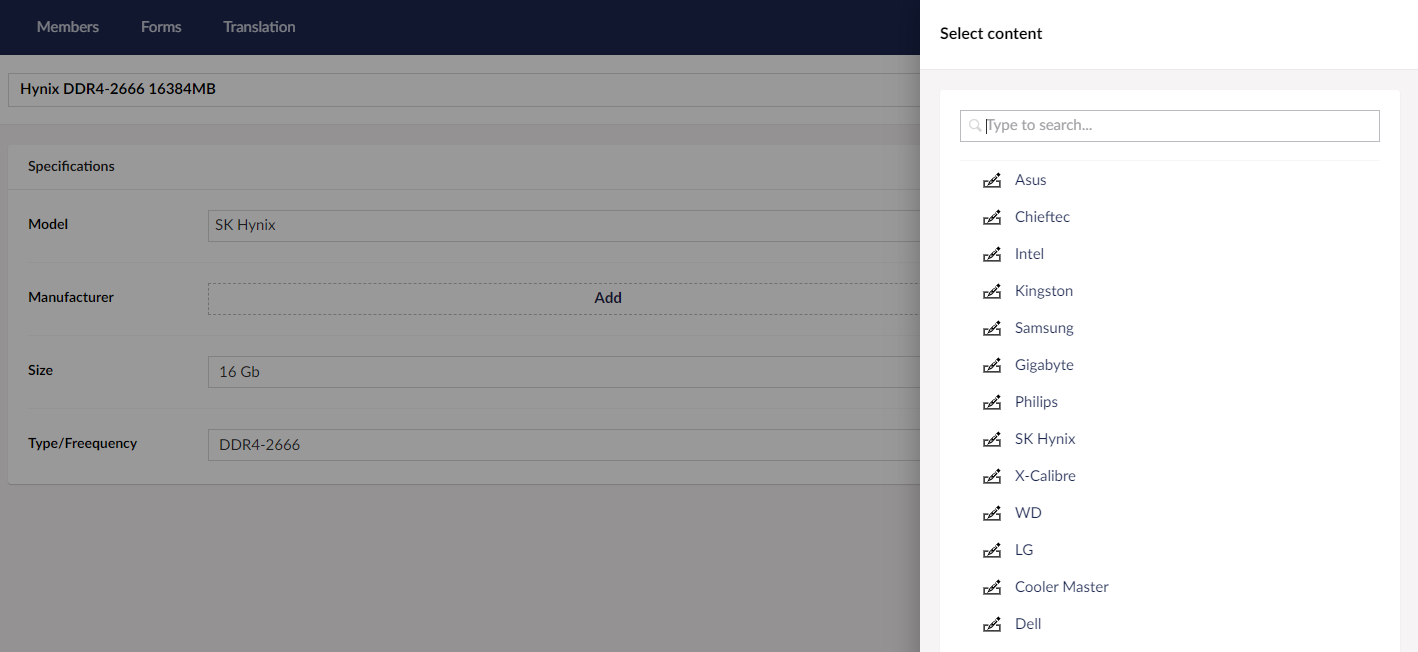
Also, we have another repository that contains all the manufacturers of equipment we use. Any value that can be reused and picked from the list instead of typing is added to the repository and any known parameter wrapped in a dropdown in advance.
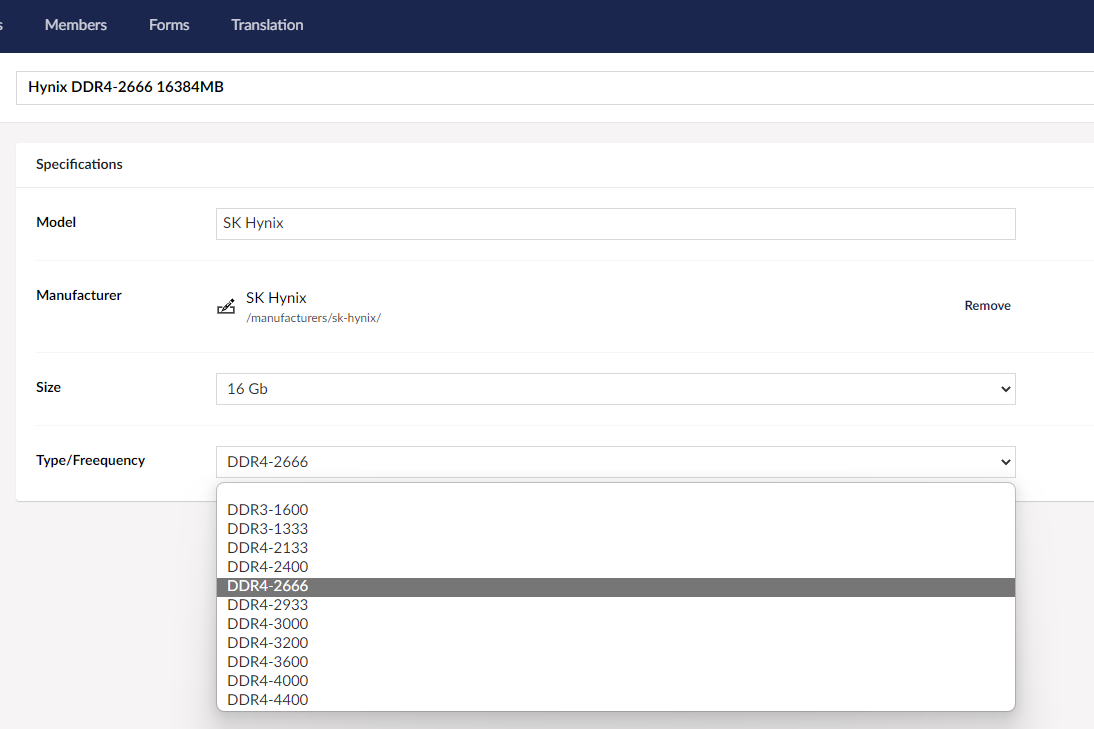
Once a component is added, we can use it as many times as we need.
From the company’s point of view, there are different departments in which people work, and each department is represented by a root node in the CMS. Under it, we can create User doctypes for employees and list there all the used equipment.
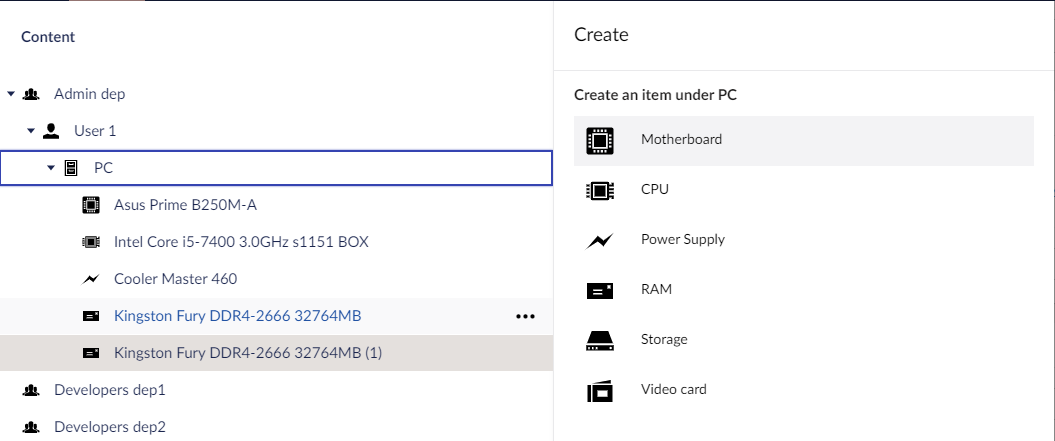
But here comes the first disadvantage of using Umbraco: asset names must be unique. When adding two identical RAM sticks, "(1)" appears next to the second one. It is not critical right now, but we must recognize this shortcoming.
Client part
For the client part, we have a separate Blazor application, which is integrated with other our services, and Umbraco is only used as a backend to make changes. Access to the admin panel is available only to employees responsible for moving equipment.
Authorization in Umbraco
OpenID Connect (OIDC) is an authentication protocol based on the OAuth2 protocol, which is used for authorization. We are using Azure OIDC for all our services to authenticate users.
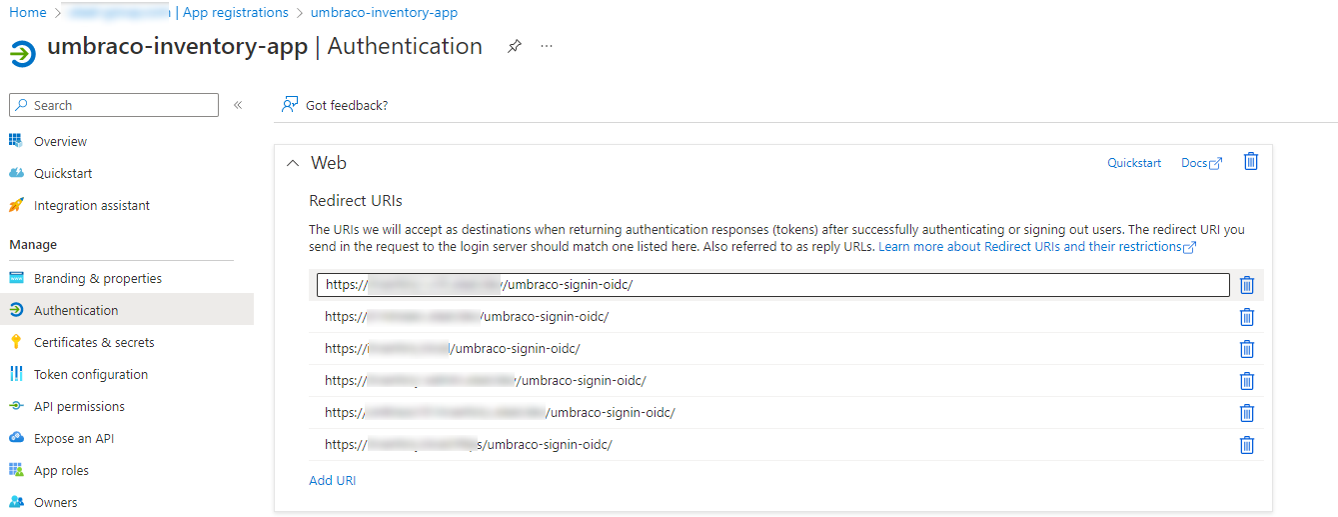
It allows us to use RBAC (role-based access control) and authorize in Umbraco only system administrators. Direct users can only view their information via frontend service.
Build, Deployment, and Hosting
This project will not be highly loaded, so there is nothing to talk about scaling. Within this project, it’s also a good strategy because in the case of scaling we also need to care about cache, search engine, and many more things, which aren’t clearly known. So, let's focus on the fact that only one pod is used in Kubernetes. Nginx-Ingress is used as a load balancer. To issue certificates, we use cert-manager, and deployments take over GitHub actions.
I don’t think that it’s a good idea to focus on setting up a Kubernetes cluster, there are a lot of guides and documentation on the Internet. So, I only hint that I really like to use Terraform and Helm to initialize the cluster.
Kubernetes Manifest
First of all, we need to describe a service.
apiVersion: v1
kind: Service
metadata:
  name: inventory-backoffice
spec:
  selector:
    app: inventory-backoffice
  ports:
    - port: 80
Here we only have to pay attention to selector.app. This selector can uniquely identify our service among others.
apiVersion: apps/v1
kind: Deployment
metadata:
  name: inventory-backoffice
  labels:
    app: inventory-backoffice
spec:
  strategy:
    type: RollingUpdate
    rollingUpdate:
      maxSurge: 1
      maxUnavailable: 50%
  replicas: 1
  selector:
    matchLabels:
      app: inventory-backoffice
  template:
    metadata:
      labels:
        app: inventory-backoffice
    spec:
      containers:
        - name: inventory-backoffice
          image: company/inventory-backoffice:latest
          ports:
            - containerPort: 80
          env:
            - name: ASPNETCORE_ENVIRONMENT
              value: Production
            - name: ConnectionStrings__umbracoDbDSN
              valueFrom:
                secretKeyRef:
                  name: inventory-backoffice
                  key: CONNECTION_STRING
            - name: FrontEndUrl
              value: "https://inventory.domain.tld"
      restartPolicy: Always
      imagePullSecrets:
        - name: docker-registry
In deployment, we explicitly indicate that when updating, Kubernetes firstly raises a new pod, and then deletes the older one. We pass the connection string to the database through environment variables and secrets and do not store it in appsettings in the code repository.
apiVersion: networking.k8s.io/v1
kind: Ingress
metadata:
  name: inventory-ingress
  annotations:
    kubernetes.io/ingress.class: nginx
    cert-manager.io/cluster-issuer: letsencrypt
    nginx.ingress.kubernetes.io/ssl-redirect: "true"
    nginx.ingress.kubernetes.io/proxy-buffer-size: "64k"
spec:
  rules:
    - host: inventory.domain.tld
      http:
        paths:
          - path: /
            pathType: ImplementationSpecific
            backend:
              service:
                name: inventory-webapp
                port:
                  number: 80
    - host: inventory.domain.tld
      http:
        paths:
          - path: /umbraco
            pathType: Prefix
            backend:
              service:
                name: inventory-backoffice
                port:
                  number: 80
    - host: inventory.domain.tld
      http:
        paths:
          - path: /umbraco-signin-oidc
            pathType: Prefix
            backend:
              service:
                name: inventory-backoffice
                port:
                  number: 80
    - host: inventory.domain.tld
      http:
        paths:
          - path: /App_Plugins
            pathType: Prefix
            backend:
              service:
                name: inventory-backoffice
                port:
                  number: 80
  tls:
    - hosts:
        - inventory.domain.tld
      secretName: inventory-webapp-ssl
In Ingress, everything is as usual too. Except for two things. First - we use one domain for frontend and backend parts. So, we need to create separate routing rules for umbraco and frontend parts. Signin and umbraco stuff routes to the umbraco and other goes to the frontend. And the proxy-buffer-size annotation deserves special attention. It will be described in more detail later in the article.
Build and Deployment
As mentioned earlier, GitHub Actions are used as a CI/CD system. First, we declare the secrets (in the repository settings), and the environment variables.
name: Build and deploy production
on:
  push:
    branches: [ "master" ]
  workflow_dispatch:
env:
  REGISTRY_URL: registry.hub.docker.com
  REGISTRY_ORG: company
  SERVICE_NAME: inventory-backoffice
  K8S_CLUSTER: stuff-k8s
Although we are using Docker Hub as a Docker registry, and it is not necessary to write its URL in the image name, I still write it so that the pipeline does not differ from those that use, for example, private ACR. Subsequently, it played a cruel joke.
In the build job, everything is standard: build and push the docker with all the necessary actions, such as login. The Dockerfile will be in the gist, along with all the materials.
jobs:
  build:
    runs-on: [self-hosted, build]
    steps:
      - uses: actions/checkout@v3
      - name: Login to docker registry
        uses: azure/docker-login@v1
        with:
          login-server: ${{ env.REGISTRY_URL }}
          username: ${{ secrets.REGISTRY_USERNAME }}
          password: ${{ secrets.REGISTRY_PASSWORD }}
      - name: Build and push docker containers
        uses: docker/build-push-action@v3
        with:
          context: .
          file: Inventory.Presentation/Dockerfile
          push: true
          tags: |
            ${{ env.REGISTRY_URL }}/${{ env.REGISTRY_ORG }}/${{ env.SERVICE_NAME }}:latest
            ${{ env.REGISTRY_URL }}/${{ env.REGISTRY_ORG }}/${{ env.SERVICE_NAME }}:${{ github.sha }}
Again, REGISTRY_URL is explicitly specified here, and so far, it doesn't cause any problems.
To deploy, first, we have to clone the repository again, because the k8s manifest is located there. Then, everything needed for the deployment is set up, and the deployment itself is performed.
  deploy:
    runs-on: [self-hosted, build]
    needs: build
    steps:
      - uses: actions/checkout@v3
      - uses: azure/setup-kubectl@v3
        id: install_kubectl
      - name: Set k8s context
        uses: azure/k8s-set-context@v3
        with:
           method: kubeconfig
           kubeconfig: ${{ secrets.KUBECONFIG }}
      - name: Deploy
        uses: Azure/k8s-deploy@v4
        with:
          name: ${{ env.K8S_CLUSTER }}
          action: deploy
          strategy: basic
          manifests: |
            deployment/k8s/inventory-backoffice.yml
          images: |
            ${{ env.REGISTRY_ORG }}/${{ env.SERVICE_NAME }}:${{ github.sha }}
An attentive reader might have noticed that REGISTRY_URL is not specified in the deployment because the image is specified in the k8s manifest as company/inventory-backoffice. It turns out that the name specified in the manifest and the name specified in Azure/k8s-deploy should match the number of parts. So, if you specify company/inventory-backoffice in the k8s manifest, and registry.hub.docker.com/company/inventory-backoffice in the pipeline, the deploy will do nothing and return deployment.apps/inventory-backoffice unchanged. In this case, there is no error, and it's even worse.

Hosting
The infrastructure is ready, and all configs are written, so it's time to deploy the application. And the first thing that happens after the deployment is an error when trying to log in to /umbraco:
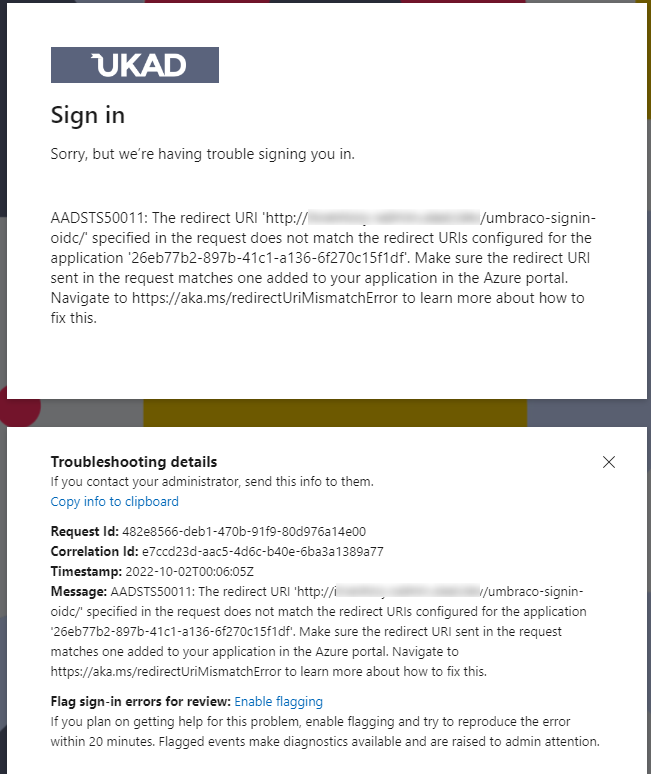
For some reason, in the redirect URI the link uses HTTP even though we have HTTPS. As I understand, ctx.ProtocolMessage.RedirectUri contains scheme HTTP, because Umbraco is running on port 80 in Docker. SSL is not in the container, it is handled by Nginx. I don't know why Umbraco doesn't take X-Forwarded-Proto, but the same problem occurred before when we hosted Umbraco on IIS that had Nginx before it. In those cases, this problem was solved by adding a certificate to IIS, so we used HTTPS everywhere, but adding HTTPS to the container seems not a good idea, although it's possible.
As a workaround, we added the following code to the authentication method:
options.Events.OnRedirectToIdentityProvider = ctx =>
{
    if (!ctx.ProtocolMessage.RedirectUri.Contains(Uri.UriSchemeHttps))
        ctx.ProtocolMessage.RedirectUri = ctx.ProtocolMessage.RedirectUri.Replace(Uri.UriSchemeHttp, Uri.UriSchemeHttps);

    return Task.CompletedTask;
};
It changes the scheme to HTTPS when generating a redirect URI. In any case, the redirect URI in the Azure app registration is not allowed to use HTTP, so adding this code makes nothing worse. Anyway, authorization doesn't work without HTTPS.
This problem occurs not only with Azure AD authorization but also when using any payment gateway. Now, we have found only two ways to solve this problem: adding SSL certificates to all web servers along the request path (full-SSL) or replacing the scheme in the redirect URI.
But the problem doesn't end here either. Authorization passed, but Umbraco doesn't show anything good, and an error 502 emerges in Dev Tools:
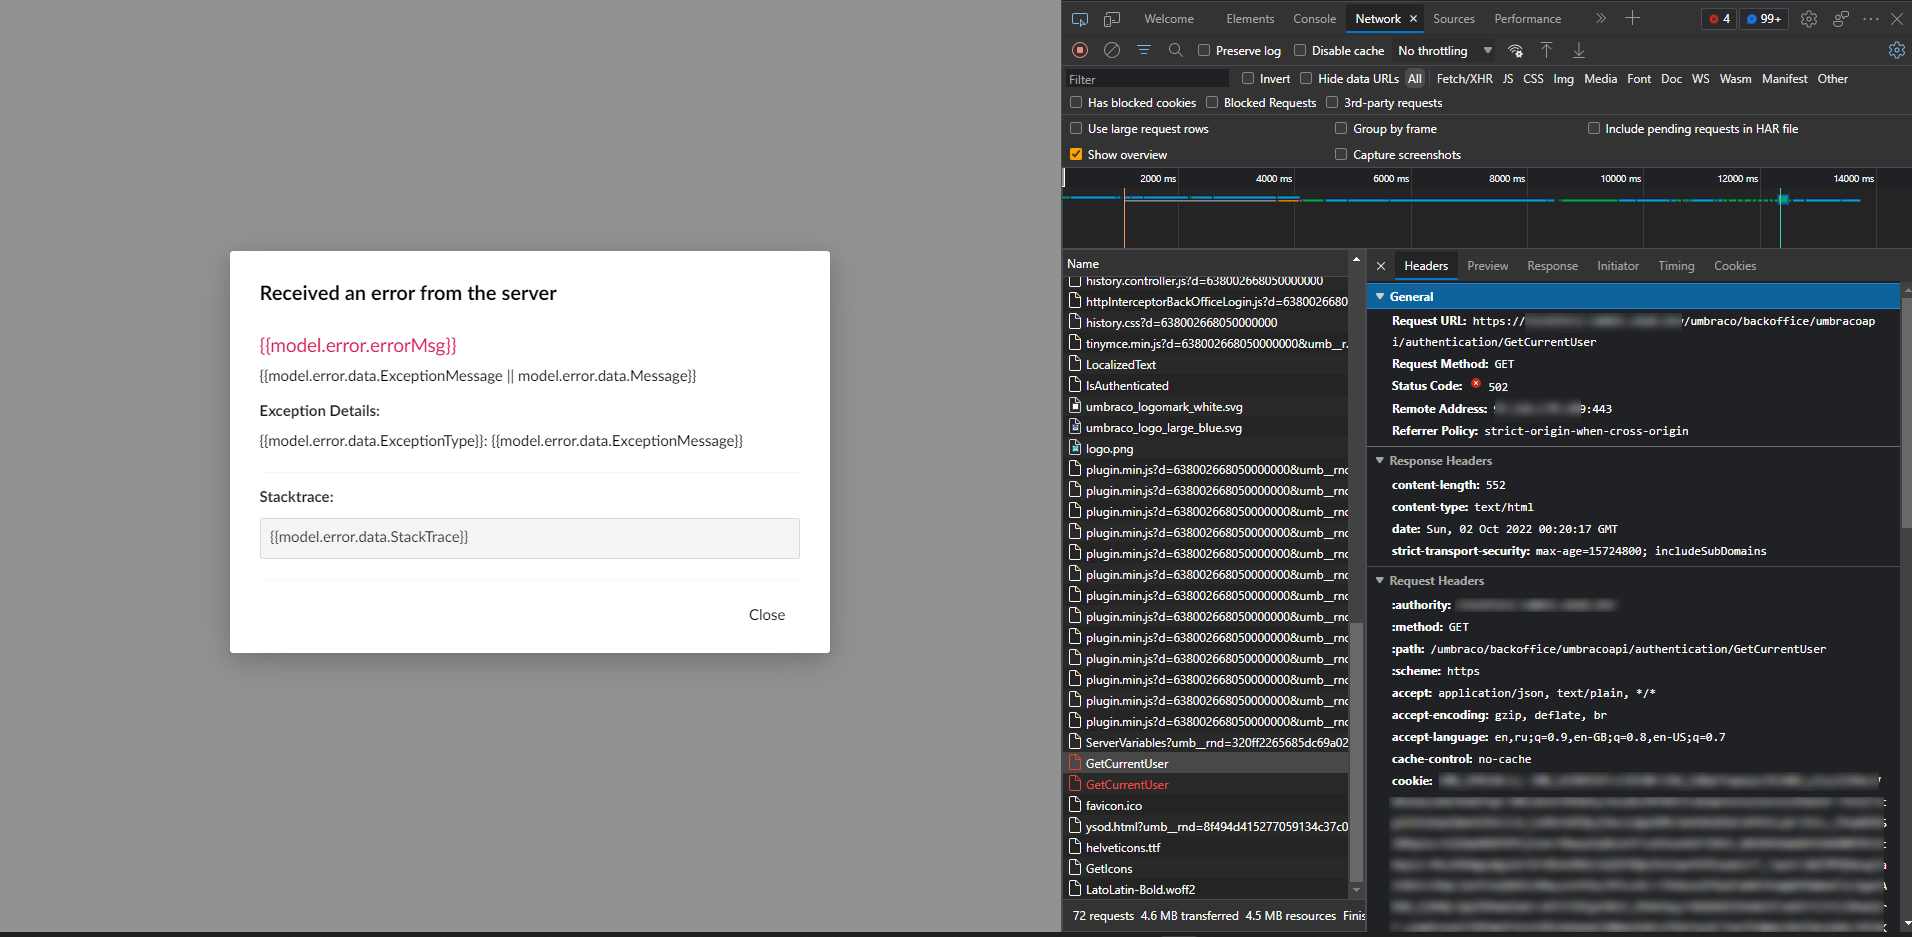
With closer examination and analysis of the Nginx logs, the next error spotted:
2022/10/02 00:20:17 [error] 5187#5187: *6052719 upstream sent too big header while reading response header from upstream, request: "GET /umbraco/backoffice/umbracoapi/authentication/GetCurrentUser HTTP/2.0", upstream: "http://10.1.104.49:80/umbraco/backoffice/umbracoapi/authentication/GetCurrentUser"
That's why it is necessary to increase the size of the proxy-buffer, which I wrote about in the Kubernetes manifest chapter.
Here, all problems end, and the life of a new application on Umbraco begins. Atypical and bright life.
Instead of a Conclusion
The fact of our success is an achievement as is. Umbraco is flexible enough to serve non-standard projects for developers with a good imagination. And the fact that now we can host it not only on Windows provides even more opportunities for building architecture. We are closer to building high-load, scalable Umbraco-based applications on Kubernetes. Time will tell.
All materials can be found by visiting this link.
