
Docker is not a new technology, it’s been around since its initial release in March, 2013 and in that time it’s had an absolutely phenomenal impact on the makeup of web applications and services and transforming the way applications are deployed.
It hasn’t had quite the same impact in our world of content managed websites, and I think we’re missing out on some great opportunities to make the sites we build faster, more efficient, more scalable and more resilient. In this blog I’ll guide you through the steps to do the following
- Install and configure Docker on your machine
- Defining your application in containers
- Splitting your application into multiple containers
- Using Docker compose to define your application
Prerequisites
In order to run this application you will need the following installed on your machine.
- Visual Studio Code
- There's a useful docker extension for Visual studio code : https://code.visualstudio.com/docs/containers/overview
- Docker Desktop
- Windows subsystem for Linux (only required in Windows obviously)
- .NET SDK version 5
- This will also work with .NET version 6, but you need the SDK
Structure for this walkthrough
This is broken into 2 main parts, the first part of which is this article, broken down as follows
Part 1 : Building and running an Umbraco website in a container
- Start from a basic website
- Create a Docker Database container
- Create the application container and make them talk to each other
Installing Docker
If you’re on Windows or Mac the best option is Docker desktop - this is a free (for individuals) application provided by docker which simply sets everything up for you. Docker on Linux is a little more involved. I won’t go through specific steps for any of the platforms here, but there are pretty good details on how to do that here: https://docs.docker.com/get-docker/
Once Docker is running, you’ll be able to issue commands on the command line or using the Docker Desktop tool on Mac and Windows. Whichever tool you use, the output is the same, and the effect is the same. That’s kinda the whole point of Docker. 🙂
Docker does have different system requirements depending on if you want to run just Windows containers or Linux containers, or both. Full details of these requirements can be found here: https://docs.docker.com/desktop/windows/install/
For most of my examples, and indeed most production workloads typically run on Linux containers - these are far more common than Windows containers, especially if you are relying on the latest software. Windows containers are typically only used where a Linux container is not available, or for example with applications built on the .NET framework 4.8 which only runs on Windows.
Key Docker Concepts
Now Docker is installed there are few things you need to know before you start creating containers and applications. We won't be covering in depth here, but will link out to additional resources as needed.
What is Docker?
Without going into too much detail, Docker is similar but also fundamentally different to the technology used to create and host virtual machines.
Traditional virtualization will virtualize the hardware, allowing you to host any secondary operating systems, but you are responsible for the entire operating system, the configuration, and the deployment of your application.
Docker virtualizes the operating system, so each container doesn’t need its own operating system, it merely uses the host operating system. Thus with a virtual machine you have a lot more control, but with Docker you have much better resource management, as you’re not duplicating the whole operating system, thus the exact same hardware can run a few virtual machines, but probably many more Docker containers.
Docker Image
The image is a blueprint for the container instance in an analogous way that a class definition is the blueprint to each instance of that class. The individual properties can be different - Name, Id, or any property, and that same class can be used to make 1, 2, 100 classes.
Typically when you build your image for your application, you will build it on a base image which is typically the smallest number of additional features to keep your container size small.
Container Registry
The registry is either an internal or publicly accessible repository of container images, much like Nuget is a repository of packages. These images can be downloaded to the docker host as an instance of a running container. This is where common applications like SQLServer, Redis, Node which are in turn built on base images - like Ubuntu or Alpine.
The public repository from DockerHub can be found at https://hub.docker.com/.
Dockerfile
The definition file for your application, which describes the base image which is used, plus any steps required to compile and deploy the application, any configuration. It typically lives in the root of your application and gets put into source control alongside your application.
Networking
Docker has several mechanisms to allow containers to communicate with each other, and with the host machine. These are as follows. In all modes, the containers are visible to the hsot.
- Bridge : The default network mode, any container can communicate with any other container, but only by IP address, not DNS.
- User-defined Bridge : A named network, which allows containers in it to communicate with each other using DNS as well as IP address, but is not visible to any containers outside the network.
Other methods are available, but are beyond the scope of this article. For full details see the references.
Part 1: Building an Umbraco container application
Let’s start with a blank slate and create a new Umbraco application running standalone on our local machine. This will be an Umbraco 9 site built on the .NET 5, but the samples will also work with .NET 6.
NOTE : These instructions are intended for Windows developers, if you are using a Mac or Linux as your main development tool, there are a few different steps you need to follow, as LocalDB isn’t supported. I’ll highlight these at the end of the article
First ensure the Umbraco templates are installed.
dotnet new -i Umbraco.Templates
Set the SDK Version being used and Create solution/project. This will create a global file.
dotnet new globaljson --sdk-version 5.0.404
dotnet new sln --name UmbDock
Start a new Umbraco website project. Note : This will only work on Windows.
dotnet new Umbraco -n UmbDock --friendly-name "Admin User" --email "admin@admin.com" --password "1234567890" --connection-string "Data Source=(localdb)\MSSQLLocalDB;AttachDbFilename=|DataDirectory|\Umbraco.mdf;Integrated Security=True"T
If you are on Linux, please see Instructions_1_Linux_Mac.md.
Add the project to the solution, and install a starter kit
dotnet sln add UmbDock
dotnet add UmbDock package Clean
Modify csProj
Edit the csproj file to change following element:
<!-- Force windows to use ICU. Otherwise Windows 10 2019H1+ will do it, but older windows 10 and most if not all winodws servers will run NLS -->
<ItemGroup Condition="'$(OS)' == 'Windows_NT'">
    <PackageReference Include="Microsoft.ICU.ICU4C.Runtime" Version="68.2.0.9" />
    <RuntimeHostConfigurationOption Include="System.Globalization.AppLocalIcu" Value="68.2" />
</ItemGroup>
Without this step, the project won't compile on Linux, but will compile in windows - This is needed even if you are using windows, since eventually the application will run in a docker container on Linux.
Now run the site
This will also create the database as a LocalDB.
dotnet run --project UmbDockIn the output you will see which port the site is running on. You should be able to browse to that site on any browser. You need to complete this step so that the databases are created.
At this point the project is a normal Umbraco site running locally on your development machine. It works with source control, can be published to a web server, everything you would normally be able to do.
Part 2 : Running a database from a container
Now that the application is running locally there’s still a problem. The database we have is SQL Server Express LocalDB - and as such doesn’t run on Linux or Mac. If you try to run it you’ll see the error “LocalDB is not supported on this platform.”
To get around that we need a database server, and since we already have Docker, we can just run one in there and access it from our website container. To create this do the following in your working folder.
1. Copy the entire UmbData folder from Files/UmbData into the Root.
2. Copy the databases into the UmbData folder
    - UmbDock/umbraco/Data/Umbraco.mdf to UmbData/Umbraco.mdf
    - UmbDock/umbraco/Data/Umbraco_log.ldf to UmbData/Umbraco_log.ldf
That folder contains a Dockerfile which defines the Database server we will create, as well as some additional steps to restore the database from our earlier step.
FROM mcr.microsoft.com/mssql/server:2019-GDR1-ubuntu-16.04

ENV ACCEPT_EULA=Y
ENV SA_PASSWORD=SQL_password123
ENV MSSQL_PID=Express

USER root

RUN mkdir /var/opt/sqlserver

RUN chown mssql /var/opt/sqlserver

ENV MSSQL_BACKUP_DIR="/var/opt/sqlserver"
ENV MSSQL_DATA_DIR="/var/opt/sqlserver"
ENV MSSQL_LOG_DIR="/var/opt/sqlserver"

COPY setup.sql /
COPY startup.sh /

COPY Umbraco.mdf /var/opt/sqlserver
COPY Umbraco_log.ldf /var/opt/sqlserver

ENTRYPOINT [ "/bin/bash", "startup.sh" ]
CMD [ "/opt/mssql/bin/sqlservr" ]
The first line defines the image we will be using: SQL Server 2019 running on Ubuntu. After that we define our password for the SA account, which is the main SQL Admin account.
The key thing this file does after this is all done is launch Startup.sh, which is listed below. The main job of startup.sh is to sleep for 15 seconds while the sql server is starting up, and run setup.sql under the server admin (or sa) account. Note the password is also defined here.
#!/bin/bash
set -e

if [ "$1" = '/opt/mssql/bin/sqlservr' ]; then
# If this is the container's first run, initialize the application database
if [ ! -f /tmp/app-initialized ]; then
    # Initialize the application database asynchronously in a background process. This allows a) the SQL Server process to be the main process in the container, which allows graceful shutdown and other goodies, and b) us to only start the SQL Server process once, as opposed to starting, stopping, then starting it again.
    function initialize_app_database() {
    # Wait a bit for SQL Server to start. SQL Server's process doesn't provide a clever way to check if it's up or not, and it needs to be up before we can import the application database
    sleep 15s

    #run the setup script to create the DB and the schema in the DB
    /opt/mssql-tools/bin/sqlcmd -S localhost -U sa -P SQL_password123 -d master -i setup.sql

    # Note that the container has been initialized so future starts won't wipe changes to the data
    touch /tmp/app-initialized
    }
    initialize_app_database &
fi
fi

exec "$@"
The setup.sql script will re-attach the database to the SQL server once it’s running.
USE [master]
GO

IF NOT EXISTS (SELECT * FROM sys.databases WHERE name = 'UmbracoDb')
BEGIN

    CREATE DATABASE [UmbracoDb] ON
    ( FILENAME = N'/var/opt/sqlserver/Umbraco.mdf' ),
    ( FILENAME = N'/var/opt/sqlserver/Umbraco_log.ldf' )
    FOR ATTACH

END;
GO

USE UmbracoDb;
At this point if you go back to your Umbraco project and edit your connectionstring to connect to this. Amend the appsettings.Development.json as follows:
"umbracoDbDSN": "Server=localhost,1400;Database=UmbracoDb;User Id=sa;Password=SQL_password123;"Note : We’re using port 1400 rather than the normal 1433, since it’s possible you already have SQL server running locally, and if we used the same port it would conflict.
With that done, we can build the Docker database image.
docker build --tag=umbdata .\UmbDataThat will give you a database image in your local Docker host.
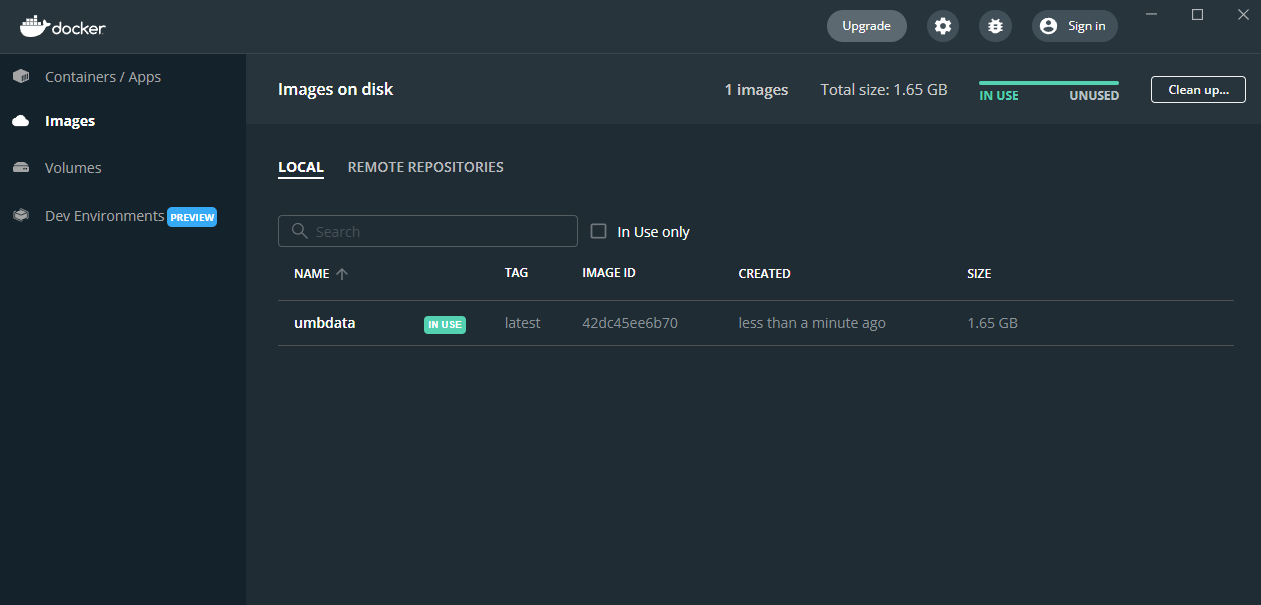
And when that’s complete, run the docker SQL server - note again the port being used - internally the Docker image still uses 1433, but externally it uses 1400 so as not to conflict with any other local SQL servers.
docker run --name umbdata -p 1400:1433 --volume sqlserver:/var/opt/sqlserver -d umbdataAt which point you'll see the database container instance running.
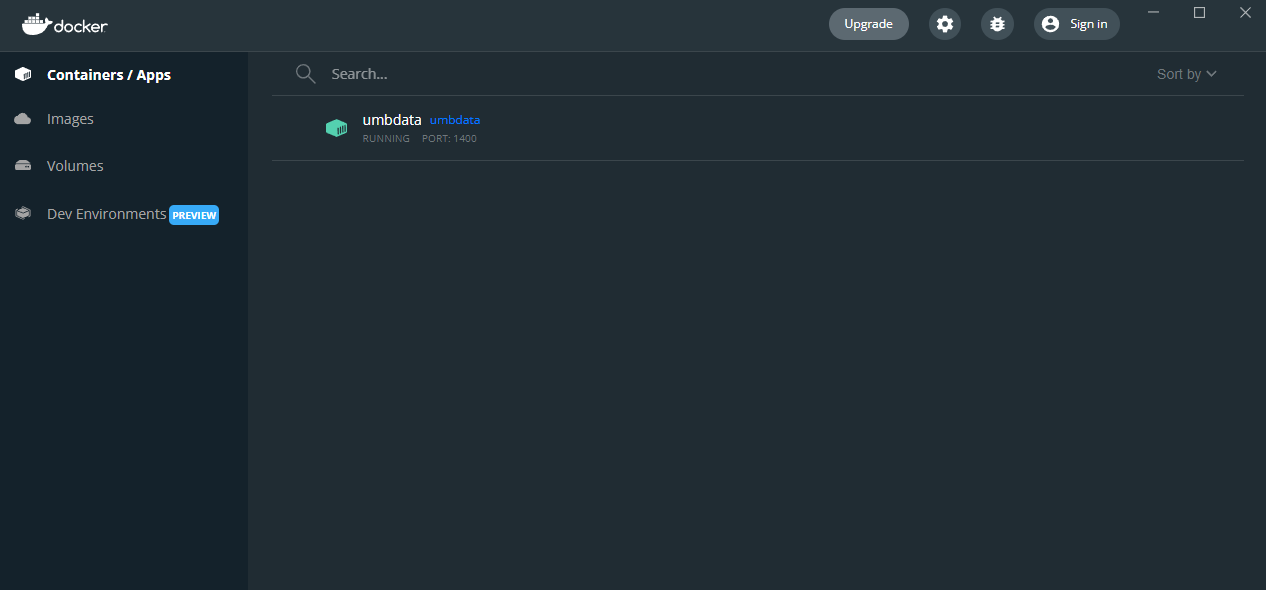
Test the site still works
At this point you can run the local site again, but it will talk to the Database container rather than the local DB.
dotnet run --project UmbDockAs before, the command will display which port should be used to browse for the site.
Part 3 : Running the application in Docker
To run the project in Docker, we need to create a new file in the root of our web project called Dockerfile. This file has been created in Files/UmbDock/Dockerfile which you can copy to the UmbDock folder.
# Use the SDK image to build and publish the website
FROM mcr.microsoft.com/dotnet/sdk:5.0 AS build
WORKDIR /src
COPY ["UmbDock.csproj", "."]
RUN dotnet restore "UmbDock.csproj"
COPY . .
RUN dotnet publish "UmbDock.csproj" -c Release -o /app/publish

# Copy the published output to the final running image
FROM mcr.microsoft.com/dotnet/aspnet:5.0 AS final
WORKDIR /app
COPY --from=build /app/publish .
ENTRYPOINT ["dotnet", "UmbDock.dll"]
Let’s break this file down. The first line describes the base container which will be used to build the application, and thus it needs the .NET 5 SDK container image, as that image has the build tools included in it.
The 2nd line sets the working directory inside the image, and the following line copies the project file into the container.
The 4th line runs a dotnet restore to import any nuget packages referenced by the project.
The 5th line copes all files across, and the 6th line builds the project and sets the output to /app/publish
The next section defines the image used to RUN the application, which sets the working directory, copies the output from the published application from the previous section and sets the starting code for the container image.
Docker Networks
Before we can run the website in a container we need to know a little about Docker networking. There are many modes of networking in Docker which allow containers to communicate. The main type is Bridge networks and there are default bridge networks and user-defined bridge networks.
The default bridge network is just the network that all containers are automatically added to if none is specified, and any container can communicate with any other container - however it can only do so using IP addresses, which are dynamically assigned.
In a user-defined bridge network you can communicate using the network name, but only containers which are explicitly added to the network can communicate with each other using the container name.
First we will create the container. If the website is still running, stop it first by running Ctrl + C.
docker network create -d bridge umbNetWe’re then going to connect our database container to that network. Note our container name (umbdata) is how we add it.
docker network connect umbNet umbdataConnectionstring for Application Container
Create a staging config file on the website called appsettings.Staging.json by copying the existing appsettings.Development.json file.
Amend the connectionstring with the following. You will need the non-standard port setting.
"umbracoDbDSN": "Server=umbdata;Database=UmbracoDb;User Id=sa;Password=SQL_password123;"Building the application container image
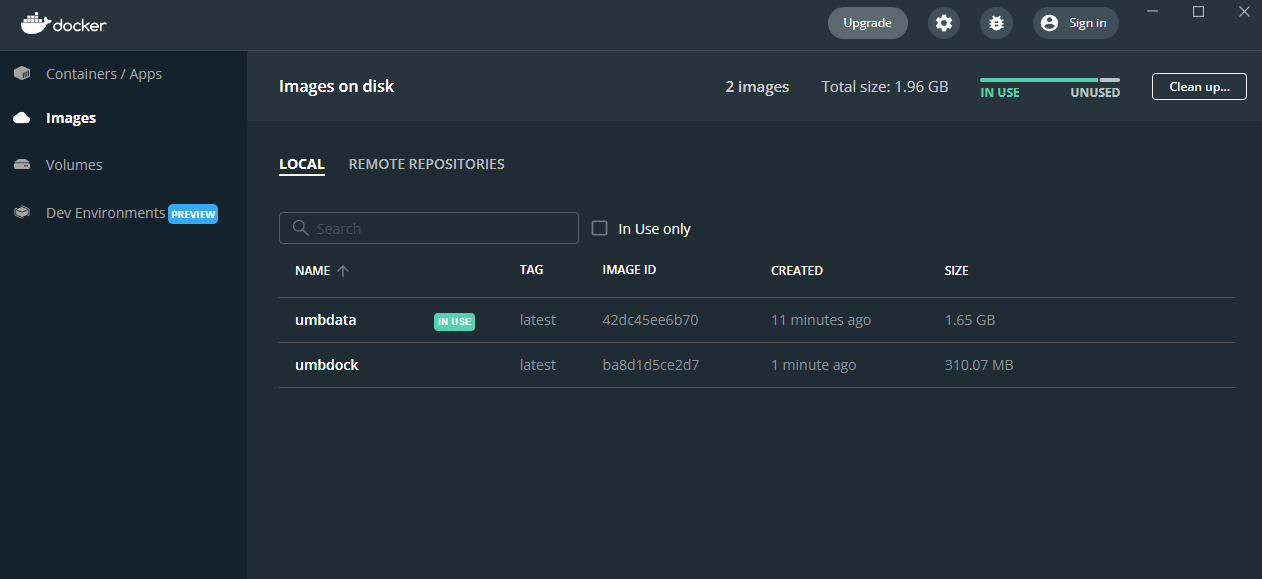
Now that we’ve got a database container running and connected to our user-defined network, we can build our application image.
docker build --tag=umbdock .\UmbDockThat will give you a website image in Docker. Note here you can see the database image is in use as it's running, but the web image is not in use.
Once the image is build we can run the image.
docker run --name umbdock -p 8000:80 -v media:/app/wwwroot/media -v logs:/app/umbraco/Logs -e ASPNETCORE_ENVIRONMENT='Staging' --network=umbNet -d umbdock
You'll see this in your containers section in Docker.
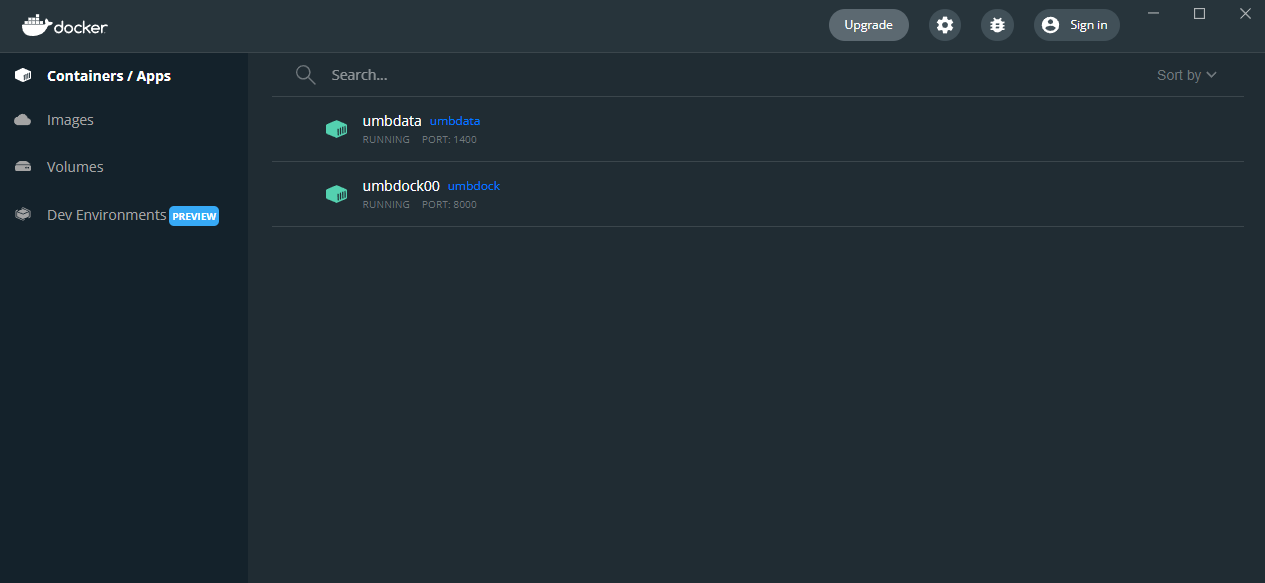
If all goes well, you’ll be able to access the site on any browser at http://localhost:8000/.
Conclusions
In this walkthrough we've created 2 containers, one for our application and then one for the database server, and run them locally on our docker instance. We've touched on Docker images, Networking and some of the requirements to get this up and running.
I deliberately didn't go into too much detail on any one area of Docker as it is a LOT to learn in one go. I wanted to help get you up and running as quickly and painlessly as possible, and to give you something you can refer to for future experimentation, something to build on.
In the next part we will compose an application using Docker Compose to host multiple instances of the website, and learn more about Docker specific technologies. Hopefully you enjoyed it, and will return for part 2.
References
Docker
- Main Page : https://docs.docker.com/
- Networking : https://docs.docker.com/network/
- Docker Compose : https://docs.docker.com/compose/reference/
- Docker Hub : https://docs.docker.com/docker-hub/
- Storage : https://docs.docker.com/storage/
- Volumes : https://docs.docker.com/storage/volumes/
Umbraco Docker
- https://swimburger.net/blog/umbraco/how-to-run-umbraco-9-as-a-linux-docker-container
- https://codeshare.co.uk/blog/umbraco-9-useful-snippets/
Networking
.NET
Database
- https://bigdata-etl.com/how-to-run-microsoft-sql-server-database-using-docker-and-docker-compose/
- https://www.abhith.net/blog/create-sql-server-database-from-a-script-in-docker-compose/