
A side project I've actually completed!
As a developer, how many times have you had an idea for a side project, started it, but never completed it? I've bought so many website addresses for my ideas, I have github repositories full of partially started projects but finally, I started a project and this article is all about how I went from an idea to an open-source package.
Start with a small idea
As someone who uses Twitter to keep in touch with the Umbraco Community, I thought it would be a fun idea to explore the Twitter API but I also wanted to use .Net (previously .Net Core) as Umbraco 9 is now built on .Net. 🎉
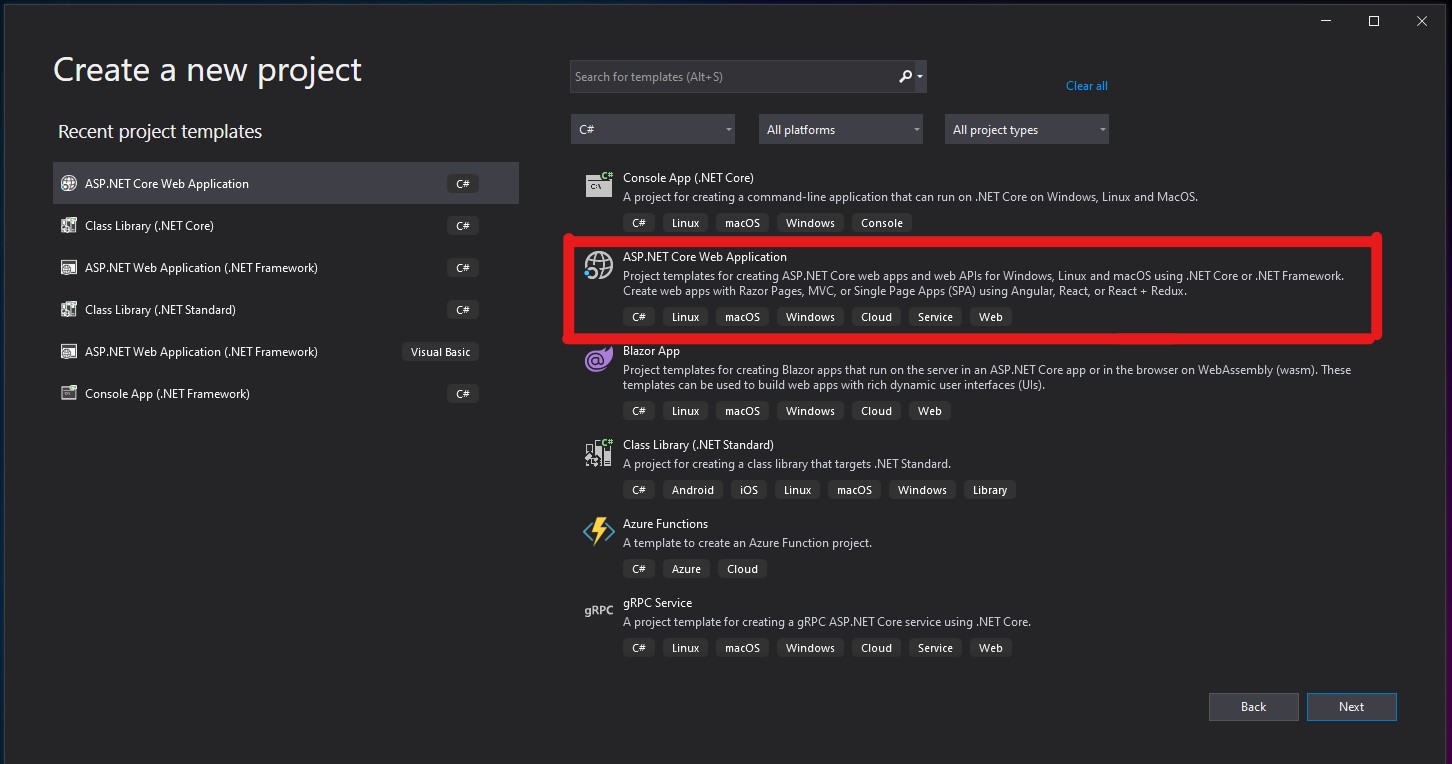
To keep things simple, I took Umbraco out of the equation and spun up a boiler plate .Net project from Visual Studio.
With the template site up and running I then installed the TweetInvi library. This is is a straight forward nuget install dotnet add package TweetinviAPI.
What is TweetInvi Api?
TweetInvi is a quick way of getting setup with using the Twitter API. The documentation is really in-depth and it allows you to start tweeting from your application really quickly. The only prerequisite is that you have a developer account setup with Twitter, you need to have API Keys for twitter before you can tweet. To get your API key, you can create an account and log in to the Developer Portal.
Once I had all my API keys that I needed, I stored them in a safe place and then went back to Visual Studio.
Small increments
I tend to jump both feet first in to projects, then get lost in my own thoughts and give up! I decided that wasn't going to happen with this and instead started building out my project in small incremental steps. I made a list of tasks in OneNote and didn't move on to the next task until I had completed the first.
If a task seemed too complicated when I started it, I broke it down in to even smaller tasks. This really helped me keep focused and have small wins from the get go.
I started with a form on the index page, it wasn't hooked up to anything initially, it was just a visual representation.
<form asp-controller="Home" asp-action="Tweet" method="post" enctype="multipart/form-data">
  <textarea asp-for="Message" placeholder="Enter your message" autocomplete="off" class="form-control" onkeyup="countChars(this);"></textarea>

<button type="submit" id="tweet_button" class="btn btn-primary">Tweet</button>
</form>
Then I moved on to hooking the form up to a controller and got a tweet sent out from the form using TweetInvi.
Success! 🎉
Once I knew I could tweet from my .Net project, I then started to read the documentation for TweetInvi a bit more and I realised I could also attach an image to a tweet. This seemed like a fun thing to learn to do and so I committed my working project to a private Git Repo and then started working on the upload function.
<form asp-controller="Home" asp-action="Tweet" method="post" enctype="multipart/form-data">
  <textarea asp-for="Message" placeholder="Enter your message" autocomplete="off" class="form-control" onkeyup="countChars(this);"></textarea>
             <p>
                 <input id="file" type="file" name="file" />
              <p>
         <button type="submit" id="tweet_button" class="btn btn-primary">Tweet</button>
</form>
Once that was working, I saved my progress and then added some JavaScript so that there was a character countdown since I didn't want to tweet something that was over the 280 character limit that Twitter has.
I could have continued to add features but I decided that it was time to move this code in to an Umbraco 9 project. It was a working tweet form. It was now time to bring Umbraco 9 back in to the mix. I presumed I could easily port my code over to Umbraco, I quickly realised it wasn't going to be as straight forward as I had hoped.
Port the Twitter App to Umbraco 9
I thought I could make a dashboard then just copy/paste my form, models, controllers etc. I was mistaken, I'd forgotten I would need to create a dashboard with AngularJS and then interact with my controller that way. Time to quickly learn AngularJS and to start with small steps again.
First up was to create a Content App where I was display my tweet form. The Umbraco Documentation came to the rescue. I followed the tutorial on how to make a Content App then once I had that setup and working, I started to build on top of that.
Removing parts I didn't need, adding parts that I did need. Tweaking parts here and there.
Project structure
Following the tutorial lead me down a path that got me up and running but it also raised some questions. I was starting to think about making this project in to an open-source project but I just couldn't work out how I could get this content app packaged up and shared with others, I had a full Umbraco 9 setup and I couldn't see how to detach just my Content App.
The Umbraco Community really helped me with this, I was going to tweet my question but instead I posted on Our and I'm so glad I did for two reasons. The first, Twitter is too instant and not great for sharing screenshots etc.; the second, Our is searchable for future me to find the answers easily when I come to making another package and it's also available for others to find in the future.
Kevin Jump was instrumental in getting me setup with his really in-depth and helpful replies. #h5yr
I restructured my solution and within an evening I was back up and running and now I had a project I could package up in the future.
Another success! 🎉
The Build
I focused on building basic functionality once again, get a simple tweet sent via a form in the backoffice, add the character countdown, but then I added some more features that I found I needed while testing the Content App.
  <umb-box>
        <umb-box-header title="Create a tweet for this node"></umb-box-header>
        <umb-box-content>
            <div class="flex">
                <div class="text-center justify-start">
                    <form novalidate>
                        <textarea ng-model="vm.message" ng-trim="false" cols="40" rows="7" maxlength="280"></textarea>
                        <p>
                            <span>{{280 - vm.message.length - vm.CurrentNodeUrl.length}} characters left</span>
                        </p>
                        <p>
                            <button type="button" id="tweet_button" ng-click="submit(vm)" class="btn btn-primary">Tweet</button>
                        </p>
                    </form>
                </div>
            </div>
        </umb-box-content>
    </umb-box>
While testing, I was spamming my twitter account with test tweets and the only way I could prevent this was by commenting out the code that was responsible for the tweeting. Rather than commenting out code or forgetting to uncomment the code before I committed it to source controller, I created a value in appsettings.json that allowed me to disable live tweeting. I also found that my controller had my API Keys in it which if I was to share this code with others was not a good thing so I setup values for them in the appsettings.json file too.
   "ConsumerKey": "twitter_consumer_key",
    "ConsumerSecret": "twitter_consumer_secret",
    "AccessToken": "twitter_access_token",
    "AccessSecret": "twitter_access_secret",
    "EnableLiveTweeting": "False",
    "EnableTestMode":  "True"
I could then reference these values in my controller:
var userClient = new TwitterClient(_tweetSettings.Value.ConsumerKey, _tweetSettings.Value.ConsumerSecret, _tweetSettings.Value.AccessToken, _tweetSettings.Value.AccessSecret);

                if (_tweetSettings.Value.EnableLiveTweeting)
                {
                    //Publish tweet
                     var published= await userClient.Tweets.PublishTweetAsync(new PublishTweetParameters(curatedMessage));
                     tweet = await userClient.Tweets.GetTweetAsync(published.Id);
                }
As you may see, I created "EnableLiveTweeting" which is a boolean value, if it's set to False then it stops spamming Twitter.
Additional features
With me adding these settings and setting up the project in a way that allowed me to create a package, I actually removed some features. I removed the option to upload an image with the tweet but the plan is to bring this back.
I just felt it best to get the package created, released and out in the wild.
However, a feature I did add and wasn't something I'd even planned to do was an audit trail. When a tweet is successful, it's added to a custom database table and then displayed in the backoffice.
I also added a notification number on the Content App so that Editors can see at a glance how many times this article / blog / news item has been tweeted. Then from the Audit the Editor can click a link on each tweet to be taken to the actual tweet.
Gotchas ⚠️
I have found it difficult to styling the dashboard. I know it can look better, I've seen what can be done with other packages, I just need to learn how to improve that.
I also made a mistake by creating a button as <input type="submit". This is a mistake because even if the submission fails, it shows the green success notification bar.
Thanks Anders for help with this, once again the Our Umbraco forum and community came to the rescue.
I changed my code from :
<p>
  <input type="submit" id="tweet_button" ng-click="submit(vm)" class="btn btn-primary" value="Tweet">
</p>
to:
<p>
  <button type="button" id="tweet_button" ng-click="submit(vm)" class="btn btn-primary">Tweet</button>
</p>
What next?
With the Content App now working and in a state that I felt I could release it to the public, I went back to my original Our Forum post and followed Kevin's instructions on how to create a Nuget package and I released my package to NuGet. I also released my package on the Umbraco Package page.
Before I released it though, I had a chat on Twitter about version numbers, when is something a beta, an alpha or a major release.
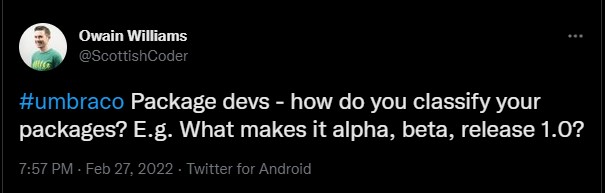
You can view the full thread on Twitter but in short, it's down to your own preference when you make something beta, alpha or a major. You might roll your package out in beta, as I did, just to get it out the door. Then maybe you will put it in to alpha once you've tested it a bit more, maybe added some more features and then make it a version 1.0 once you think it's where you personally want it to be e.g. all your planned features are now included.
On top of deciding what version number I would release my package as, I also had to consider what sort of license I would attach to the package. Nuget requires you to state what license your package is released under.
I did a bit of reading about open source licenses, chatted with Paul Seal, Nik Rimington and Matt Wise about what license choice they have all used in the past and I ended up releasing ocTweetThis under the MIT License - a good resource for working out the differences between the licenses is https://choosealicense.com/
It's been quite a learning curve but one I've really enjoyed. The help and support the Umbraco Community has given has been amazing. Thank you!
I'm excited to continue developing the Content App, adding new features and as it's an Open Source project, anyone is welcome to make a contribution to it, whether it's adding a feature, making the dashboard look a bit nicer or even fixing any spelling mistakes I might have made! Everything is welcome.